Sony VPCL212FX VPCL1 Series Optical Disk Drive Replacement Instructions - Page 3
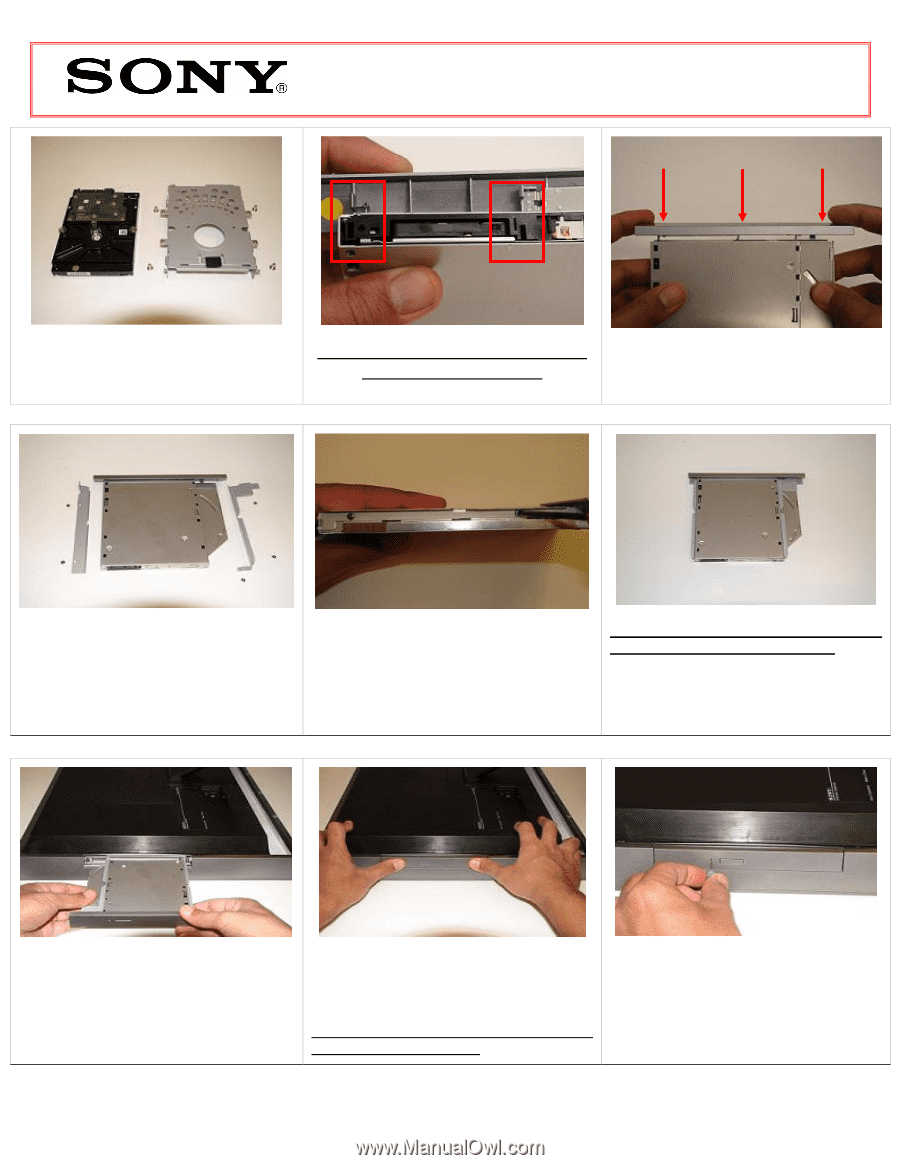
Note! Identify tabs on the bezel and tab, holes located on the ODD.
 |
UPC - 027242820449
View all Sony VPCL212FX manuals
Add to My Manuals
Save this manual to your list of manuals |
Page 3 highlights
VPCL1 Series Optical Disk Drive Replacement Instructions Step 11. Take the new ODD and bezel provided in the CRU kit and prepare for assembly. Note! Identify tabs on the bezel and tab holes located on the ODD. Step 12. Align the tabs on the bezel with the tab holes located on the ODD. Firmly but carefully press the bezel into place. Step 13. Position the new ODD (Label side down) and identify the correct bracket with the correct side it is to be mounted. Notice the different shapes for each bracket and the way the available screw holes should align. Step 14. Firmly but carefully hold the ODD and begin the re-installation of the screws & brackets. Note! Flat surface of bracket should sit flush with silver side of ODD. Step 15. To install the new drive, hold the optical drive by the edges and align it with the bay opening. Step 16. To ensure proper assembly and connection, with even force push the ODD back into place. You should feel ODD connect to connector. (Optical drive should be sitting flush with the edge of the computer) Step 17. Manually eject the ODD to secure the new ODD to the computer. P/N 989200673 Rev. A 3/4
-
 1
1 -
 2
2 -
 3
3 -
 4
4
 |
 |