Sony XR-CA600X Primary User Manual - Page 19
Labeling a CD, Disc Memo For a CD unit with the, CUSTOM FILE function
 |
View all Sony XR-CA600X manuals
Add to My Manuals
Save this manual to your list of manuals |
Page 19 highlights
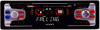
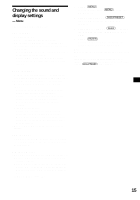
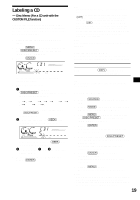
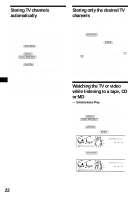
Labeling a CD - Disc Memo (For a CD unit with the CUSTOM FILE function) You can label each disc with a custom name (Disc Memo). You can enter up to 8 characters for a disc. If you label a CD, you can locate the disc by name (page 20). 1 Start playing the disc you want to label. 2 Press (MENU), then press either side of (DISC/PRESET) repeatedly until "NAMEEDIT" appears. 3 Press (ENTER). The unit will repeat the disc during the labeling procedure. 4 Enter the characters. 1 Press the (+)*1 side of (DISC/PRESET) repeatedly to select the desired character. A t B t C ... t 0 t 1 t 2 ... t + t * - t ... t _*2 t A *1 For reverse order, press the (-) side of (DISC/PRESET). *2 (blank space) 2 Press the (+) side of (SEEK) after locating the desired character. If you press the (-) side of (SEEK), you can move back to the left. 3 Repeat steps 1 and 2 to enter the entire name. 5 To return to normal CD play mode, press (ENTER). Tips • Simply overwrite or enter "_" to correct or erase a name. • There is another way to start labeling a CD: Press (LIST) for 2 seconds instead of performing steps 2 and 3. You can also complete the operation by pressing (LIST) for 2 seconds instead of step 5. • You can label CDs on a unit without the CUSTOM FILE function if that unit is connected along with a CD unit that has the function. The Disc Memo will be stored in the memory of the CD unit with the CUSTOM FILE function. Note REP-1/shuffle play is suspended until the Name Edit is complete. Viewing the Disc Memo As a display item, the Disc Memo always takes priority over any original CD TEXT information. To View Press (DSPL) during CD/CD TEXT disc playback Tip To find out about other items that can be displayed, see page 18. Erasing the Disc Memo 1 Press (SOURCE) repeatedly to select "CD." 2 Press (MODE) repeatedly to select the CD unit storing the Disc Memo. 3 Press (MENU), then press either side of (DISC/PRESET) repeatedly until "NAME DEL" appears. 4 Press (ENTER). The stored names will appear in order from the earliest entered. 5 Press either side of (DISC/PRESET) repeatedly to select the disc name you want to erase. The stored names will appear from the earliest ones entered. 6 Press (ENTER) for 2 seconds. The name is erased. Repeat steps 5 and 6 if you want to erase other names. 7 Press (MENU) twice. The unit returns to normal CD play mode. Notes • When the Disc Memo for a CD TEXT disc is erased, the original CD TEXT information is displayed. • If you cannot find the Disc Memo you want to erase, try selecting a different CD unit in step 2. 19
-
 1
1 -
2
-
3
-
4
-
5
-
6
-
7
-
8
-
9
-
10
-
11
-
12
-
13
-
 14
14 -
 15
15 -
 16
16 -
 17
17 -
 18
18 -
 19
19 -
 20
20 -
 21
21 -
 22
22 -
 23
23 -
 24
24 -
25
-
26
-
27
-
28
 |
 |