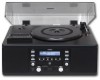
TEAC LP-R450 LP-R450 Manual - Page 24
Before Recording, To stop playback, Fast-forwarding/rewinding, Before you start recording
 |
View all TEAC LP-R450 manuals
Add to My Manuals
Save this manual to your list of manuals |
Page 24 highlights
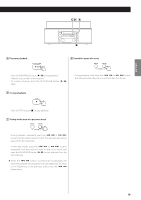
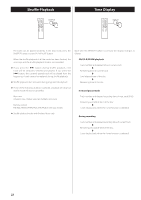
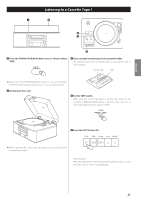
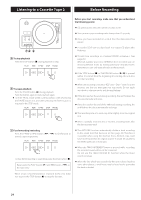
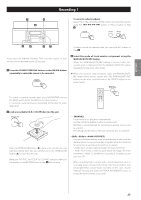
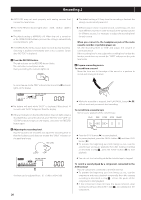
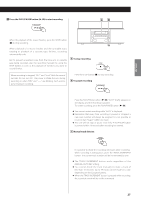
Listening to a Cassette Tape 2 Before Recording Before you start recording, make sure that you understand the following points: < CD specifications limit the number of tracks to 99. < You can not create recording tracks shorter than 10 seconds. < Once you have recorded on a CD-R disc, the data cannot be erased. < A recorded CD-R can be played back in a regular CD player after finalizing. A To stop playback Press the STOP button (H) during playback to stop. < To add more recordings to a finalized CD-RW, unfinalize it. (See page 29.) When all available space on a CD-RW has been recorded, you can record additional tracks by erasing previously recorded tracks. Note that you can only erase all tracks or the last track. < If the STOP button (H) or PLAY/PAUSE button (y/J) is pressed within 10 seconds from the beginning of recording, the unit does not stop recording. B To pause playback Press the PAUSE button (J) during playback . Press the button again to start playback again. < To enter PAUSE mode at the current position, order of pressing the PAUSE button first and then pressing the PLAY button is required in the STOP mode. < When the recording is finished, "REC" and "- ENd - " blink for a few seconds, and the unit then goes into stop mode. Do not apply any shock or vibration to the unit during blinking. < If the disc reaches the end during recording, the unit finalizes the disc automatically and stops. < If the disc reaches the end of the 99th track during recording, the unit finalizes the disc automatically and stops. < The recording time of a track may differ slightly from the original one. < When a partially recorded disc is inserted, recording starts after the last recorded track. C Fast-forwarding/rewinding Press the F.FWD or REW button (,/m) to fast-forward or rewind a tape respectively. < The AUTO REC function automatically divides a track according to the sound level that has been set (See page 25). Therefore it is possible when using this function that a finished copy could have more tracks than its original source. It would be caused by extremely quiet part or noisy part. To stop fast-forwarding or rewinding, press the Stop button (H). Never press the PLAY button (y) and REW button (m) at the same time. < When the TRACK INCREMENT button is pressed while recording, the recorded sound will be cut for a moment. Do not use the TRACK INCREMENT function while the music sound continues. < When the disc which was recorded by this unit is played back by some other players, a small noise may be heard at the point that the track is divided. When a tape is fast-forwarded or rewound to the end, make sure to press the STOP button (H) to stop the function. 24
-
 1
1 -
2
-
3
-
4
-
5
-
6
-
7
-
8
-
9
-
10
-
11
-
12
-
13
-
14
-
15
-
16
-
17
-
18
-
 19
19 -
 20
20 -
 21
21 -
 22
22 -
 23
23 -
 24
24 -
 25
25 -
 26
26 -
 27
27 -
 28
28 -
 29
29 -
30
-
31
-
32
-
33
-
34
-
35
-
36
-
37
-
38
-
39
-
40
-
41
-
42
-
43
-
44
-
45
-
46
-
47
-
48
-
49
-
50
-
51
-
52
-
53
-
54
-
55
-
56
-
57
-
58
-
59
-
60
-
61
-
62
-
63
-
64
-
65
-
66
-
67
-
68
-
69
-
70
-
71
-
72
-
73
-
74
-
75
-
76
-
77
-
78
-
79
-
80
-
81
-
82
-
83
-
84
-
85
-
86
-
87
-
88
-
89
-
90
-
91
-
92
-
93
-
94
-
95
-
96
 |
 |
