Tecumseh Products TVM220 Operator Manual - Page 11
Checking and Changing Oil - specifications
 |
View all Tecumseh Products TVM220 manuals
Add to My Manuals
Save this manual to your list of manuals |
Page 11 highlights
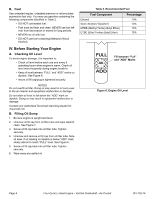
A. Checking and Changing Oil To avoid engine damage, it is important to: • Check oil level before each use and every 5 operating hours when engine is warm. See "A. Checking Oil Level" instructions on page 4. • Change oil after first 2 operating hours and every 50 operating hours thereafter; more often if operated in extremely dusty or dirty conditions. Engine should still be warm but not hot from recent use. 1. Be sure you find the correct drain plug location, if present. (See equipment manufacturer's instructions). See Figure 13. 2. Disconnect spark plug wire and keep it away from spark plug. See "G. Avoid Accidental Starts" instructions on page 2. 3. Be sure the gas cap is on and is tightened securely. 4. Clean area around oil drain plug. See Figure 13. 5. Place approved recyclable oil container under oil drain plug. (See equipment manufacturer's instructions). NOTE Used oil must be disposed of at a proper collection center. 6. Remove oil drain plug and drain oil into an approved container. See Figure 13. 7. Install oil drain plug and tighten securely. 8. Fill with recommended oil. See "III. Oil and Fuel Specifications" instructions on page 3. See "Table 1. Recommended Engine Oil" instructions on page 3. See Figure 14. 9. Wipe away any spilled oil. 10. Carefully disconnect spark plug wire from grounding post, if provided. 11. Carefully re-connect spark plug wire to spark plug. NOTES The oil filter if so equipped, should be changed every 100 operating hours or at least once a year. The filter should be changed more often if the engine is operated in extremely dust or dirty conditions. Changing the oil filter requires that additional oil be added to fill the filter. Figure 13. Oil Drain Plug Location 5 4 67 8 3 2 1 1. Spark Plug 2. Spark Plug Cap 3. Spark Plug Wire 4. Fuel Fill Cap 5. Oil Fill Plug and Dipstick 6. Air Intake Screen 7. Recoil Starter Handle 8. Air Filter 9. Carburetor 10. Muffler 9 10 Figure 14. Engine Assembly with Oil Fill Dipstick 181-732-14 Four-Cycle L-Head Engine • Vertical Crankshaft • Air-Cooled Page 9
-
 1
1 -
2
-
3
-
4
-
5
-
 6
6 -
 7
7 -
 8
8 -
 9
9 -
 10
10 -
 11
11 -
 12
12 -
 13
13 -
 14
14 -
 15
15 -
 16
16 -
17
-
18
-
19
-
20
-
21
-
22
-
23
-
24
 |
 |
