Toshiba 46VX700U User Manual - Page 41
Setting the HDMI, audio mode, Viewing the HDMI, signal, information, Using your PC with the TV
 |
View all Toshiba 46VX700U manuals
Add to My Manuals
Save this manual to your list of manuals |
Page 41 highlights
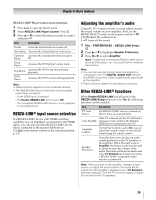
Chapter 6: Basic features Setting the HDMI® audio mode Using your PC with the TV 1 Y > PREFERENCES > AV Connection > . OK 2 Press B or b to select HDMI 3 Audio or HDMI 4 Audio. 3 Press C or c to select Auto, Digital or Analog. Mode Description Auto When viewing the HDMI 3 input or HDMI 4 input, if digital audio from the HDMI input is available, it will be output. If not, the TV detects and outputs analog audio from each Audio input. Digital When viewing the HDMI 3 input or HDMI 4 input, digital audio from the HDMI input will be output. Analog When viewing the HDMI 3 input or HDMI 4 input, analog audio from each input will be output. Note: • HDMI 3 Audio is set to Digital when Rear Shared Audio is set to ColorStream HD1 or Video 1 (- p. 30). • HDMI 4 Audio is set to Digital when Side Shared Audio is set to PC or ColorStream HD2 (- p. 30). Viewing the HDMI® signal information 1 Y > PREFERENCES > HDMI Information Display. 2 Press C or c to select On. Press . Normal banner and signal information banner appears. Note: • Signal information banner will appear when this feature is set to On and you watch HDMI input. • If you press when this feature is set to Off, only normal banner will appear. • When Content type is No Data, this is not displayed. Adjusting the image If the edges of the picture are hidden, readjust the Horizontal Position and Vertical Position. If the picture is affected by interference, readjust the Clock Phase and Sampling Clock. 1 Select PC input mode (- "Selecting the video input to view" on p. 33). 2 Y > PREFERENCES > Display Settings > . OK 3 Press B or b to select PC Settings. Press . OK Note: If a PC is not connected or there is no PC input signal, this menu will be not available. 4 Press B or b to select the item. 5 Press C or c to make adjustments. Note: The screen is disrupted momentarily when adjusting the PC settings. This is not a sign of malfunction. Mode Description Adjustment range Horizontal Moves the picture within ±10 from Position left/right. center.* Vertical Position Moves the picture within ±10 from up/down. center.* Helps to reduce Clock Phase noise and sharpen the picture. within ±15 from center. Sampling Clock Helps to reduce noise and minimize periodic vertical stripes on the screen. within ±5 from center. * The default settings and /or adjustment ranges vary depending on the input signal format. To reset PC Settings: Select Reset. Press . OK Setting the PC audio You can output sound from your PC when connecting using the AUDIO IN terminal and PC audio cable. 1 Y > PREFERENCES > AV Connection > . OK 2 Press B or b to select Side Shared Audio. 3 Press C or c to select PC. Note: • To select PC, set Shared PC Input to PC. • Setting Side Shared Audio to PC forces HDMI 4 Audio to Digital mode. 41
-
 1
1 -
2
-
3
-
4
-
5
-
6
-
7
-
8
-
9
-
10
-
11
-
12
-
13
-
14
-
15
-
16
-
17
-
18
-
19
-
20
-
21
-
22
-
23
-
24
-
25
-
26
-
27
-
28
-
29
-
30
-
31
-
32
-
33
-
34
-
35
-
 36
36 -
 37
37 -
 38
38 -
 39
39 -
 40
40 -
 41
41 -
 42
42 -
 43
43 -
 44
44 -
 45
45 -
 46
46 -
47
-
48
-
49
-
50
-
51
-
52
-
53
-
54
-
55
-
56
-
57
-
58
-
59
-
60
-
61
-
62
-
63
-
64
-
65
-
66
-
67
-
68
-
69
-
70
-
71
-
72
-
73
-
74
-
75
-
76
-
77
-
78
-
79
-
80
-
81
-
82
-
83
-
84
-
85
-
86
-
87
-
88
-
89
-
90
-
91
-
92
-
93
-
94
-
95
-
96
-
97
-
98
-
99
-
100
 |
 |