Toshiba 46VX700U User Manual - Page 56
Setting up the Network
 |
View all Toshiba 46VX700U manuals
Add to My Manuals
Save this manual to your list of manuals |
Page 56 highlights
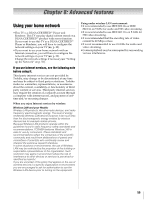
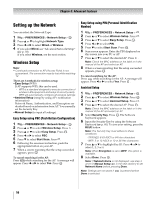
Chapter 8: Advanced features Setting up the Network You can select the Network Type. 1 Y > PREFERENCES > Network Setup > . OK 2 Press B or b to highlight Network Type. 3 Press C or c to select Wired or Wireless. 4 If you select Wired, see "Advanced Network Setup" (- p. 58). If you select Wireless, see the next section. Wireless Setup Note: • Continued connection to AP (Access Point) is not guaranteed. The connection may be lost while watching TV. There are 3 methods for wireless setup: •Easy Setup (WPS) If AP supports WPS, this can be used. - WPS is a standard designed to execute connection of wireless LAN equipment and setup of security easily. WPS will automatically configure all wireless settings. •Assisted Setup (setup by using AP's notification information) Network Name, Authentication, and Encryption are decided based on information from AP. You manually set the Security Key. •Manual Setup (to input all settings) Easy Setup using PBC (Push Button Configuration) 1 Y > PREFERENCES > Network Setup > . OK 2 Press B or b to select Wireless Setup. Press . OK 3 Press B or b to select Easy Setup. Press . OK 4 Press C or c to select PBC. 5 Press b to select Start Scan. Press . OK 6 Following the onscreen instruction, push the appropriate button on your AP. 7 When a screen reporting that the setup succeeded appears, press . OK To cancel searching for the AP: Press while searching for the AP. A message will appear. Press C or c to select Yes. Press . OK Easy Setup using PIN (Personal Identification Number) 1 Y > PREFERENCES > Network Setup > . OK 2 Press B or b to select Wireless Setup. Press . OK 3 Press B or b to select Easy Setup. Press . OK 4 Press C or c to select PIN. 5 Press b to select Start Scan. Press . OK 6 Scan screen appears. Enter the PIN displayed on this screen into your PC or AP. 7 Press B or b to select the desired AP. Press . OK Note: Check the MAC address on the label or in the manual of the AP and select an AP. 8 When a screen reporting that the setup succeeded appears, press . OK To cancel searching for the AP: Press while searching for the AP. A message will appear. Press C or c to select Yes. Press . OK Assisted Setup 1 Y > PREFERENCES > Network Setup > . OK 2 Press B or b to select Wireless Setup. Press . OK 3 Press B or b to select Assisted Setup. Press . OK 4 Press B or b to select the desired AP. Press . OK Note: Check the MAC address on the label or in the manual of the AP and select an AP. 5 Select Security Key. Press OK . The Software Keyboard appears. 6 Input the Security Key by using the Software Keyboard (- p. 60). To save your setting, press the BLUE button. Note: The Security Key must adhere to these conditions: -TKIP/AES: 8-63 ASCII or 64 Hex characters -WEP: 5 or 13 ASCII or 10 or 26 Hex characters 7 Press B or b to highlight Key ID. Press C or c to select 1, 2, 3 or 4. Note: When Encryption is set to WEP, this option is available. 8 Select Done. Press . OK Note: If Network Name is not displayed, see step 4 and 5 in Manual Setup (- in the next section) to set Network Name before pressing Done. Note: Settings are not saved if Done is selected. is pressed before 56
-
 1
1 -
2
-
3
-
4
-
5
-
6
-
7
-
8
-
9
-
10
-
11
-
12
-
13
-
14
-
15
-
16
-
17
-
18
-
19
-
20
-
21
-
22
-
23
-
24
-
25
-
26
-
27
-
28
-
29
-
30
-
31
-
32
-
33
-
34
-
35
-
36
-
37
-
38
-
39
-
40
-
41
-
42
-
43
-
44
-
45
-
46
-
47
-
48
-
49
-
50
-
 51
51 -
 52
52 -
 53
53 -
 54
54 -
 55
55 -
 56
56 -
 57
57 -
 58
58 -
 59
59 -
 60
60 -
 61
61 -
62
-
63
-
64
-
65
-
66
-
67
-
68
-
69
-
70
-
71
-
72
-
73
-
74
-
75
-
76
-
77
-
78
-
79
-
80
-
81
-
82
-
83
-
84
-
85
-
86
-
87
-
88
-
89
-
90
-
91
-
92
-
93
-
94
-
95
-
96
-
97
-
98
-
99
-
100
 |
 |
