Toshiba 50HMX96 Owner's Manual - English
Toshiba 50HMX96 - 50" Rear Projection TV Manual
 |
UPC - 022265251577
View all Toshiba 50HMX96 manuals
Add to My Manuals
Save this manual to your list of manuals |
Toshiba 50HMX96 manual content summary:
- Toshiba 50HMX96 | Owner's Manual - English - Page 1
of malfunction. For details, see "IMPORTANT NOTICE ABOUT HOT LAMP RESTART" on page 3. © 2006 TOSHIBA CORPORATION All Rights Reserved RICA CONSUMER PR O 14001 FILE No. A96 Owner's Record The model number and serial number are on the back of your TV. Record these numbers in the spaces below. Refer to - Toshiba 50HMX96 | Owner's Manual - English - Page 2
the user's authority to operate this equipment. Important notes about your DLP™ projection TV 1) The light source for this TV is a projection lamp unit with a limited service life. When the lamp wears out, the picture may become dark or black or the lamp may fail, at which time you must replace - Toshiba 50HMX96 | Owner's Manual - English - Page 3
surge, or other similar power failure occurs, such that the TV loses and regains power within a few minutes. This is a property of DLP™ TV lamp technology and is NOT a sign of malfunction. If this occurs, the yellow LED on the TV front panel will blink (and the blue LED will be lit solid) until the - Toshiba 50HMX96 | Owner's Manual - English - Page 4
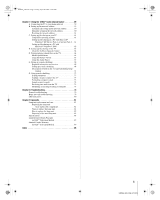
Introduction 6 Welcome to Toshiba 6 Features of your new TV 6 Overview of steps for installing, setting up, and using your new TV 7 TV front and side panel controls and connections 8 TV back panel connections 9 Chapter 2: Using the remote control 11 Installing the remote control batteries 11 - Toshiba 50HMX96 | Owner's Manual - English - Page 5
81 Replacing the lamp unit (User-replaceable component 81 When to replace the lamp unit 81 How to replace the lamp unit 82 Disposing of the used lamp unit 83 Specifications 84 Limited United States Warranty for DLP™ Television Models 85 Limited Canada Warranty for DLP™ Television Models 86 - Toshiba 50HMX96 | Owner's Manual - English - Page 6
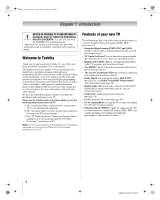
! Use this TV only with the TOSHIBA TV stand listed in the "Specifications" section of this manual. Use with other stands may result in instability, causing possible injury or death. Welcome to Toshiba Thank you for purchasing this Toshiba TV, one of the most innovative DLP™ projection TVs on the - Toshiba 50HMX96 | Owner's Manual - English - Page 7
sharing and e-mail scheduling of recordings, see Chapter 7. 17 For help, refer to the Troubleshooting Guide, Chapter 8. 18 For lamp unit replacement instructions, see Chapter 9. 19 For technical specifications and warranty information, see Chapter 9. 20 Enjoy your new TV! 7 HMX96 (E/F) Web 213:276 - Toshiba 50HMX96 | Owner's Manual - English - Page 8
navigation buttons. 9 EXIT - Press to instantly close an on-screen menu. 10 GUIDE - Press to access the TV Guide On Screen™ program guide (- TV Guide On Screen™ Interactive Program Guide). 11 VIDEO-2 IN - The side panel A/V connections are referred to as "VIDEO 2" and include standard A/V inputs - Toshiba 50HMX96 | Owner's Manual - English - Page 9
HMX96_EN.book Page 9 Friday, April 28, 2006 12:03 PM Chapter 1: Introduction TV back panel connections For an explanation of cable types and connections, see the Installation Guide. 1 2 34 56 7 1 VIDEO 1 IN - Composite video and analog audio inputs plus optional S-video inputs for - Toshiba 50HMX96 | Owner's Manual - English - Page 10
TV to your home network. See boxed note below. **THINC™ system (Toshiba Home Interactive Network Connection) The RJ-45 (Ethernet) port allows your Toshiba TV Installation Guide and Chapter 7 for details. 12 CableCARD™ slot - For use with a digital security card and digital cable TV service (provided - Toshiba 50HMX96 | Owner's Manual - English - Page 11
the battery cover off the back of the remote control. Remote control effective range For optimum performance, aim the remote control directly at the TV and obstructions between the remote control and the TV. Point remote control toward remote sensor on front of TV. 2 Install two "AA" size alkaline - Toshiba 50HMX96 | Owner's Manual - English - Page 12
TV Guide On Screen™ system, see the separate TV Guide On Screen™ Interactive Program Guide. Note: The error message "Not Available" may appear if you press a key for a function that is not available. 1 LIGHT illuminates the keypad for five seconds. The MODE SELECT key that is being selected blinks - Toshiba 50HMX96 | Owner's Manual - English - Page 13
2006 12:03 PM Chapter 2: Using the remote control 17 EXIT closes on-screen menus and the TV Guide On Screen™ system. 18 INFO provides detailed information on highlighted items in the TV Guide On Screen™ system (- TV Guide On Screen™ Interactive Program Guide). 19 MUTE reduces or turns off the sound - Toshiba 50HMX96 | Owner's Manual - English - Page 14
:03 PM Chapter 2: Using the remote control Remote Control functional key chart REMOTE Toshiba CONTROL KEY TV (TV) CABLE SAT (satellite) MODE SELECT LIGHT SLEEP POWER 1 2 3 4 5 6 7 8 9 0 100/-/+10 INPUT PIC SIZE MENU FAV BROWSER/ SET UP THINC/ TOP MENU TV GUIDE INFO ENTER B b C3 #c EXIT/ DVD - Toshiba 50HMX96 | Owner's Manual - English - Page 15
HMX96_EN.book Page 15 Friday, April 28, 2006 12:03 PM Chapter 2: Using the remote control REMOTE Toshiba CONTROL KEY TV (TV) CABLE CH RTN/ DVD RTN RECALL MUTE SLOW SKIP z SKIP Z REW PAUSE/STEP PLAY FF C.CAPTION TV/VCR DISC/AM/FM STOP REC CH B b POP FREEZE Previous channel On-screen display - Toshiba 50HMX96 | Owner's Manual - English - Page 16
The TV remote control is preprogrammed to operate most Toshiba devices. To operate a non-Toshiba device or a Toshiba device that the remote control is SAT, DVD, VCR/PVR, AUX 1, or AUX 2), until the device button LED blinks 3 times. 3 While holding down E, press the Number buttons to enter the device - Toshiba 50HMX96 | Owner's Manual - English - Page 17
) This feature clears all programmed remote control features not related to "Device code setup" and resets the volume lock to the "TV" device mode. To reset the remote control: While holding down E, press 8, 9, 0, 0. The Device button LED will respond with four blinks. 17 HMX96 (E/F) Web 213:276 - Toshiba 50HMX96 | Owner's Manual - English - Page 18
HMX96_EN.book Page 18 Friday, April 28, 2006 12:03 PM Multi-brand remote control device codes TVs Brand Toshiba Code 1524 Cable boxes Brand ABC Americast Bell South Clearmaster ClearMax Coolmax Digeo Director GoldStar Hamlin Memorex Motorola/ General Instrument/ Jerrold Motorola General - Toshiba 50HMX96 | Owner's Manual - English - Page 19
, April 28, 2006 12:03 PM Chapter 2: Using the remote control Jaton JBL JSI JVC jWin Kawasaki Kenwood KLH Konka Koss Sony Sungale Superscan SVA Sylvania Symphonic Teac Technics Technosonic Techwood Theta Digita Toshiba Tredex Urban Concepts US Logic Venturer Vizio Xbox Yamaha Yamakawa Zenith Zoece - Toshiba 50HMX96 | Owner's Manual - English - Page 20
Scott Sears Sharp Shintom Shogun 20 Chapter 2: Using the remote control 0043, 0061, 0067, 0075, 0173, 0807 ABS Alienware CyberPower Dell Direc TV Gateway Hewlett Packard Howard Sonic Blue Sony Stack 9 Systemax Tagar Systems Tivo Toshiba Touch Viewsonic Voodoo ZT Group 1972 1972 1972 1972 - Toshiba 50HMX96 | Owner's Manual - English - Page 21
, 0435, 0626 0029 0083 0000 0157 0083 Chapter 2: Using the remote control MTC NAD NEC Nikko NSM Onkyo Optimus Panasonic Parasound Philips Pioneer Polk Sanyo Sharp Sherwood Sonic Frontiers Sony Sugden TAG McLaren Tascam Teac Technics Toshiba Victor Wards Yamaha 0420 0019, 0299 0234 0170 0157 0101, - Toshiba 50HMX96 | Owner's Manual - English - Page 22
of your TV's menu system. To open the main menus (illustrated below), press Y on the remote control or TV control panel. Icon Applications Launches the MP3 Audio Player] S [Launches the Channel Browser™] S [Opens the TV Guide On Screen™ option] S [Launches the ATSC Digital CC Selector] (This option - Toshiba 50HMX96 | Owner's Manual - English - Page 23
Setup/Installation menu layout The Installation menu contains the Terrestrial, Network, TV Guide On Screen™ Setup, Time and Date, and System Status menus. To open the Installation menu (illustrated below), press Y on the remote control or TV control panel, open the Setup menu, select Installation - Toshiba 50HMX96 | Owner's Manual - English - Page 24
Viewer Audio Player Channel Browser Favorites Browser TV Guide On Screen Navigating the menu system You can use the buttons on the remote control or TV control panel to access and navigate your TV's on-screen menu system. • Press Y to open the menu system. • When a menu is open, use the up/down/left - Toshiba 50HMX96 | Owner's Manual - English - Page 25
ENTER Select CH RTN Back EXIT Exit 4 Press B or b to highlight Antenna 1 In, and press C or c to select the input source (Cable or Antenna) for the ANT 1 input on the TV. Note: If a cable box is connected to the ANT 1 input during TV Guide On Screen™ setup, the entire Terrestrial menu will not be - Toshiba 50HMX96 | Owner's Manual - English - Page 26
28, 2006 12:03 PM Chapter 4: Setting up your TV Programming channels into the TV's channel memory When you press < or , on the remote control or TV control panel, your TV will stop only on the channels you programmed into the TV's channel memory. Follow the steps below to program channels into - Toshiba 50HMX96 | Owner's Manual - English - Page 27
up your TV Manually adding and deleting channels in the channel memory After automatically programming channels into the channel memory, you can manually add or delete individual channels. To add or delete channels in the channel memory: 1 Press Y and open the Setup menu. 2 Highlight Installation - Toshiba 50HMX96 | Owner's Manual - English - Page 28
menu. TV Guide On Screen™ setup, the manual time and date settings will be overridden by the TV Guide On Screen™ settings. Setup Installation No Sleep Timer Yes On/Off Timer PC Settings ColorStream HD1 Audio No HDMI 1 Audio Auto ColorStream HD2 Audio No Navigate ENTER Select CH RTN Back - Toshiba 50HMX96 | Owner's Manual - English - Page 29
Channel Browser TV Guide On Screen Digital CC/Audio Selector CableCARD IP Service Conditional Access CableCARD(tm) Status Network Setup CableCARD(tm) Pairing Navigate ENTER Select CH RTN Back EXIT Exit Note: The CableCARD™ menu is for informational purposes only and has no user-adjustable options - Toshiba 50HMX96 | Owner's Manual - English - Page 30
surge, or other similar power failure occurs, such that the TV loses and regains power within a few minutes. This is a property of DLP™ TV lamp technology and is NOT a sign of malfunction. If this occurs, the yellow LED on the TV front panel will blink (and the blue LED will be lit solid) until the - Toshiba 50HMX96 | Owner's Manual - English - Page 31
ENTER Select CH RTN Back EXIT Exit 4 Press C c to scroll through the menu bar to select either Product Information or Software Version and view the related information. System Information Sun Jan 1, 2006 12:12:19am Product Information Brand: Toshiba Model: 56HMX96 System Information Software - Toshiba 50HMX96 | Owner's Manual - English - Page 32
the video input source to view: 1 Press + on the remote control or INPUT on the TV control panel. 2 To select the input: Press 0-8 to select the Closed Caption Advanced Input Labeling Menu Language English Channel Browser Setup Navigate ENTER Select CH RTN Back EXIT Exit Input Labeling Video - Toshiba 50HMX96 | Owner's Manual - English - Page 33
of how you could label the inputs if you connected a DVD player to VIDEO 1, Cable TV to VIDEO 2, a video recorder to ColorStream HD1, a DTV set-top box to HDMI To clear the input labels: 1 Press Y and open the Preferences menu. 2 Highlight Input Labeling and press T. 3 Highlight Reset and press - Toshiba 50HMX96 | Owner's Manual - English - Page 34
Using the TV's features To set up the Channel Browser™: 1 Press Y and open the Preferences menu. 2 TV Guide setup. To open the Channel Browser™ banner: • Press 3 C, # c, or n on the remote control 1 While watching TV, press 3 C or # c to open the Channel Browser™ banner and surf back to a previous - Toshiba 50HMX96 | Owner's Manual - English - Page 35
Using the TV's features To tune to a channel or input in Select mode: 1 While watching TV, press 3 C or # c to open the Channel Browser™ banner and surf back to a , on the remote control or TV control panel. Note:This feature will not work unless you program channels into the TV's channel memory (- - Toshiba 50HMX96 | Owner's Manual - English - Page 36
using the Channel Number buttons (and the dash (=) button if selecting a digital channel). 3 Press R on the remote control. The previous channel will display. Each time you press R, the TV will switch back and forth between the last two channels that were tuned. Note: If you press R from a non - Toshiba 50HMX96 | Owner's Manual - English - Page 37
for each input on your TV. To select the picture size: 1 Press I on the remote control. 2 While the menu. Select the input for which you want to save your picture settings. To save your settings, highlight Done and press T. Theater Settings Picture Size Picture Scroll Cinema Mode Auto Aspect Ratio - Toshiba 50HMX96 | Owner's Manual - English - Page 38
5: Using the TV's features TheaterWide menu. 2 Highlight Theater Settings and press T. Video Picture Settings Advanced Picture Settings Theater Settings Navigate ENTER Select CH RTN Back Settings Picture Size Picture Scroll Cinema Mode Auto Aspect Ratio TheaterWide 2 -5 Film On Reset Done 6 To - Toshiba 50HMX96 | Owner's Manual - English - Page 39
Chapter 5: Using the TV's features Using the auto aspect ratio feature When the auto aspect ratio feature is set to On, the TV will automatically select the auto aspect ratio feature: 1 Press Y and open the Video menu. 2 Highlight Theater Settings and press T. 3 In the Auto Aspect Ratio field, - Toshiba 50HMX96 | Owner's Manual - English - Page 40
recording: • If the POP window is open and you attempt to start recording, the POP window will close before recording starts. • If you use the TV's remote control to start recording, you will not be able to open the POP window and the message "Not Available" will appear on-screen if you - Toshiba 50HMX96 | Owner's Manual - English - Page 41
minutes, the FREEZE mode will automatically be released and the TV will return to the moving picture. POP double-window aspect ratio The POP double-window feature displays each picture according to its input signal aspect ratio, as illustrated in the examples below. Moving picture Still picture - Toshiba 50HMX96 | Owner's Manual - English - Page 42
increase the contrast or change the color temperature), the picture mode automatically changes to Preference in the Picture Settings menu. • If you have previously set the TV to High Bright mode, and have chosen Reset in item 4 above, the TV will default to Low Power mode. To set the TV back to High - Toshiba 50HMX96 | Owner's Manual - English - Page 43
sound effects of TV programs and videos that are closed captioned (usually marked "CC" in program guides). • Text Menu Language English CC3 Channel Browser Setup CC4 T1 T2 Navigate ENTER Select CH RTN Back same color. To customize the closed captions: 1 Press Y and open the Preferences menu. - Toshiba 50HMX96 | Owner's Manual - English - Page 44
menu. 2 Highlight Digital CC/Audio Selector and press T. Applications Picture Viewer Audio Player Channel Browser TV Guide On Screen Digital CC/Audio Selector CableCARD Navigate ENTER Select CH RTN Back EXIT Exit 3 Press B or b to select Audio, and then press C or c to select the desired service - Toshiba 50HMX96 | Owner's Manual - English - Page 45
word "STEREO" or "SAP" appears on-screen when E is pressed. The MTS feature is not available when the TV is in VIDEO mode. To listen to stereo sound: 1 Press Y and open the Audio menu. 2 Highlight Audio Setup and press T. Audio Audio Settings Advanced Audio Settings Audio Setup 3 In the MTS field - Toshiba 50HMX96 | Owner's Manual - English - Page 46
your audio adjustments to the following factory settings: Bass center (50) Treble center (50) Balance center (0) StableSound. . . Off To turn the TV (- "Connecting a digital audio system" in the Installation Guide). To select the optical audio output format: 1 Press Y and open the Audio menu. - Toshiba 50HMX96 | Owner's Manual - English - Page 47
TV's features Using the Locks menu The Locks menu includes the Enable Rating Blocking, Edit Rating Limits, Channels Block, Input Lock, Front (control) Panel Block Input Lock Off Front Panel Lock Off Game Timer Off New PIN Code Navigate ENTER Select EXIT Exit MENU Back 5 Press the Number - Toshiba 50HMX96 | Owner's Manual - English - Page 48
Chip feature in this TV, which supports the U.S. V-Chip system only. To block and unblock TV programs and movies: 1 Press Y and highlight the Locks menu icon. 2 Press Block Input Lock Off Front Panel Lock Off Game Timer Off New PIN Code Navigate ENTER Select EXIT Exit MENU Back 6 Press b to - Toshiba 50HMX96 | Owner's Manual - English - Page 49
of the program you are watching, press E on the remote control. If it is rated "None," the word "NONE , no rating will appear in the RECALL screen. TV - PG L V NONE Blocking channels With the Off Front Panel Lock Off Game Timer Off New PIN Code Navigate ENTER Select EXIT Exit MENU Back 5 - Toshiba 50HMX96 | Owner's Manual - English - Page 50
HMX96_EN.book Page 50 Friday, April 28, 2006 12:03 PM Chapter 5: Using the TV's features To unblock all locked channels at once: Highlight Allow All in Lock Off Front Panel Lock Off Game Timer Off New PIN Code Off Video Video + Navigate ENTER Select EXIT Exit MENU Back Off: Unlocks all - Toshiba 50HMX96 | Owner's Manual - English - Page 51
Exit MENU Back To unlock the control panel: Highlight Off in step 5 above, or press and hold the VOLUME - button on the TV control panel for minutes). To set the sleep timer: Press [ on the remote control to set the length of time until the TV turns off. Repeatedly press [ to increase the time in - Toshiba 50HMX96 | Owner's Manual - English - Page 52
from a PC on the TV screen. The PC must be connected to the TV's PC IN terminals (- Installation Guide). You can use the PC Setup menu. Setup Installation Sleep Timer On/Off Timer PC Settings ColorStream HD1 Audio HDMI 1 Audio ColorStream HD2 Audio No Auto No Navigate ENTER Select CH RTN Back - Toshiba 50HMX96 | Owner's Manual - English - Page 53
the last mode memory feature To display TV setting information on-screen: Press E on the remote control. The following information will display on status • V-Chip rating status • Picture size • Video resolution • Lamp mode (appears only if the TV is in High Bright mode) STEREO NC-17 Sleep Timer: 18 - Toshiba 50HMX96 | Owner's Manual - English - Page 54
and open the Video menu. 2 Highlight Advanced Picture Settings and press T. 3 In the CableClear field, select your desired setting. Advanced Picture Settings Dynamic Contrast CableClear MPEG Noise Reduction Color Temperature Lamp Mode Vertical Edge Enhancer Color Management GCaomloer Maondeagement - Toshiba 50HMX96 | Owner's Manual - English - Page 55
1 Press Y and open the Video menu. 2 Highlight Advanced Picture Settings and press T. 3 In the Color Temperature field, select the mode you prefer (Cool, Medium, or Warm). Advanced Picture Settings Dynamic Contrast CableClear MPEG Noise Reduction Color Temperature Lamp Mode Vertical Edge Enhancer - Toshiba 50HMX96 | Owner's Manual - English - Page 56
Y and open the Video menu. 2 Highlight Advanced Picture Settings and press T. 3 Highlight Color Management and press T. Advanced Picture Settings Dynamic Contrast CableClear MPEG Noise Reduction Color Temperature Lamp Mode Vertical Edge Enhancer Color Management GCaomloer Maondeagement Reset High - Toshiba 50HMX96 | Owner's Manual - English - Page 57
the Video menu. 2 Highlight Advanced picture settings and press T. 3 Press B or b to highlight the Game Mode field, and then press C or c to select On. Advanced Picture Settings Dynamic Contrast CableClear MPEG Noise Reduction Color Temperature Lamp Mode Vertical Edge Enhancer Color Management Game - Toshiba 50HMX96 | Owner's Manual - English - Page 58
audio will sound fuller, richer, and wider. To adjust the WOW™ settings: 1 Put the TV in STEREO mode (- "Selecting stereo/SAP broadcasts" on page 45). 2 Press Y and open the Audio menu. 3 Highlight Advanced Audio Settings and press T. 4 Press b or B to highlight the WOW feature you want to adjust - Toshiba 50HMX96 | Owner's Manual - English - Page 59
TV to your home network 1 Connect the TV to your home network via the TV's RJ-45 (Ethernet) port. See Installation Guide for connection instructions. 2 If you want to use file sharing only and do not have Internet service Toshiba TV and router might have compatibility problems, please contact Toshiba - Toshiba 50HMX96 | Owner's Manual - English - Page 60
Upgrade Navigate ENTER Select CH RTN Back EXIT Exit 5 The message "Obtain Press T to close the screen and return to the Network menu. b) Skip to section C, "Setting up file sharing on properly. See Installation Guide for TV connection information. Also consult the owner's manuals for your other - Toshiba 50HMX96 | Owner's Manual - English - Page 61
, go to "Manually setting up the network address". For home network troubleshooting tips, see Chapter 8. C. Setting up file sharing on your PC Compatible operating systems The following operating systems are compatible for file sharing with the TV: • Microsoft® Windows® XP Service Pack 2 (Home - Toshiba 50HMX96 | Owner's Manual - English - Page 62
3 In the Permissions window for the selected folder: a) Click "Add..." and then select the user to be given sharing privileges.* *This user must match the user stored in the TV's "Home File Server Setup" menu. b) Click to check "Allow" next to "Full Control." c) Click "Apply." d) Click "OK" to close - Toshiba 50HMX96 | Owner's Manual - English - Page 63
TV" at right. For home network troubleshooting tips, see Chapter 8. D. Setting up file sharing on the TV 1 Press Y and open the Setup menu. 2 Highlight Installation and press T. The Installation menu will appear. Open the Network menu . Home Server Name ABCD User Name XYZ Password ***** JPEG - Toshiba 50HMX96 | Owner's Manual - English - Page 64
your TACP customer service representative will provide TV. Toshiba will not compensate for any lost data or recording(s) caused by the use of such PCs, or data. • The technical criteria set out in this Guide are meant as a guide only. • You must obtain any required permission from copyright owners - Toshiba 50HMX96 | Owner's Manual - English - Page 65
pages 59-64). 2 Press Y and open the Applications menu. 3 Highlight Picture Viewer and press T. Applications Picture Viewer Audio Player Channel Browser TV Guide On Screen Digital CC/Audio Selector CableCARD Navigate ENTER Select CH RTN Back EXIT Exit If the network is available, it will retrieve - Toshiba 50HMX96 | Owner's Manual - English - Page 66
menu sidebar (2, 5, 10, 15, or 20 seconds). Setup PC Settings ColorStream HD1 Audio No HDMI 1 Audio Auto ColorStream HD2 Audio No HDMI 2 Audio Auto Slide Show Interval 2 Sec Quick Restart On 2 Sec 5 Sec 10 Sec 15 Sec 20 Sec Navigate ENTER Select CH RTN Back the regular TV screen. During - Toshiba 50HMX96 | Owner's Manual - English - Page 67
pages 59-64). 2 Press Y and open the Applications menu. 3 Highlight Audio Player and press T. Applications Picture Viewer Audio Player Channel Browser TV Guide On Screen Digital CC/Audio Selector CableCARD Navigate ENTER Select CH RTN Back EXIT Exit If the network is available, it will retrieve - Toshiba 50HMX96 | Owner's Manual - English - Page 68
already done so, follow the instructions in sections A and B (- page 59), before proceeding. • Before you can schedule recordings, the time and date in the TV Guide On Screen feature must be set (- "Setting the time and date" on page 28). Required information and services Before you can set up the - Toshiba 50HMX96 | Owner's Manual - English - Page 69
for details on setting up the TV Guide On Screen™ system. If you experience any issues with e-mail scheduling, please contact Toshiba Consumer Solutions by calling 1-800-631-3811 or by visiting http://www.tacp.com/customersupport/contact.asp. For home network troubleshooting tips, see Chapter 8. 69 - Toshiba 50HMX96 | Owner's Manual - English - Page 70
" names (or IP addresses). -"Account" (user name) and "Password" for the TV's e-mail account. -"E-mail Address" for the TV. • Check with your ISP to make sure your TV's e-mail account has been activated. • Check with your ISP to make sure their servers support POP3 and SMTP protocols without secure - Toshiba 50HMX96 | Owner's Manual - English - Page 71
"E-mail Scheduling Setup" window For instructions on entering data in these fields for the TV to receive e-mails from any PC to remotely schedule and modify hosts the TV's e-mail account. Note: The TV does not support encrypted troubleshooting tips, see Chapter 8. 71 HMX96 (E/F) Web 213:276 - Toshiba 50HMX96 | Owner's Manual - English - Page 72
ON Enter ID The TV will only accept e-mails TV from receiving or sending unwanted e-mails (including e-mails that contain information about the programs the TV is set to record), it is recommended that you not change these settings unless you need to diagnose a problem or deal with a unique user - Toshiba 50HMX96 | Owner's Manual - English - Page 73
sent to the TV will be deleted eventually. Note: • Toshiba is not TV To send a request e-mail to the TV: 1 Format the e-mail following according to the instructions under "Formatting a request e-mail" below. 2 Send the e-mail to the TV. 3 After the TV receives and processes the e-mail, the TV - Toshiba 50HMX96 | Owner's Manual - English - Page 74
ADD INPUT ANT-1 CHANNEL 102-1 DATE 06/10/2005 START TIME 7 PM DURATION 2H15M TYPE RECORD Sample ADD request e-mail to schedule a new reminder: To: [TV's email address] Subject: [this can be left blank] ID MYID1234* cmd add input cb ch 4 date 7-4 start 8:30pm dur 1hr type remind GET request e-mail - Toshiba 50HMX96 | Owner's Manual - English - Page 75
mail. • FAILED - NO DEVICE AVAILABLE Make sure you have a recording device connected to the TV and that all cables are properly connected. • FAILED - MISC ERROR Make sure all devices and modified recording or reminder. For home network troubleshooting tips, see Chapter 8. 75 HMX96 (E/F) Web 213:276 - Toshiba 50HMX96 | Owner's Manual - English - Page 76
is a property of DLP TV lamp technology and is NOT a sign of malfunction. For details, see IMPORTANT NOTICE ABOUT "HOT LAMP RESTART" (- page 3). Picture problems General picture problems • Check the antenna/cable connections (- Installation Guide). • Press + on the remote control or TV and select - Toshiba 50HMX96 | Owner's Manual - English - Page 77
16). • Remove all obstructions between the remote control and the TV. • The remote control batteries may be dead. Replace the batteries (- page 11). • Your TV remote control may not operate certain features on your external device. Refer to the owner's manual for your other device to determine its - Toshiba 50HMX96 | Owner's Manual - English - Page 78
Troubleshooting Recording problems • If you use the TV's remote file is not a valid or supported MP3 file. Some files in Guide) and set up the network address properly (- Chapter 7). • The JPEG files exceed the specified limits (- "Media specifications" in Chapter 7). Picture viewer option in menu - Toshiba 50HMX96 | Owner's Manual - English - Page 79
," or "Password" settings are incorrect. User names and passwords are generally case sensitive. • Your Internet service provider may not support SMTP or POP3 protocols. Check with your ISP for details on supported protocols. The e-mail test passes, but the TV never responds to the e-mails • Email - Toshiba 50HMX96 | Owner's Manual - English - Page 80
TV again. "Lamp door is open." "Fan stopped." "Fan stopped." - - "Color wheel stopped." "Temperature warning." If, after trying the solution, the problem still exists: • In the U.S., call TACP Consumer Solutions at 1-800-631-3811. • In Canada, locate the nearest Toshiba authorized service depot - Toshiba 50HMX96 | Owner's Manual - English - Page 81
warranty: consult your consumer electronics dealer. In Canada Locate a Toshiba parts distributor by visiting www.toshiba.ca. Click "Home Entertainment" and then click "Support." Always replace the lamp unit with the model currently recommended by Toshiba. The correct lamp replacement part number - Toshiba 50HMX96 | Owner's Manual - English - Page 82
page 83). [ 3 On the lamp unit door on the back of the TV, loosen the screw using a manual screwdriver, and then remove the lamp unit door. TV back Lamp unit door detail Loosen screw using manual screwdriver NOTE: Wear soft, lint-free gloves when replacing the lamp unit. 6 Carefully insert the - Toshiba 50HMX96 | Owner's Manual - English - Page 83
steps 1-9, the problem still exists: • In the U.S., call TACP Consumer Solutions at 1-800-631-3811. • In Canada, locate the nearest Toshiba authorized service depot by directing your web browser to www.toshiba.ca; click "Home Entertainment," and then click "Support." Disposing of the used lamp unit - Toshiba 50HMX96 | Owner's Manual - English - Page 84
are subject to change without notice. • This model may not be compatible with features and/or Remote control with two size "AA" alkaline batteries • Dual-wand IR blaster cable • Installation Guide • Operating Guide (this book) • TV Guide On Screen™ Interactive Program Guide Optional Stands 50HMX96 - Toshiba 50HMX96 | Owner's Manual - English - Page 85
Obtain Warranty Service If, after following all of the operating instructions in this manual and reviewing the section titled "Troubleshooting," you find that service is needed: (1) To find the nearest TACP Authorized Service Station, visit TACP's website at www.tacp.toshiba.com/service or contact - Toshiba 50HMX96 | Owner's Manual - English - Page 86
to Obtain Warranty Services If, after following all of the operating instructions in this manual and checking the "Troubleshooting" section, you find that service is needed: (1) To find the nearest TCL Authorized Service Depot, visit TCL's web site at www.toshiba.ca. (2) Present your bill of sale or - Toshiba 50HMX96 | Owner's Manual - English - Page 87
code in this product may be obtained by contacting Toshiba Consumer Solutions at (800)631-3811. There will PROJECT "AS IS" AND ANY EXPRESSED OR IMPLIED WARRANTIES, INCLUDING, BUT NOT LIMITED TO, THE IMPLIED WARRANTIES be given attribution as the author of the parts of the library used. This can be in - Toshiba 50HMX96 | Owner's Manual - English - Page 88
size 37 THINC button 12 THINC™ system 10 Time and date setting 28 Troubleshooting 76 TV GUIDE button 12 V V-Chip blocking (Locks menu) .........47 Vertical Edge Enhancer 56 Video input label 32 Video input lock 50 W Warranty Canada 86 U.S 85 WOW:SRS 3D 58 WOW:SRS Focus 58 WOW:SRS - Toshiba 50HMX96 | Owner's Manual - English - Page 89
HMX96_EN.book Page 89 Friday, April 28, 2006 12:03 PM Notes 89 HMX96 (E/F) Web 213:276 - Toshiba 50HMX96 | Owner's Manual - English - Page 90
, and TheaterWide are registered trademarks of Toshiba America Consumer Products, L.L.C. Channel Browser, SurfLock, THINC, and Quick Restart are trademarks of Toshiba America Consumer Products, L.L.C. Digital Light Processing™, DLP™ and the DLP™ medallion are trademarks of Texas Instruments
-
 1
1 -
 2
2 -
 3
3 -
 4
4 -
 5
5 -
 6
6 -
 7
7 -
8
-
9
-
10
-
11
-
12
-
13
-
14
-
15
-
16
-
17
-
18
-
19
-
20
-
21
-
22
-
23
-
24
-
25
-
26
-
27
-
28
-
29
-
30
-
31
-
32
-
33
-
34
-
35
-
36
-
37
-
38
-
39
-
40
-
41
-
42
-
43
-
44
-
45
-
46
-
47
-
48
-
49
-
50
-
51
-
52
-
53
-
54
-
55
-
56
-
57
-
58
-
59
-
60
-
61
-
62
-
63
-
64
-
65
-
66
-
67
-
68
-
69
-
70
-
71
-
72
-
73
-
74
-
75
-
76
-
77
-
78
-
79
-
80
-
81
-
82
-
83
-
84
-
85
-
86
-
87
-
88
-
89
-
90
 |
 |

HIGH
-DEFINITION TELEVISION
50HMX96
56HMX96
I
S
O
1
4
0
0
1
F
I
L
E
N
o
.
A
9
6
4
5
T
O
S
H
I
B
A
A
M
E
R
I
C
A
C
O
N
S
U
M
E
R
P
R
O
D
U
C
T
S
,
L
.
L
.
C
.
YC/N
VX1A00004100
Integrated High Definition
DLP
™
Projection Television
© 2006 TOSHIBA CORPORATION
All Rights Reserved
Owner’s Record
The model number and serial number are on the back of
your TV. Record these numbers in the spaces below.
Refer to these numbers whenever you communicate
with your Toshiba dealer about this TV.
Model number:
Serial number:
For an overview of steps for setting up your new TV, see page 7.
Note: If the TV is powered off and then quickly on again when the
lamp unit is hot, it may take several minutes for the picture to appear
on-screen. This is a property of DLP
TM
TV lamp technology and is NOT
a sign of malfunction. For details, see "IMPORTANT NOTICE ABOUT
HOT LAMP RESTART" on page 3.
Note: To display a High Definition picture, the TV must be receiving a
High Definition signal (such as an over-the-air High Definition TV
broadcast, a High Definition digital cable program, or a High Definition
digital satellite program). For details, please contact your TV antenna
installer, cable provider, or satellite provider.
IMPORTANT NOTE
Before connecting, operating, or adjusting this product, carefully
read the Important Safety, Installation, Care, and Service
information in the separate
Installation Guide
.
HMX96_EN.book
Page 1
Friday, April 28, 2006
12:03 PM