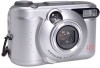
Toshiba PDR-M25 User Guide - Page 47
Close-up Photography Macro Photography
 |
UPC - 032017108370
View all Toshiba PDR-M25 manuals
Add to My Manuals
Save this manual to your list of manuals |
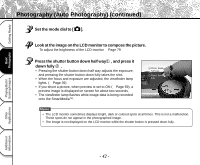
Page 47 highlights
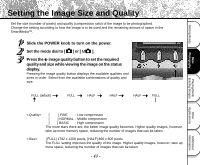
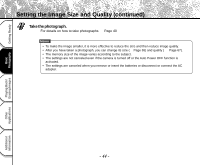
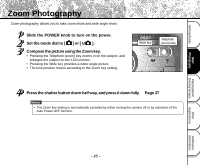
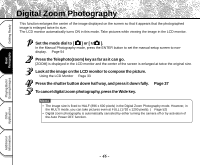
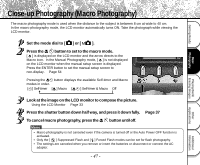
Close-up Photography (Macro Photography) The macro photography mode is used when the distance to the subject is between 8 cm at wide to 40 cm. In the macro photography mode, the LCD monitor automatically turns ON. Take the photograph while viewing the LCD monitor. Getting Ready Basic Photography Set the mode dial to [ ] or [ ]. Press the button to set to the macro mode. [ ] is displayed on the LCD monitor and the arrow directs to the Macro icon. In the Manual Photography mode, [ ] is not displayed on the LCD monitor when the manual setup screen is displayed. Press the ENTER button to set the manual setup screen to non-display. ➲ Page 54 Pressing the button displays the available Self-timer and Macro modes in order. [ ] Self-timer ➔ [ ] Macro ➔ [ ] Self-timer & Macro ➔ Off Playing Back/ Erasing Images Other Applications Look at the image on the LCD monitor to compose the picture. ☞ Using the LCD Monitor ➲ Page 33 Press the shutter button down half way, and press it down fully. ➲ Page 37 To cancel macro photography, press the button until off. Memo • Macro photography is not canceled even if the camera is turned off or the Auto Power OFF function is activated. • Only the [ ] Suppressed Flash and [ ] Forced Flash modes can be set for flash photography. • The settings are canceled when you remove or insert the batteries or disconnect or connect the AC adapter. - 47 - Additional Information
-
 1
1 -
2
-
3
-
4
-
5
-
6
-
7
-
8
-
9
-
10
-
11
-
12
-
13
-
14
-
15
-
16
-
17
-
18
-
19
-
20
-
21
-
22
-
23
-
24
-
25
-
26
-
27
-
28
-
29
-
30
-
31
-
32
-
33
-
34
-
35
-
36
-
37
-
38
-
39
-
40
-
41
-
 42
42 -
 43
43 -
 44
44 -
 45
45 -
 46
46 -
 47
47 -
 48
48 -
 49
49 -
 50
50 -
 51
51 -
 52
52 -
53
-
54
-
55
-
56
-
57
-
58
-
59
-
60
-
61
-
62
-
63
-
64
-
65
-
66
-
67
-
68
-
69
-
70
-
71
-
72
-
73
-
74
-
75
-
76
-
77
-
78
-
79
-
80
-
81
-
82
-
83
-
84
-
85
-
86
-
87
-
88
-
89
-
90
-
91
-
92
-
93
-
94
-
95
-
96
-
97
-
98
-
99
-
100
-
101
-
102
 |
 |
