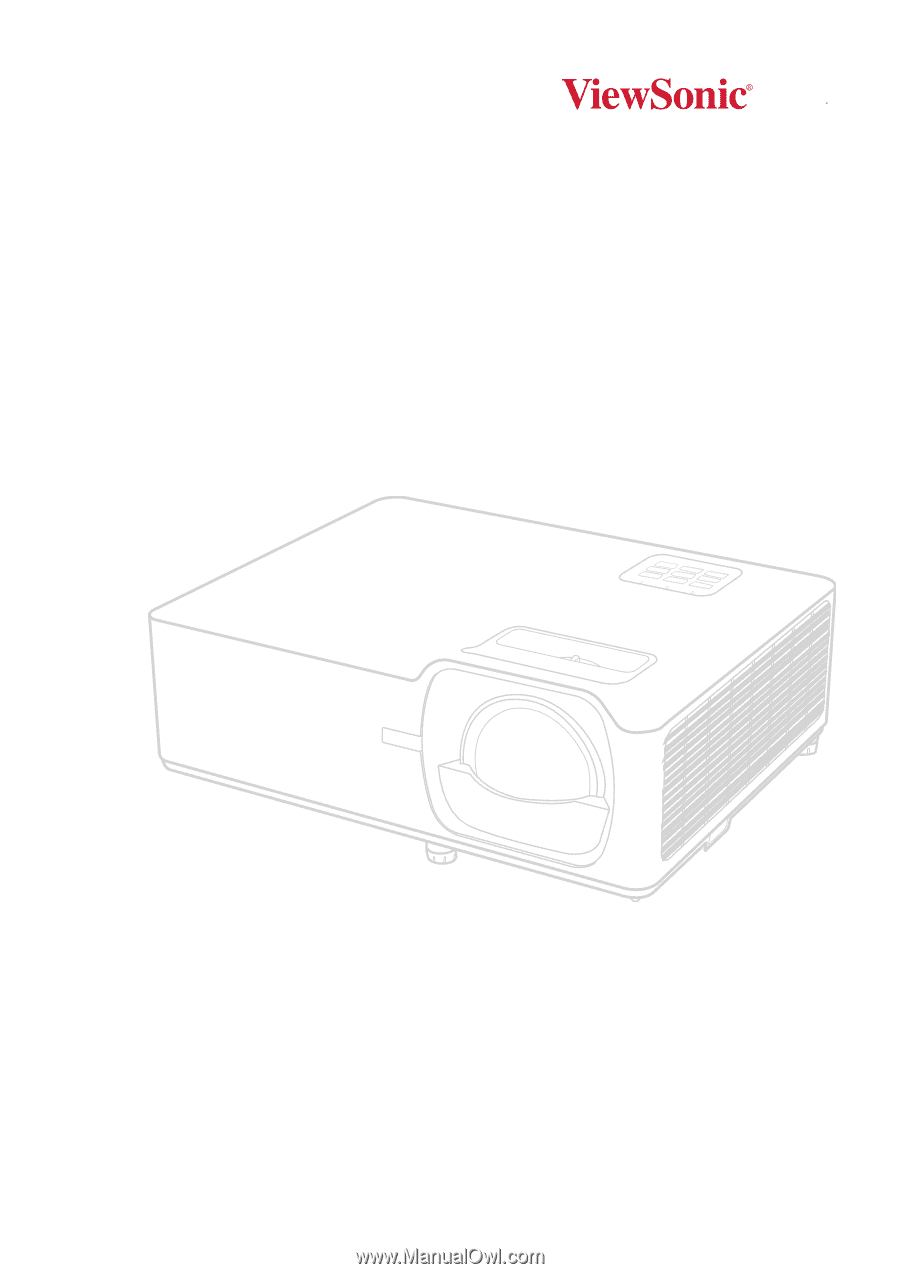
ViewSonic LS751HD User Guide English
ViewSonic LS751HD Manual
 |
View all ViewSonic LS751HD manuals
Add to My Manuals
Save this manual to your list of manuals |
ViewSonic LS751HD manual content summary:
- ViewSonic LS751HD | User Guide English - Page 1
important information on installing and using your product in a safe manner, as well as registering your product for future service. Warranty information contained in this User Guide will describe your limited coverage from ViewSonic® Corporation, which is also found on our web site at http://www - ViewSonic LS751HD | User Guide English - Page 2
exceeding the world's expectations for technological evolution, innovation, and simplicity. At ViewSonic®, we believe that our products have the potential to make a positive impact in the world, and we are confident that the ViewSonic® product you have chosen will serve you well. Once again, thank - ViewSonic LS751HD | User Guide English - Page 3
Please read the following Safety Precautions before you start using the projector. • Keep this user guide in a safe place for later reference. • Read all warnings and follow all instructions. • Allow at least 20" (50 cm) clearance around the projector to ensure proper ventilation. • Place - ViewSonic LS751HD | User Guide English - Page 4
present, immediately switch the projector off and call your dealer or ViewSonic®. It is dangerous to continue using the projector. • Use only being used for a long period of time. • Refer all servicing to qualified service personnel. CAUTION: Possibly hazardous optical radiation is emitted from this - ViewSonic LS751HD | User Guide English - Page 5
Safety Precautions - Ceiling Mounting Please read the following Safety Precautions before you start using the projector. If you intend to mount the projector on the ceiling, it is strongly recommended that you use a proper fitting projector ceiling mount kit and that you ensure it is securely and - ViewSonic LS751HD | User Guide English - Page 6
12 I/O Ports...13 Remote Control...14 Initial Setup 18 Choosing a Location - Projection Orientation 18 Projection Dimensions - LS710HD 19 Projection Dimensions - LS751HD 23 Mounting the Projector 27 Using the Security Bar 27 Making Connections 28 Connecting to Power 28 Connecting to External - ViewSonic LS751HD | User Guide English - Page 7
Menu...58 Information Menu 60 Appendix 61 Specifications...61 Projector Dimensions 62 Timing Chart...63 HDMI PC Timing...63 3D Support Timing 64 Troubleshooting...65 LED Indicators...67 Maintenance...68 General Precautions 68 Cleaning the Lens 68 Cleaning the Case 68 Storing the Projector - ViewSonic LS751HD | User Guide English - Page 8
Regulatory and Service Information 69 Compliance Information 69 FCC Compliance Statement 69 Industry Canada Statement 69 CE Hazardous Substances 72 Product Disposal at End of Product Life 72 Copyright Information 73 Customer Service 74 Limited Warranty 75 Mexico Limited Warranty 78 8 - ViewSonic LS751HD | User Guide English - Page 9
Contents - LS710HD LS710HD Series DLP Projector Quick Start Guide ViewSonic Projector http://vsweb.us Download Link http://vsweb.us/q/dn.php 1 Number 1 2 3 4 5 23 4 5 Description Projector Remote Control Batteries Quick Start Guide Power Cord NOTE: The power cord and remote control - ViewSonic LS751HD | User Guide English - Page 10
Package Contents - LS751HD LS751HD Series DLP Projector Quick Start Guide ViewSonic Projector http://vsweb.us Download Link http://vsweb.us/q/dn.php 1 23 4 5 Number 1 2 3 4 5 Description Projector Remote Control Batteries Quick Start Guide Power Cord NOTE: The power cord and remote - ViewSonic LS751HD | User Guide English - Page 11
Product Overview Projector 7 2 7 2 4 1 10 9 LS710HD 5 8 3 6 1 10 4 9 LS751HD 5 8 Number 1 2 3 4 5 6 7 8 9 10 Description Remote IR Sensor Keypad Lens Shift Focus Ring Vent (inlet) Zoom Ring Vent (outlet) Security Bar Adjuster Foot Projection Lens NOTE: Do - ViewSonic LS751HD | User Guide English - Page 12
Key AUTO Power Keystone ENETNETRER Navigation AUTO Menu/Exit ESNoTuErRce Description Toggles the projector between standby mode and Power On. Manually corrects distorted images resulting from an angled projection. ASUeTAOleUcTtOs the desired menu items and makes adjustments when the On-Screen - ViewSonic LS751HD | User Guide English - Page 13
HDMI 1 HDCP 2.2 4 HDMI 2 HDCP 1.4 5 Port Description 1 AUDIO OUT Audio signal output socket. 2 RS-232 RS-232 control port. 3 USB (5V/1.5A Out) (Service) USB Type A port for power and service. 4 HDMI 11 HDMI port. 5 HDMI 22 HDMI port. 6 RJ-45 LAN port. 7 AC IN AC IN socket - ViewSonic LS751HD | User Guide English - Page 14
Remote Control 1 3 5 7 10 12 13 16 18 20 22 2 4 6 8 9 11 14 15 17 19 21 23 Button 1 AV Mute 2 Power 3 Auto Sync 4 Source 5 Navigation Buttons 6 Enter 7 Menu/Exit 8 Brightness 9 Volume Up Description Hides the screen picture and volume mute. Turns the projector On or Off - ViewSonic LS751HD | User Guide English - Page 15
16 Page Up 17 Zoom In 18 Freeze 19 Zoom Out 20 Page Down 21 Display Mode 22 Mouse Mode 23 Mute Description Manually correct distorted images. Decrease the volume level. Unsupported Button Unsupported Button Selects the HDMI 1 or HDMI 2 input source. Displays the aspect ratio selection - ViewSonic LS751HD | User Guide English - Page 16
.8 ft.) • Top IR: 7 m (23 ft.) NOTE: Refer to the illustration for the location of the infrared (IR) remote control sensor(s). Approx. 30° LS710HD Approx. 30° LS751HD 16 - ViewSonic LS751HD | User Guide English - Page 17
for an extended period of time, remove the batteries to avoid damage to the remote control. • Dispose of the used batteries according to the manufacturer's instructions and local environment regulations for your region. 17 - ViewSonic LS751HD | User Guide English - Page 18
Initial Setup This section provides detailed instructions for the initial set up your projector. Choosing a Location - Projection Orientation Personal preference and room layout will decide the installation location. Consider the following: • Size - ViewSonic LS751HD | User Guide English - Page 19
Projection Dimensions - LS710HD • 16:9 Image on a 16:9 Screen (b) (a) (a) (d) (c) (f) (e) (e) (f) (c) (d) (b) NOTE: • (e) = Screen (f) = Center of Lens 16:9 Image on a 16:9 Screen (a) Screen Size (b) Projection Distance Minimum Maximum in. mm in. mm in. mm 40 1016 17.29 439 17. - ViewSonic LS751HD | User Guide English - Page 20
(a) Screen Size in. mm 110 2794 120 3048 130 3302 140 3556 150 3810 200 5080 250 6350 300 7633 (b) Projection Distance Minimum Maximum in. mm in. mm 47.55 1208 47.55 1208 51.88 1318 51.88 1318 56.20 1427 56.20 1427 60.52 1537 60.52 1537 64.85 1647 64.85 1647 86.46 2196 86.46 2196 108. - ViewSonic LS751HD | User Guide English - Page 21
• 16:9 Image on a 4:3 Screen (b) (a) (d) (c) (f) (e) (a) (e) (f) (c) (d) (b) NOTE: • (e) = Screen (f) = Center of Lens 16:9 Image on a 4:3 Screen (a) Screen Size (b) Projection Distance Minimum Maximum in. mm in. mm in. mm 40 1016 15.87 403 15.87 403 50 1270 19.84 504 19.84 504 60 - ViewSonic LS751HD | User Guide English - Page 22
(a) Screen Size in. mm 110 2794 120 3048 130 3302 140 3556 150 3810 200 5080 250 6350 300 7633 (b) Projection Distance Minimum Maximum in. mm in. mm 43.65 1109 43.65 1109 47.62 1209 47.62 1209 51.58 1310 51.58 1310 55.55 1411 55.55 1411 59.52 1512 59.52 1512 79.36 2016 79.36 2016 99.20 - ViewSonic LS751HD | User Guide English - Page 23
Projection Dimensions - LS751HD • 16:9 Image on a 16:9 Screen (b) (a) (a) (d) (c) (f) (e) (e) (f) (c) (d) (b) NOTE: • (e) = Screen (f) = Center of Lens 16:9 Image on a 16:9 Screen (a) Screen Size (b) Projection Distance Minimum Maximum in. mm in. mm - ViewSonic LS751HD | User Guide English - Page 24
(a) Screen Size (b) Projection Distance Minimum Maximum (c) Image Height in. mm in. mm in. mm in. mm 110 2794 134.22 3409 214.76 5455 53.93 1370 120 3048 146.42 3719 234.28 5951 58.83 1494 130 3302 158.63 4029 253.80 6447 63.73 1619 140 3556 170.83 4339 273.33 6942 68.64 1743 150 3810 183.03 - ViewSonic LS751HD | User Guide English - Page 25
• 16:9 Image on a 4:3 Screen (b) (a) (d) (c) (f) (e) (a) (e) (f) (c) (d) (b) NOTE: • (e) = Screen (f) = Center of Lens 16:9 Image on a 4:3 Screen (a) Screen Size (b) Projection Distance Minimum Maximum in. mm in. mm in. mm 30 763 34.16 868 54.66 1388 40 1016 44.80 1138 71.68 1821 50 1270 - ViewSonic LS751HD | User Guide English - Page 26
(a) Screen Size (b) Projection Distance Minimum Maximum (c) Image Height in. mm in. mm in. mm in. mm 110 2794 123.20 3129 197.12 5007 49.50 1257 120 3048 134.40 3414 215.04 5462 54.00 1372 130 3302 145.60 3698 232.96 5917 58.50 1486 140 3556 156.80 3983 250.88 6372 63.00 1600 150 3810 168.00 - ViewSonic LS751HD | User Guide English - Page 27
correct screw size. Screw size can vary depending on the thickness of the mounting plate. 1. To ensure the most secure installation, please use a ViewSonic® wall or ceiling mount. 2. Ensure the screws used to attach the mount to the projector meet the following specifications: • Screw type: M4 x 10 - ViewSonic LS751HD | User Guide English - Page 28
Making Connections Connecting to Power 1. Connect the power cord to the AC IN jack at the rear of the projector. 2. Plug the power cord into a power outlet. 2 1 NOTE: When installing the projector, incorporate a readily accessible disconnect device in the fixed wiring, or connect the power plug to - ViewSonic LS751HD | User Guide English - Page 29
end of the cable to the HDMI 1/2 port of your projector. NOTE: • iPhone/iPad users will need to use an additional adapter. • The HDMI 1 port supports HDCP 2.2. • The HDMI 2 port supports HDCP 1.4. HDMI 2 HDCP 1.4 HDMI 1 HDCP 2.2 USB A 5V/1.5A (SERVICE) 29 - ViewSonic LS751HD | User Guide English - Page 30
Audio Connection You can connect to various external sound delivery devices via the Audio Out port. AUDIO OUT 30 - ViewSonic LS751HD | User Guide English - Page 31
USB and Network Connection USB Type A Connection The USB port is for supplying power and service needs. Network Connection Plug the network cable into the LAN port. HDMI 1 HDCP 2.2 USB A 5V/1.5A (SERVICE) CONTROL 31 - ViewSonic LS751HD | User Guide English - Page 32
RS-232 Connection When you use a RS-232 serial port cable to connect the projector to an external computer certain functions can be controlled remotely by the PC, including Power On/Off, Volume adjustment, Input select, Brightness, and more. RS232 32 - ViewSonic LS751HD | User Guide English - Page 33
Using the Projector Starting Up the Projector 1. Ensure the projector's power cord is properly connected to a power outlet. 2. Press the Power button on the projector or remote control to turn on the projector. NOTE: The Power Indicator Light will be flashing blue during startup. 33 - ViewSonic LS751HD | User Guide English - Page 34
devices at the same time. However, it can only display one full screen at a time. HDMI 2 HDCP 1.4 HDMI 1 HDCP 2.2 USB A 5V/1.5A (SERVICE) CONTROL RS232 AUDIO OUT The projector will automatically search for input sources. If multiple sources are connected, press the Source button on the - ViewSonic LS751HD | User Guide English - Page 35
Adjusting the Projected Image Adjusting the Projector's Height and Projection Angle The projector is equipped with three (3) adjustment feet. Adjusting the feet will change the projector's height and the vertical projection angle. Adjustment Feet Tilt-Adjustment Ring 35 - ViewSonic LS751HD | User Guide English - Page 36
Adjusting the Focus, Keystone, and Lens Shift You can improve and adjust the clarity and position of the image by adjusting the Focus Ring, Keystone Keys, Lens Shift1 dial, or Zoom Ring¹. LS710HD LS751HD ¹ Only on LS751HD. 36 - ViewSonic LS751HD | User Guide English - Page 37
Shutting Down the Projector 1. Press the Power button on the projector or remote control and a "power off message" will appear. 2. Press the Power button again to confirm and shut down the projector. NOTE: The cooling fans will continue to operate for about 10 seconds for the cooling cycle and the - ViewSonic LS751HD | User Guide English - Page 38
Operating the Projector On-Screen Display (OSD) Menu The projector has multilingual on-screen display menus that allow you to make image adjustments and change a variety of settings. Display Image Settings 3D Aspect Ratio Edge Mask Zoom Image Shift Keystone i Select Exit 4:3 0 0 Enter Menu - ViewSonic LS751HD | User Guide English - Page 39
Menu Navigation The projector has multilingual on-screen display menus that allow for image and settings adjustment. 1. To open the On-Screen Display (OSD) Menu, press the Menu/Exit button on the projector or the remote control. 2. When the OSD is displayed, use the Navigation buttons (pq) to select - ViewSonic LS751HD | User Guide English - Page 40
On-Screen Display (OSD) Menu Tree Main Menu Sub-menu Menu Option Presentation Bright HDR SIM Cinema Display Mode Game sRGB DICOM SIM User 3D Off Blackboard Light Yellow Wall Color Light Green Light Blue Display Image Settings Pink Gray Brightness (-/+, -50~50) Contrast (-/+, - - ViewSonic LS751HD | User Guide English - Page 41
Main Menu Sub-menu Menu Option Brilliant Color™ (-/+, 1~10) Warm Color Temperature Standard Cool Cold Color Display Image Settings Color Settings Color Matching RGB Gain/Bias Hue/R Saturation/G Gain/B Reset Exit Red Gain Green Gain Blue Gain Red Bias Green Bias Blue Bias Reset Exit Red - ViewSonic LS751HD | User Guide English - Page 42
Main Menu Display Sub-menu Image Settings 3D Aspect Ratio Edge Mask Zoom Image Shift Color Settings Brightness Mode Reset 3D Mode 3D - 2D 3D Format 3D Sync Invert 4:3 16:9 LBX Native Auto (-/+, 0~10) (-/+, -5~25) Horizontal (H.) Vertical (V.) Menu Option Auto Color Space RGB (0~255) RGB (16~ - ViewSonic LS751HD | User Guide English - Page 43
Main Menu Sub-menu Four Corners Display Audio Setup Keystone Mute Volume Projection H. Keystone V. Keystone Auto Keystone Reset Off On (-/+, 0~10) Front Rear Ceiling-Top Rear-Top Direct Power On Power Settings Signal Power On Auto Power Off Power Mode USB Power Security Security Security - ViewSonic LS751HD | User Guide English - Page 44
Main Menu Sub-menu HDMI CEC Test Pattern Setup Options HDMI CEC Test Pattern Language Menu Option Off On Off Green Grid Magenta Grid White Grid White English Deutsch Français Italiano Español Português Polski Nederlands Svenska Norsk/Dansk Suomi Magyar Čeština Türkçe Tiếng Việt Bahasa Indonesia - ViewSonic LS751HD | User Guide English - Page 45
Main Menu Sub-menu Setup Options Reset Menu Option Top-Left Top-Right Menu Location Center Menu Settings Bottom-Left Bottom-Right Off Menu Timer 5 seconds 10 seconds Off Auto Source On Input Source HDMI 1 HDMI 2 Off High Altitude On Default Logo Neutral Black Blue Background - ViewSonic LS751HD | User Guide English - Page 46
Main Menu Sub-menu Network Status MAC Address DHCP LAN IP Address Subnet Mask Gateway DNS Reset Network Crestron Extron Control PJ Link AMX Device Discovery Telnet HTTP Menu Option Off On xxx.xxx.xxx xxx.xxx.xxx xxx.xxx.xxx xxx.xxx.xxx Off On Off On Off On Off On Off On Off On 46 - ViewSonic LS751HD | User Guide English - Page 47
Main Menu Information Sub-menu Serial Number Source Resolution Refresh Rate Display Mode Power Mode Light Source Hours Network Status IP Address Brightness Mode Firmware Version System LAN MCU Menu Option 47 - ViewSonic LS751HD | User Guide English - Page 48
Menu Operation Display Menu Display i Menu Image Settings Image Settings 3D Aspect Ratio 4:3 Edge Mask 0 Zoom 0 Image Shift Keystone Select Exit Enter Description Display Mode There are several predefined display modes that you can choose from to suit your viewing preference. Mode - ViewSonic LS751HD | User Guide English - Page 49
Menu Image Settings Description Wall Color Designed to adjust the colors of the projected image when projecting on to a wall without a screen. NOTE: A screen is recommended for more accurate color reproduction. Brightness The higher the value, the brighter the image. Lower values will result in a - ViewSonic LS751HD | User Guide English - Page 50
Menu Image Settings Color Settings Description Setting Brilliant Color™ Color Temperature Description A color-processing algorithm and enhancements to enable higher brightness while providing true, more vibrant colors in picture. Select from Warm, Standard, Cool, or Cold. Only in permanent - ViewSonic LS751HD | User Guide English - Page 51
: This projector is a 3D ready projector with DLP-Link 3D solution. Please make sure your 3D glasses are for DLP-Link 3D. This projector supports frame sequential (page-flip) 3D via the HDMI 1/HDMI 2 ports. For the best performance, 1920 x 1080 resolution is recommended. Please note that 4K (3840 - ViewSonic LS751HD | User Guide English - Page 52
Menu Aspect Ratio Edge Mask Zoom Image Shift Description Select the aspect ratio of the projected image. Aspect Ratio 4:3 16:9 Native LBX Auto Description Scales an image so that it is displayed in the center of the screen with a 4:3 aspect ratio. This is most suitable for 4:3 images like - ViewSonic LS751HD | User Guide English - Page 53
Menu Keystone Option Four Corners H. Keystone V. Keystone Auto Keystone Reset Description Description Adjust each corner to make a square image when the projection surface is not level. NOTE: While adjusting the Four Corners, the Aspect Ratio, Edge Mask, Image Shift, and Zoom menus will be - ViewSonic LS751HD | User Guide English - Page 54
Audio Menu Audio Mute Volume 0 i Menu Mute Volume Select Exit Enter Description Temporarily turn off the sound. Adjust the volume level. 54 - ViewSonic LS751HD | User Guide English - Page 55
Setup Menu Setup Projection Power Settings Security HDMI CEC Test Pattern Options Reset i Select Exit Enter Menu Projection Power Settings Description Select the preferred projection: Front, Rear, Ceiling-Top, and Rear-Top. Direct Power On Automatically power on the projector when AC power - ViewSonic LS751HD | User Guide English - Page 56
Menu Security HDMI CEC Test Pattern Description Security Enable or disable a password prompt before using the projector. NOTE: The default password is: 1234 Security Timer Set the amount of time the projector can be used. Once this time has elapsed you will be requested to enter your password again - ViewSonic LS751HD | User Guide English - Page 57
Menu Options Reset Description Language Select the On-Screen Display (OSD) Menu language. Menu Settings Set the menu location on screen and configure the menu timer settings. Auto Source Automatically find an available input source. Input Source Select the input signal: HDMI 1 or HDMI 2. High - ViewSonic LS751HD | User Guide English - Page 58
Network Menu LAN Control Network i Menu LAN Control Select Exit Enter Description View network information and enable/disable DHCP. Enable or disable network control suites. NOTE: To connect successfully, the control suite must be enabled. Network Control Crestron Extron PJ Link AMX Device - ViewSonic LS751HD | User Guide English - Page 59
and go to: Network > LAN. 3. Select DHCP and turn it On to obtain an IP address automatically; or select Off to enter the network information manually. NOTE: Please wait for around 15~20 seconds, then re-enter the LAN settings page. The Projector IP Address, Subnet Mask, Default Gateway, DNS Server - ViewSonic LS751HD | User Guide English - Page 60
Information Menu View Serial Number, Source, Resolution, Refresh Rate, Display Mode, Power Mode, Light Source Hours, Network Status, IP Address, Brightness Mode, and Firmware Version information. Information Serial Number Source Resolution Refresh Rate Display Mode Power Mode Light Source Hours - ViewSonic LS751HD | User Guide English - Page 61
Zoom Display System HDMI Native Input Voltage Temperature Humidity Altitude Temperature Humidity Altitude Physical (W x H x D) Physical On1 Off Specifications LS710HD LS751HD Laser 40"~300" 30"~300" 0.49±3% (100"@1.08m) 1.4~2.24±3% (100" @3.10m) Fixed 1.6x 1-CHIP DMD fh: 15~102 kHz - ViewSonic LS751HD | User Guide English - Page 62
Projector Dimensions 337 mm (W) x 131.5 mm (H) x 265 mm (D) LS710HD LS710HD LS751HD LS751HD 62 - ViewSonic LS751HD | User Guide English - Page 63
/85 Mac 60/72/85 Mac 60/70/75/85 Mac 75 Mac 60 Mac 60/75 Mac 60 ² Mac 60 ³ 1920 x 1200 @ 60Hz only supports RB (Reduced Blanking) ⁴ HDMI 1 UHD/4K2K timing - ViewSonic LS751HD | User Guide English - Page 64
3D Support Timing Signal 720p 1080i 1080p Resolution 1280 x 720p 1280 x 720p 1920 x 1080i 1920 x 1080p 1920 x 1080p Refresh Rate (Hz) 50/60 50/60 50/60 - ViewSonic LS751HD | User Guide English - Page 65
Troubleshooting This section describes some common problems that you may experience when using the projector. Problem or Issue The projector does not turn on There is no picture The image is blurred Possible Solutions • Ensure the power cord is properly attached - ViewSonic LS751HD | User Guide English - Page 66
Problem or Issue The remote control does not work The projector stops responding to all controls Possible Solutions • Ensure there are no obstacles between the remote - ViewSonic LS751HD | User Guide English - Page 67
from the projector, wait for 30 seconds and try again. If the warning indicators light up or flash, please contact your nearest service center for assistance. Status and Description Power Indicator Light Red Blue Temperature Light Source Indicator Light Indicator Light Red Red Standby State - ViewSonic LS751HD | User Guide English - Page 68
sure the projector is turned off and the power cable is unplugged from the power outlet. • Never remove any parts from the projector. Contact ViewSonic® or a reseller when any part of the projector needs replacing. • Never spray or pour any liquid directly onto the case. • Handle the projector with - ViewSonic LS751HD | User Guide English - Page 69
Regulatory and Service Information Compliance Information This section addresses all connected requirements radiate radio frequency energy, and if not installed and used in accordance with the instructions, may cause harmful interference to radio communications. However, there is no guarantee that - ViewSonic LS751HD | User Guide English - Page 70
CE Conformity for European Countries The device complies with the EMC Directive 2014/30/EU and Low Voltage Directive 2014/35/EU. Ecodesign Directive 2009/125/EC. The following information is only for EU-member states: The mark shown to the right is in compliance with the Waste Electrical and - ViewSonic LS751HD | User Guide English - Page 71
Declaration of RoHS2 Compliance This product has been designed and manufactured in compliance with Directive 2011/65/EU of the European Parliament and the Council on restriction of the use of certain hazardous substances in electrical and electronic equipment (RoHS2 Directive) and is deemed to - ViewSonic LS751HD | User Guide English - Page 72
0.1 weight % and 0.01 weight % for cadmium, except for the exemptions set in Schedule 2 of the Rule. Product Disposal at End of Product Life ViewSonic® respects the environment and is committed to working and living green. Thank you for being part of Smarter, Greener Computing. Please visit the - ViewSonic LS751HD | User Guide English - Page 73
damages resulting from furnishing this material, or the performance or use of this product. In the interest of continuing product improvement, ViewSonic® Corporation reserves the right to change product specifications without notice. Information in this document may change without notice. No part of - ViewSonic LS751HD | User Guide English - Page 74
Customer Service For technical support or product service, see the table below or contact your reseller. NOTE: You will need the product's serial number. Country/ Region Website Country/ Region Website Asia Pacific & Africa Australia 中国 (China) www.viewsonic.com/au/ www.viewsonic.com.cn - ViewSonic LS751HD | User Guide English - Page 75
original lamp from the date of the first consumer purchase. Other regions or countries: Please check with your local dealer or local ViewSonic® office for the warranty information. Lamp warranty subject to terms and conditions, verification and approval. Applies to manufacturer's installed lamp only - ViewSonic LS751HD | User Guide English - Page 76
ViewSonic® Customer Support (Please refer to the "Customer Support" page). You will need to provide your product's serial number. 2. To obtain warranted service, you will be required to provide: (a) the original dated sales slip, (b) your name, (c) your address, (d) a description of the problem - ViewSonic LS751HD | User Guide English - Page 77
Canada: For warranty information and service on ViewSonic® products sold outside of the U.S.A. and Canada, contact ViewSonic® or your local ViewSonic® dealer. The warranty period at: http://www.viewsonic.com/eu/ under "Support/Warranty Information". Projector Warranty Term Template In UG VSC_TEMP_2005 - ViewSonic LS751HD | User Guide English - Page 78
be defective in material or workmanship during the warranty period, ViewSonic® will, at its sole option, repair or replace the product modification, unauthorized attempted repair, or failure to follow instructions supplied with the product. ͫ Any damage of the product set-up service charges. 78 - ViewSonic LS751HD | User Guide English - Page 79
service: For information about receiving service under warranty, contact ViewSonic® Customer Support (Please refer to the attached "Customer Service problem, and (e) the serial number of the product. 2. Take or ship the product, in the original container packaging, to an authorized ViewSonic® service - ViewSonic LS751HD | User Guide English - Page 80
Colo Centro 39300 Acapulco, Guerrero Tel: 744-48-32627 Monterrey: Global Product Services Mar Caribe # 1987, Esquina con Golfo Pérsico Fracc. Bernardo Reyes, 20 de Noviembr Tijuana, Mexico FOR USA SUPPORT: ViewSonic® Corporation 381 Brea Canyon Road, Walnut, CA. 91789 USA Tel: 800-688-6688 E-Mail - ViewSonic LS751HD | User Guide English - Page 81
81
-
 1
1 -
 2
2 -
 3
3 -
 4
4 -
 5
5 -
 6
6 -
 7
7 -
8
-
9
-
10
-
11
-
12
-
13
-
14
-
15
-
16
-
17
-
18
-
19
-
20
-
21
-
22
-
23
-
24
-
25
-
26
-
27
-
28
-
29
-
30
-
31
-
32
-
33
-
34
-
35
-
36
-
37
-
38
-
39
-
40
-
41
-
42
-
43
-
44
-
45
-
46
-
47
-
48
-
49
-
50
-
51
-
52
-
53
-
54
-
55
-
56
-
57
-
58
-
59
-
60
-
61
-
62
-
63
-
64
-
65
-
66
-
67
-
68
-
69
-
70
-
71
-
72
-
73
-
74
-
75
-
76
-
77
-
78
-
79
-
80
-
81
 |
 |
LS710HD
LS751HD
Projector
User Guide
Model No. VS19338 | VS19337
P/N: LS710HD | LS751HD
IMPORTANT:
Please read this User Guide to obtain important information on installing and using your product in
a safe manner, as well as registering your product for future service.
Warranty information contained in this User
Guide will describe your limited coverage from ViewSonic
®
Corporation, which is also found on our web site at
http://www.viewsonic.com in English, or in specific languages using the Regional selection box on our website.