ViewSonic PF790 User Manual - Page 5
Quick, Installation
 |
UPC - 766907143119
View all ViewSonic PF790 manuals
Add to My Manuals
Save this manual to your list of manuals |
Page 5 highlights
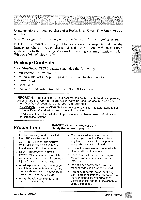
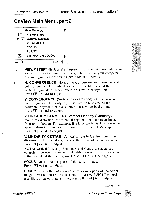
Quick Installation 1 Connect video cable 4 Install INF and ICM files Make sure both the PF790 and • For CD-ROM: Insert the CD-ROM computer are powered OFF. Connect into your system, wait for it to auto- the video cable to the computer. start, select"Monitor Drivers", and Macintosh° users: Connect a follow the on-screen instructions. Macintosh adapter (part No. VMAC-1) • For diskette: Insert the diskette into to the video cable, then to the PF790. your system, run install.exe, and E To order an adapter, contact follow the on-screen instructions. N G ViewSonic° (see the back cover of this guide).You will need to provide your PF790's serial number. 5 Windows users: Setting the Timing Mode (Resolution and Refresh Rate) 2 Connect power cord Example: 1024 x 768 @ 75 Hz Connect the power cord to a properly grounded AC outlet, then to the PF790 Resolution Right-click on the Windows desktop > Properties > Settings > 3 Power-ON monitor and computer Power-ON the PF790 monitor, THEN power-ON the computer. "Desktop Area". Set the resolution. Refresh Rate (vertical frequency) See your graphic card's user guide for instructions. NOTE: • This sequence (monitor before computer) is very important. • At this point Windows® '98 users may receive a message asking them to install the PF790's INF file. Installation is complete! Enjoy your new PF790 Monitor! To be best prepared for any future customer service needs: • Write the serial number (see back of the monitor) in Tor Your Records" on page 1 of this guide. • Register the warranty of your monitor on the Internet at: http://www.viewsonic.com AC IN Wall Socket 4 Getting Started Power cord a Back of Computer Video Cable ViewSonic PF790
-
 1
1 -
 2
2 -
 3
3 -
 4
4 -
 5
5 -
 6
6 -
 7
7 -
 8
8 -
 9
9 -
 10
10 -
 11
11 -
12
-
13
-
14
-
15
-
16
-
17
-
18
 |
 |
