Weider 8515 User Manual - Page 7
Weider 8515 Manual
 |
View all Weider 8515 manuals
Add to My Manuals
Save this manual to your list of manuals |
Page 7 highlights
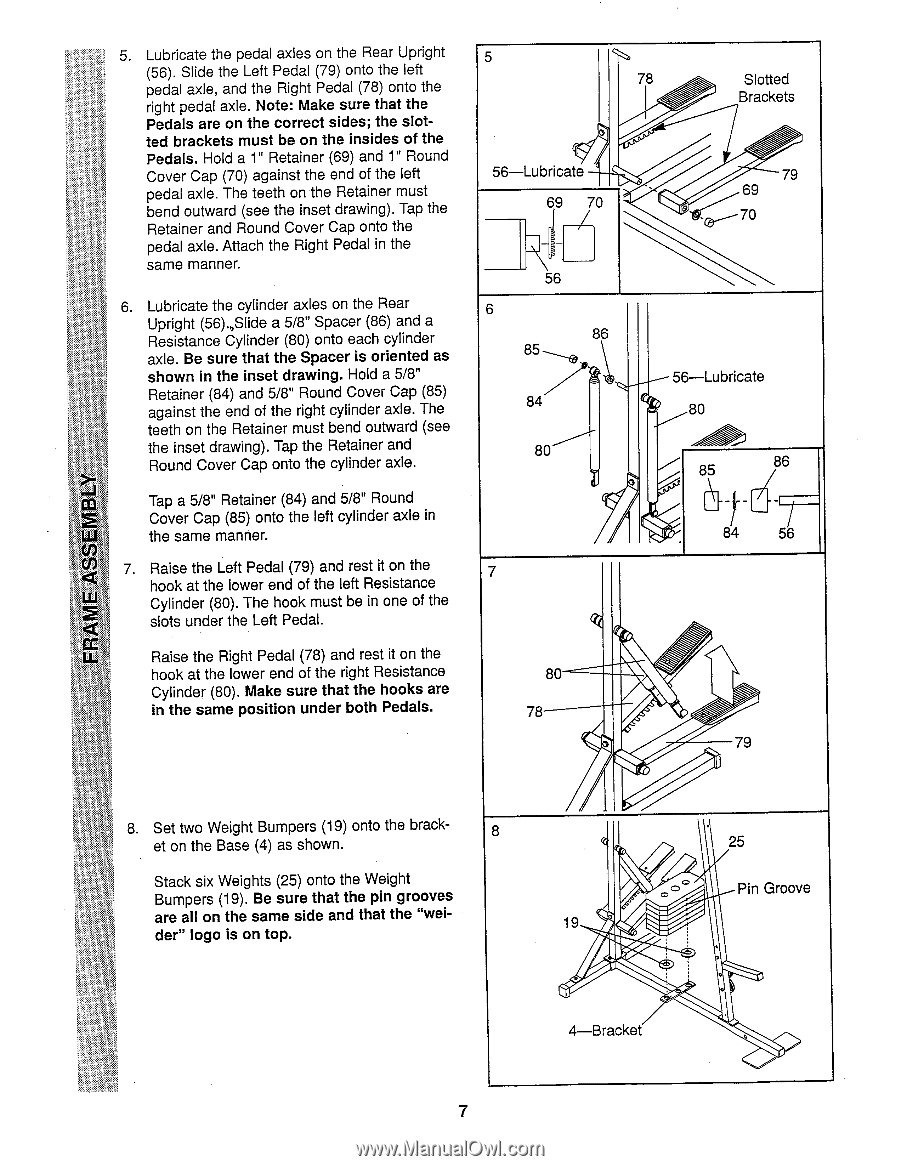
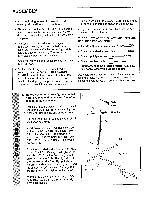
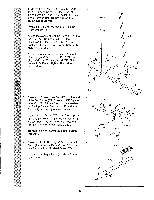
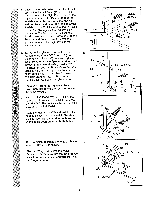
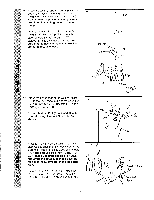
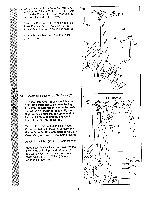
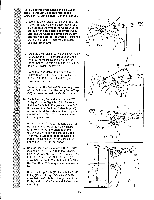
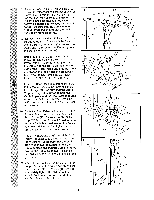
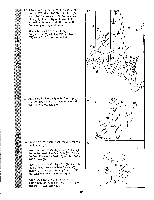
Lubricate the pedal axles on the Rear Upright (56). Slide the Left Pedal (79) onto the left pedal axle, and the Right Pedal (78) onto the right pedal axle. Note: Make sure that the Pedals are on the correct sides; the slotted brackets must be on the insides of the Pedals. Hold a 1" Retainer (69) and 1" Round Cover Cap (70) against the end of the left pedal axle. The teeth on the Retainer must bend outward (see the inset drawing). Tap the Retainer and Round Cover Cap onto the pedal axle. Attach the Right Pedal in the same manner. 6. Lubricate the cylinder axles on the Rear Upright (56).,,Slide a 5/8" Spacer (86) and a Resistance Cylinder (80) onto each cylinder axle. Be sure that the Spacer is oriented as shown in the inset drawing. Hold a 5/8" Retainer (84) and 5/8" Round Cover Cap (85) against the end of the right cylinder axle. The teeth on the Retainer must bend outward (see the inset drawing). Tap the Retainer and Round Cover Cap onto the cylinder axle. CCI Tap a 5/8" Retainer (84) and 5/8" Round 2 Cover Cap (85) onto the left cylinder axle in W the same manner. C!) Cf) 7. Raise the Left Pedal (79) and rest it on the LLI hook at the lower end of the left Resistance Cylinder (80). The hook must be in one of the slots under the Left Pedal. CC Raise the Right Pedal (78) and rest it on the hook at the lower end of the right Resistance Cylinder (80). Make sure that the hooks are in the same position under both Pedals. 5 56-Lubricate 69 70 56 6 86 85 7 1' 84 80 7 80 78 78 Slotted Brackets 79 69 70 56-Lubricate 80 85 8 6 -\T -1 84 - i 56 < 79 8. Set two Weight Bumpers (19) onto the brack- 8 et on the Base (4) as shown. Stack six Weights (25) onto the Weight Bumpers (19). Be sure that the pin grooves are all on the same side and that the "welder" logo is on top. 25 0 c,:0 Pin Groove 19 ,0 • 4-Bracket 7
-
 1
1 -
 2
2 -
 3
3 -
 4
4 -
 5
5 -
 6
6 -
 7
7 -
 8
8 -
 9
9 -
 10
10 -
 11
11 -
 12
12 -
13
-
14
-
15
-
16
-
17
-
18
-
19
 |
 |