Weider Bench 250 English Manual - Page 7
Attach the Front Leg 4 to the Bench Frame 3 - i
 |
View all Weider Bench 250 manuals
Add to My Manuals
Save this manual to your list of manuals |
Page 7 highlights
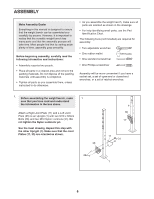
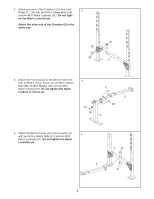
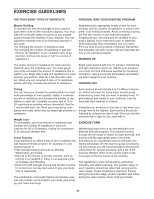
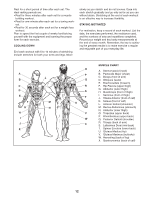
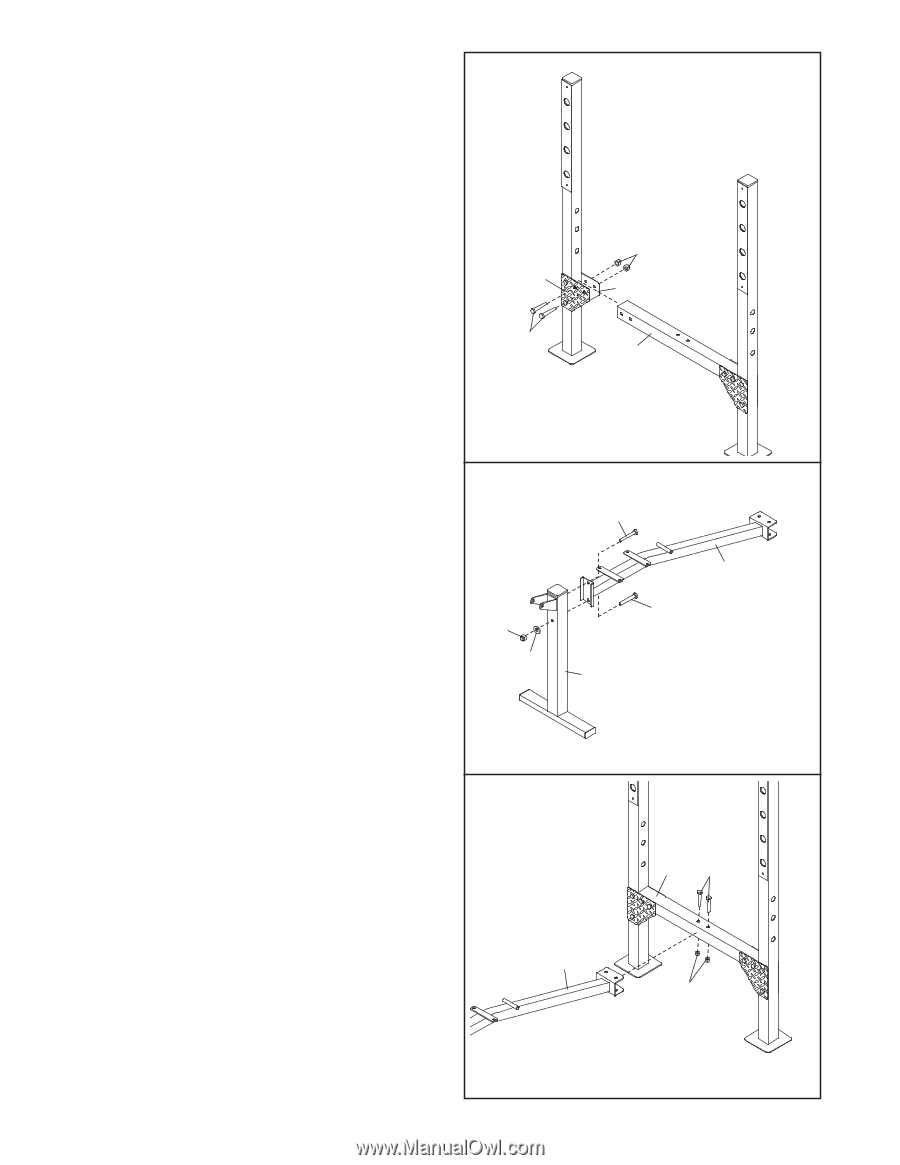
2. Attach one end of the Crossbar (2) to two Joint 2 Plates (11, 35) with two M10 x 66mm Bolts (28) and two M10 Nylon Locknuts (31). Do not tight- en the Nylon Locknuts yet. Attach the other end of the Crossbar (2) in the same way. 35 28 31 11 2 3. Attach the Front Leg (4) to the Bench Frame (3) 3 with an M10 x 19mm Screw (5), an M10 x 66mm Bolt (28), an M10 Washer (30), and an M10 Nylon Locknut (31). Do not tighten the Nylon Locknut or Screw yet. 5 3 28 31 30 4 4. Attach the Bench Frame (3) to the Crossbar (2) 4 with two M10 x 68mm Bolts (27) and two M10 Nylon Locknuts (31). Do not tighten the Nylon Locknuts yet. 3 2 27 31 7
-
 1
1 -
 2
2 -
 3
3 -
 4
4 -
 5
5 -
 6
6 -
 7
7 -
 8
8 -
 9
9 -
 10
10 -
 11
11 -
 12
12 -
13
-
14
-
15
-
16
 |
 |
7
3
28
5
30
31
3
4
2.
Attach one end of the Crossbar (2) to two Joint
Plates (11, 35) with two M10 x 66mm Bolts (28)
and two M10 Nylon Locknuts (31).
Do not tight-
en the Nylon Locknuts yet.
Attach the other end of the Crossbar (2) in the
same way.
3.
Attach the Front Leg (4) to the Bench Frame (3)
with an M10 x 19mm Screw (5), an M10 x 66mm
Bolt (28), an M10 Washer (30), and an M10
Nylon Locknut (31).
Do not tighten the Nylon
Locknut or Screw yet.
2
28
35
11
2
31
4.
Attach the Bench Frame (3) to the Crossbar (2)
with two M10 x 68mm Bolts (27) and two M10
Nylon Locknuts (31).
Do not tighten the Nylon
Locknuts yet.
3
2
31
27
4