Weider Pro 180 English Manual - Page 8
Slide the Curl Post 6 into the Bench Leg 8. Align
 |
View all Weider Pro 180 manuals
Add to My Manuals
Save this manual to your list of manuals |
Page 8 highlights
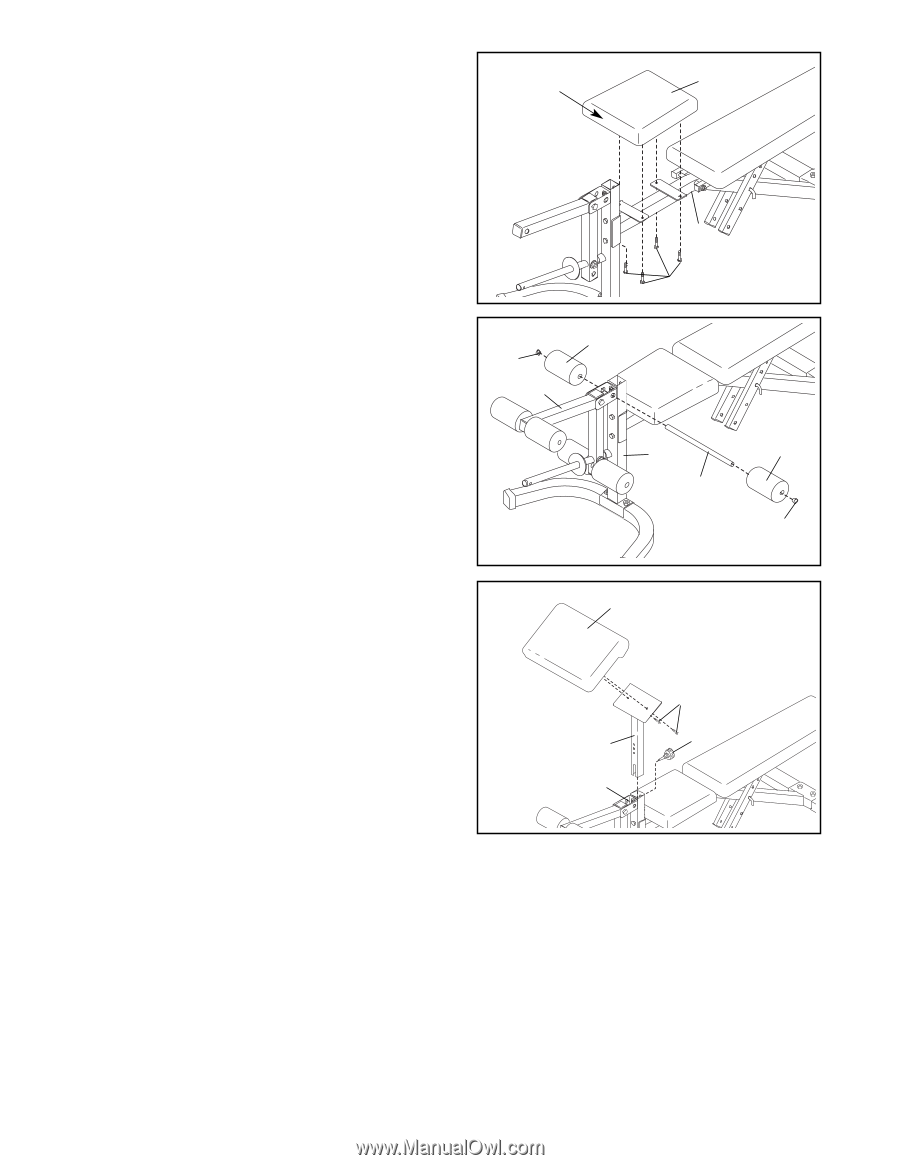
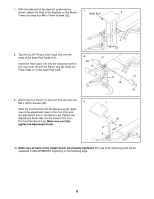
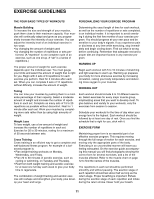
7. With the wide end of the Seat (5) positioned as shown, attach the Seat to the brackets on the Bench 7 Wide End 5 Frame (4) using four M6 x 16mm Screws (32). 4 32 8. Tap the six 3/4" Round Inner Caps (23) into the ends of the three Pad Tubes (13). 8 17 Insert the Pad Tubes (13) into the indicated holes in the Leg Lever (9) and the Bench Leg (8). Slide two 23 9 Foam Pads (17) onto each Pad Tube. 8 17 13 23 9. Attach the Curl Pad (7) to the Curl Post (6) with two M6 x 16mm Screws (32). 9 Slide the Curl Post (6) into the Bench Leg (8). Align one of the adjustment holes in the Curl Post with the adjustment hole in the Bench Leg. Tighten the Adjustment Knob (39) into the holes in the Curl Post and the Bench Leg. Make sure you fully tighten the Adjustment Knob. 7 32 39 6 8 10. Make sure all parts of the weight bench are properly tightened. The use of all remaining parts will be explained in ADJUSTMENTS, beginning on the following page. 8
-
 1
1 -
2
-
 3
3 -
 4
4 -
 5
5 -
 6
6 -
 7
7 -
 8
8 -
 9
9 -
 10
10 -
 11
11 -
 12
12 -
 13
13 -
14
-
15
-
16
 |
 |