Weider Pro 240 Bench English Manual
Weider Pro 240 Bench Manual
 |
View all Weider Pro 240 Bench manuals
Add to My Manuals
Save this manual to your list of manuals |
Weider Pro 240 Bench manual content summary:
- Weider Pro 240 Bench | English Manual - Page 1
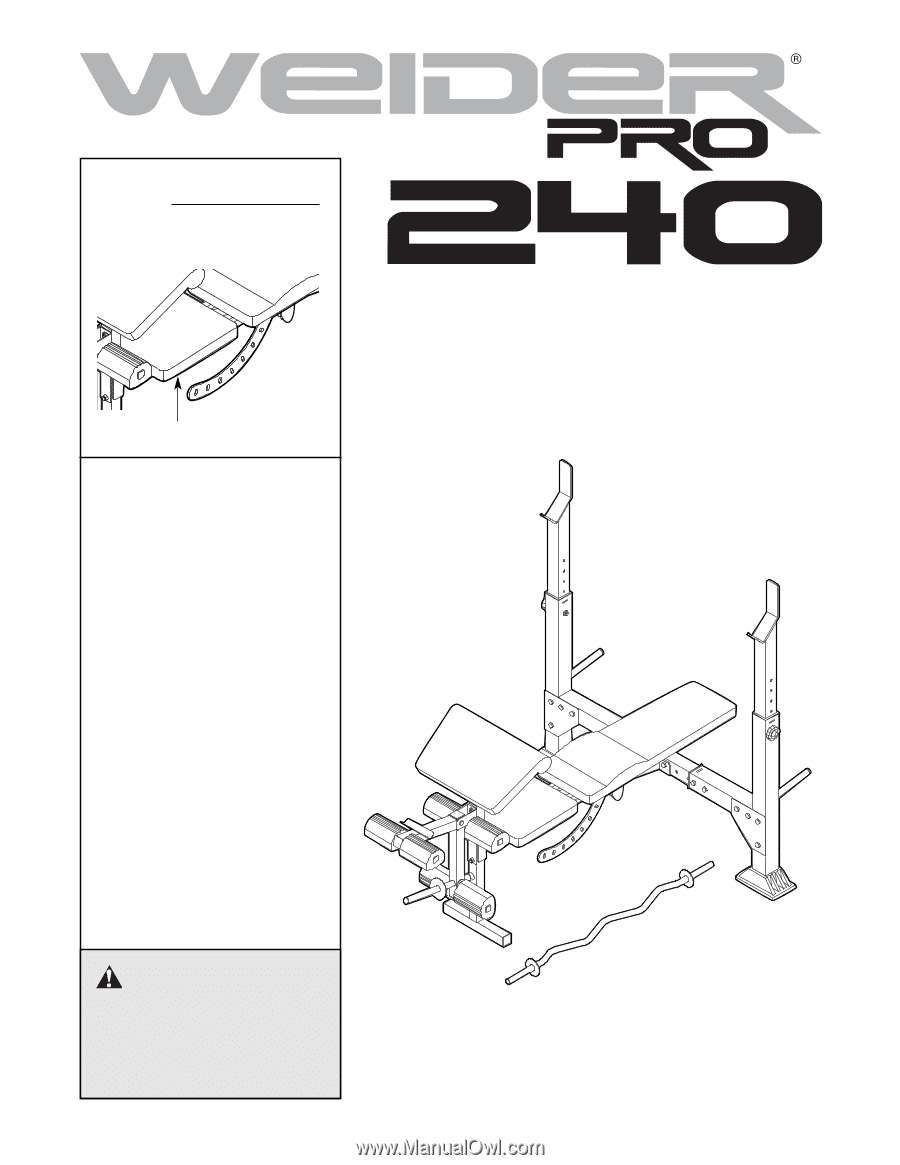
for reference. Serial Number Decal (under seat) • Assembly • Adjustments • Part List and Drawing WEIGHT BENCH EXERCISER User's Manual CAUTION Read all precautions and instructions in this manual before using this equipment. Save this manual for future reference. Patent Pending Sears, Roebuck and - Weider Pro 240 Bench | English Manual - Page 2
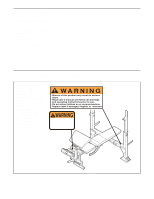
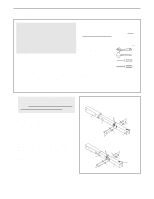
YOU BEGIN 4 PART IDENTIFICATION CHART 5 ASSEMBLY 6 ADJUSTMENTS 10 EXERCISE GUIDELINES 12 PART LIST 14 EXPLODED DRAWING 15 ORDERING REPLACEMENT PARTS Back Cover FULL 90-DAY WARRANTY Back Cover WARNING DECAL PLACEMENT The warning decals shown here have been placed on the weight bench in the - Weider Pro 240 Bench | English Manual - Page 3
time the weight bench is used. Replace any worn parts immediately. 6. Make sure the set screws attaching the Olympic adapters are properly tightened each time the adapters are used. 7. Keep children under 12 and pets away from the weight bench at all times. 8. The weight bench is designed to support - Weider Pro 240 Bench | English Manual - Page 4
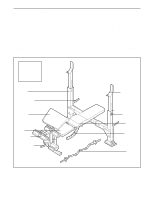
the versatile WEIDER® PRO 240 weight bench. The weight bench offers an impressive array of weight stations designed to weight bench (see the front cover of this manual for the location of the decal). Before reading further, please review the drawing below and familiarize yourself with the parts - Weider Pro 240 Bench | English Manual - Page 5
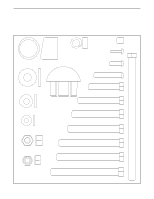
CHART This chart is provided to help you identify the small parts used in assembly. The number in parenthesis below each part refers to the key number of the part, from the PART LIST on page 14 of this manual. Important: Some parts may have been pre-assembled for shipping purposes. If you cannot - Weider Pro 240 Bench | English Manual - Page 6
unless instructed to do otherwise. • As you assemble the weight bench, make sure all parts are oriented as shown in the drawings. • For help identifying small parts, use the PART IDENTIFICATION CHART on page 5. The following tools (not included) are required for assembly: • Two adjustable wrenches - Weider Pro 240 Bench | English Manual - Page 7
Press a Foot (29) 2 onto the bottom of the Right Upright. 9 Lift the Weight Rest (9) in the Right Upright (7) and secure it in a raised position with a Weight 7 18 38 38 48 18 48 5 4. Attach the Front Leg (2) to the Bench Frame (1) 4 with two M10 x 67mm Bolts (35), the Plate (31), and two - Weider Pro 240 Bench | English Manual - Page 8
10mm Spacer (30), and an M8 Nylon Locknut (51). Press a 25mm Round Angled Cap (34) onto the end of the Weight Tube. Lubricate an M10 x 72mm Bolt (21) with the slot in the Bench Frame (1). Lubricate an M10 x 172mm Bolt (41) with grease. Attach the Backrest Tubes (12) to the Bench Frame (1) with the - Weider Pro 240 Bench | English Manual - Page 9
12. Attach the Curl Pad (15) to the Curl Post (11) with 12 two M6 x 16mm Screws (37). 15 11 13. Make sure that all parts are properly tightened before you use the weight bench. The use of all remaining parts will be explained in ADJUST- 37 MENTS, beginning on the following page. 9 - Weider Pro 240 Bench | English Manual - Page 10
your own weight set (not included). The steps below explain how the weight bench can be adjusted. See EXERCISE GUIDELINES on page 12 for important exercise information and refer to the accompanying exercise guide to see the correct form for each exercise. Make sure all parts are properly tightened - Weider Pro 240 Bench | English Manual - Page 11
) from the Crossbar Extensions (5). Refer to assembly step 1 for instructions on how to reassemble the Crossbar (4) at the desired width. 5 39 5 4 39 ATTACHING THE CURL POST For some exercises, the Curl Post (11) must be attached to the weight bench. Remove the 45mm Square Inner Cap (26) from the - Weider Pro 240 Bench | English Manual - Page 12
the full range of motion for each exercise, and moving only the appropriate parts of the body. Exercising in an uncontrolled manner will leave you feeling exhausted. On the exercise guide accompanying this manual you will find photographs showing the correct form for several exercises, and a list - Weider Pro 240 Bench | English Manual - Page 13
resistance used, and the numbers of sets and repetitions completed. Record your weight and key body measurements at the end of every month. Remember, the key to achieving the greatest results is to make exercise a regular and enjoyable part of your - Weider Pro 240 Bench | English Manual - Page 14
Weight Rest Knob 24 1 Curl Post Knob 25 1 Adjustment Bolt 44 3 M8 x 10mm Set Screw 45 9 M4 x 16mm Weight Clip 54 2 48mm Weight Clip 55 2 25mm Round Thick Inner Cap # 1 User's Manual # 1 Exercise Guide # 1 Allen Wrench # 1 Grease Pack "#" Indicates a non-illustrated part - Weider Pro 240 Bench | English Manual - Page 15
EXPLODED DRAWING-Model No. 831.150311 55 R1203A 36 53 54 32 9 49 55 13 45 44 45 49 15 44 32 23 6 27 12 22 48 33 47 50 7 5 18 18 11 48 46 48 28 37 50 40 47 27 50 41 46 52 45 51 29 38 52 22 39 6 14 45 10 4 51 45 6 48 46 48 43 48 22 52 46 26 48 24 35 1 45 - Weider Pro 240 Bench | English Manual - Page 16
the date of purchase, if failure occurs due to defect in material or workmanship in this WEIGHT BENCH EXERCISER, contact the nearest Sears Service Center throughout the United States and Sears will repair or replace the WEIGHT BENCH EXERCISER, free of charge. This warranty does not apply when the
-
 1
1 -
 2
2 -
 3
3 -
 4
4 -
 5
5 -
 6
6 -
 7
7 -
8
-
9
-
10
-
11
-
12
-
13
-
14
-
15
-
16
 |
 |
CAUTION
Read all precautions and instruc-
tions in this manual before using
this equipment. Save this manu-
al for future reference.
Patent Pending
Model No. 831.150311
Serial No.
Write the serial number in the
space above for reference.
Serial Number Decal (under seat)
Sears, Roebuck and Co., Hoffman Estates, IL 60179
• Assembly
• Adjustments
• Part List and Drawing
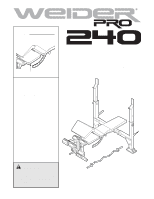
WEIGHT BENCH EXERCISER
User’s Manual