Weider Pro 440 English Manual
Weider Pro 440 Manual
 |
View all Weider Pro 440 manuals
Add to My Manuals
Save this manual to your list of manuals |
Weider Pro 440 manual content summary:
- Weider Pro 440 | English Manual - Page 1
. c/o HI Group PLC Express Way Whitwood, West Yorkshire WF10 5QJ UK AUSTRALIA Call: 1-800-237-173 E-mail: [email protected] CAUTION Read all precautions and instructions in this manual before using this equipment. Save this manual for future reference. USERʼS MANUAL www.iconeurope.com - Weider Pro 440 | English Manual - Page 2
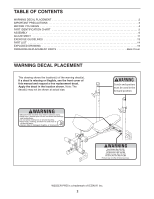
Cover WARNING DECAL PLACEMENT This drawing shows the location(s) of the warning decal(s). If a decal is missing or illegible, see the front cover of this manual and request a free replacement decal. Apply the decal in the location shown. Note: The decal(s) may not be shown at actual size - Weider Pro 440 | English Manual - Page 3
precautions and instructions in this manual and all warnings on your weight bench before using your weight bench. ICON assumes Replace any worn parts immediately. 8. The weight bench is designed to support a maximum user weight of 300 lbs. (136 kg) and a maximum total weight of 510 lbs (231 kg). Do - Weider Pro 440 | English Manual - Page 4
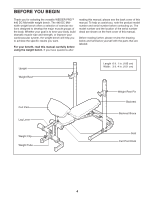
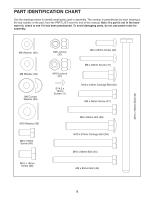
selecting the versatile WEIDER PRO™ 440 DC Mid-width weight bench. The 440 DC Midwidth weight bench offers a selection the front cover of this manual. Before reading further, please review the drawing below and familiarize yourself with the parts that are labeled. Upright Weight Rest Length 6 ft. - Weider Pro 440 | English Manual - Page 5
in assembly. The number in parentheses by each drawing is the key number of the part, from the PART LIST near the end of this manual. Note: If a part is not in the hardware kit, check to see if it has been preattached. To avoid damaging parts, do not use power - Weider Pro 440 | English Manual - Page 6
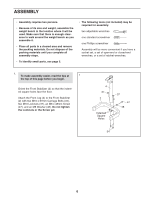
in the location where it will be used. Make sure that there is enough clearance to walk around the weight bench as you assemble it. • Place all parts in a cleared area and remove the packing materials. Do not dispose of the packing materials until you complete - Weider Pro 440 | English Manual - Page 7
2. Attach the Front Leg (4) to the Frame (1) with two M8 x 63mm Bolts (38), two M8 Curved Washers (33), and two M8 Locknuts (31). Do not tighten the Locknuts yet. 2 4 33 38 31 1 31 3. Orient the Rear Stabilizer (3) so that the warning decals are facing upward. 3 Attach the Rear Stabilizer (3) - Weider Pro 440 | English Manual - Page 8
(5) to the 7 Front Leg (4) with the Bolt and an M10 Locknut (37). Do not overtighten the Locknut; the Leg Lever should pivot easily. Attach the Weight Clip (8) to the weight tube on the Leg Lever (5). 8 37 4 5 45 Grease 8 - Weider Pro 440 | English Manual - Page 9
8. Insert a Pad Tube (21) through the Front Leg (4). Slide two Foam Pads (22) onto the Pad Tube (21). Then, press two Pad Caps (23) into the ends of the Pad Tube. Attach the remaining Pad Tubes (not shown), Foam Pads (22), and Pad Caps (23) to the Leg Lever (5) in the same way. 8 23 22 5 22 21 4 - Weider Pro 440 | English Manual - Page 10
. Insert the Weight Rest Pin (13) through the Weight Rest and the Upright. Attach the other Weight Rest (12) to the other Upright (11) in the same way. Attach both Weight Rests at the same height. 14. Make sure that all parts are properly tightened before you use the weight bench. 10 7 49 - Weider Pro 440 | English Manual - Page 11
your exercise program. Also, refer to the accompanying exercise guide to see the correct form for several exercises. Make sure all parts are properly tightened each time you use the weight bench. Replace any worn parts immediately. The weight bench can be cleaned with a damp cloth and a mild, non - Weider Pro 440 | English Manual - Page 12
side of an Upright (11), and align the Weight Rest with the desired adjustment hole in the Upright. Insert the Weight Rest Pin (13) through the Weight Rest and the Upright. Adjust the other Weight Rest (12) in the same way. WARNING: Always attach the Weight Rests (12) on the indicated side of the - Weider Pro 440 | English Manual - Page 13
the flexibility of your muscles and helps to prevent post-exercise problems. EXERCISE FORM Move through the full range of motion for each minutes after each set. • Toning-Rest for one minute after each set. • Weight Loss-Rest for 30 seconds after each set. STAYING MOTIVATED For motivation, keep a - Weider Pro 440 | English Manual - Page 14
Post 7 1 Base 8 1 Weight Clip 9 2 Base Stabilizer 10 4 Foot 11 2 Upright 12 2 Weight Rest 13 2 Weight Rest Pin 14 2 70mm Round M8 Washer 49 8 M8 x 16mm Screw * - Userʼs Manual * - Exercise Guide * - Grease Packet Note: Specifications are subject to change without - Weider Pro 440 | English Manual - Page 15
EXPLODED DRAWING Model No. WEEVBE24711.0 R0311A 19 14 14 13 17 13 12 43 35 29 42 41 20 22 23 30 22 8 28 29 16 12 11 11 42 35 37 41 44 49 35 37 32 15 33 36 49 36 35 9 39 18 25 6 23 22 10 17 24 26 31 37 27 5 27 33 46 38 37 31 4 37 45 39 21 30 2 21 47 48 34 25 21 - Weider Pro 440 | English Manual - Page 16
information when contacting us: • the model number and serial number of the product (see the front cover of this manual) • the name of the product (see the front cover of this manual) • the key number and description of the replacement part(s) (see the PART LIST and the EXPLODED DRAWING near the
-
 1
1 -
 2
2 -
 3
3 -
 4
4 -
 5
5 -
 6
6 -
 7
7 -
8
-
9
-
10
-
11
-
12
-
13
-
14
-
15
-
16
 |
 |
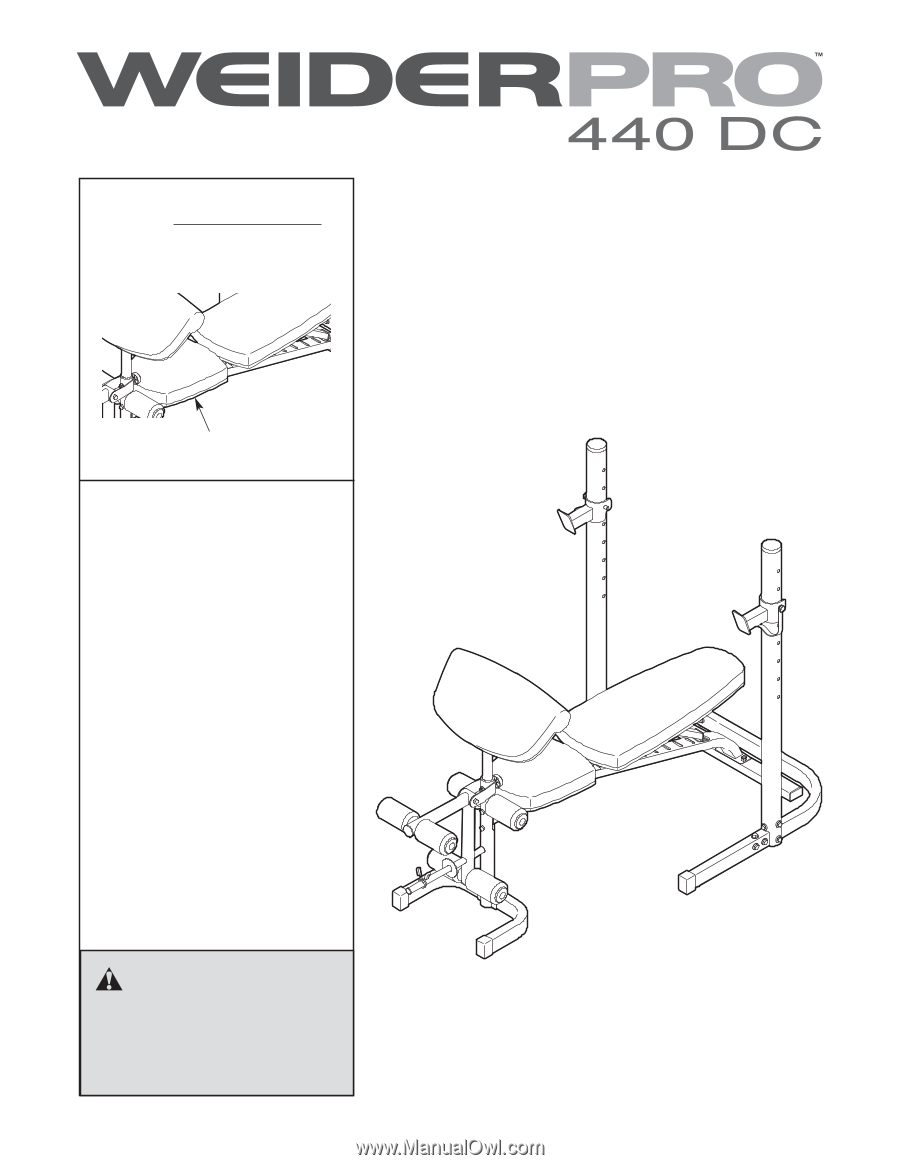
CAUTION
Read all precautions and instruc-
tions in this manual before using
this equipment. Save this manual
for future reference.
Model No. WEEVBE24711.0
Serial No.
Write the serial number in the
space above for reference.
Serial Number Decal
(under the seat)
USERʼS MANUAL
QUESTIONS?
If you have questions, or if there are
missing parts, please contact us:
UK
Call: 08457 089 009
From Ireland: 053 92 36102
Website: www.iconsupport.eu
E-mail: [email protected]
Write:
ICON Health & Fitness, Ltd.
c/o HI Group PLC
Express Way
Whitwood, West Yorkshire
WF10 5QJ
UK
AUSTRALIA
Call: 1-800-237-173
E-mail:
www.iconeurope.com