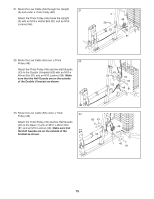
Weider Pro 6900 English Manual - Page 19
the Pad Tube 29. Then, press a Pad Cap 34
 |
View all Weider Pro 6900 manuals
Add to My Manuals
Save this manual to your list of manuals |
Page 19 highlights
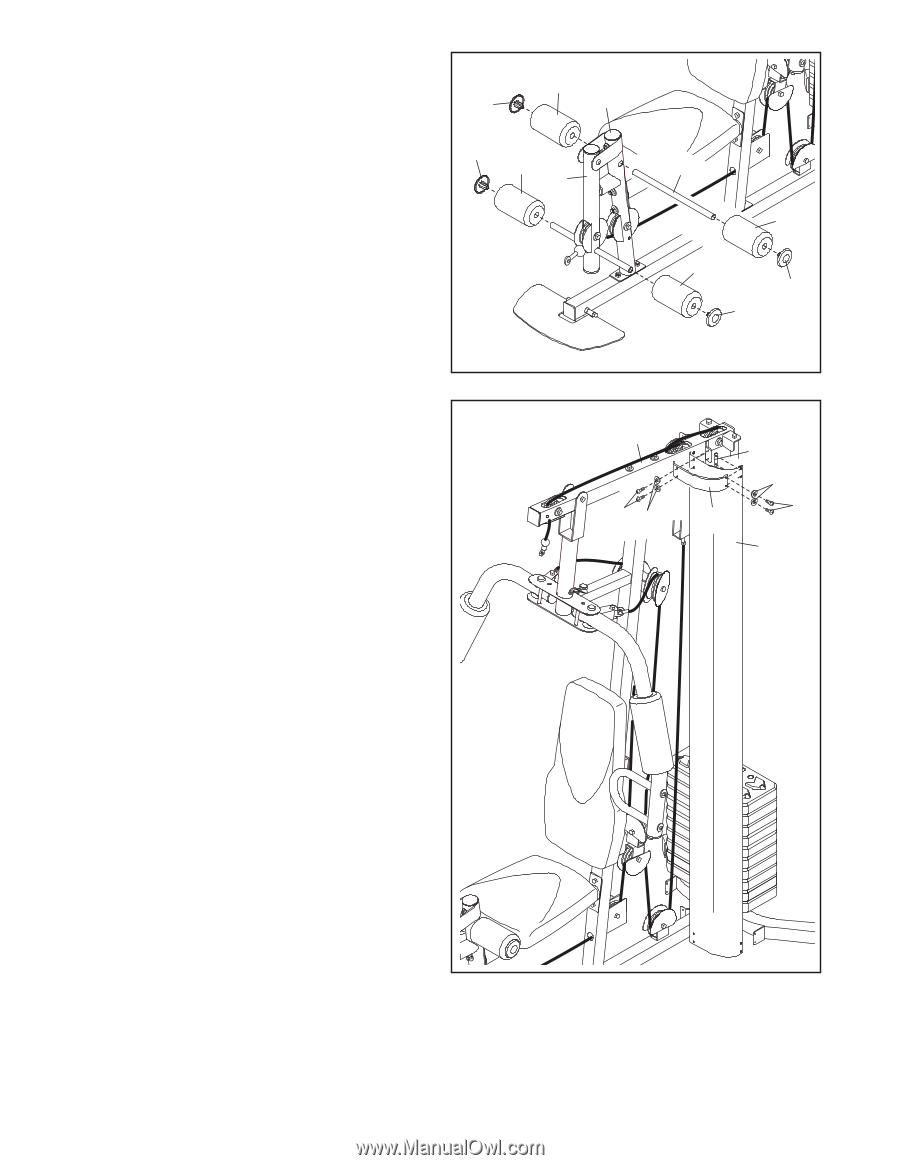
33. Insert the Pad Tube (29) into the Front Leg (7). Slide a Small Foam Pad (28) onto each side of the Pad Tube (29). Then, press a Pad Cap (34) into each Small Foam Pad. Slide a Small Foam Pad (28) onto each end of the Leg Lever (8). Then, press a Pad Cap (34) into each Small Foam Pad. 33 34 28 7 34 28 8 29 28 28 34 34 34. Attach a Shroud Support (19) and the top of the 34 Left Shroud (17) to the left side of the Top Frame (4) with two M4.2 x 16mm Self-tapping Screws (49) and two M4 Washers (33). Do not tighten the Screws yet. Then, attach a Shroud Clamp (90) to the top of the Left Shroud (17) and the Shroud Support (19) with two M4 x 12mm Screws (78) and two M4 Washers (33). Do not tighten the Screws yet. 4 49 33 90 33 78 19 17 19
-
 1
1 -
2
-
3
-
4
-
5
-
6
-
7
-
8
-
9
-
10
-
11
-
12
-
13
-
 14
14 -
 15
15 -
 16
16 -
 17
17 -
 18
18 -
 19
19 -
 20
20 -
 21
21 -
 22
22 -
 23
23 -
 24
24 -
25
-
26
-
27
-
28
-
29
-
30
-
31
-
32
 |
 |
19
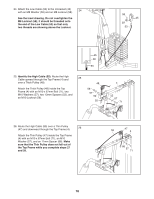
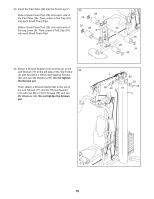
34. Attach a Shroud Support (19) and the top of the
Left Shroud (17) to the left side of the Top Frame
(4) with two M4.2 x 16mm Self-tapping Screws
(49) and two M4 Washers (33).
Do not tighten
the Screws yet.
Then, attach a Shroud Clamp (90) to the top of
the Left Shroud (17) and the Shroud Support
(19) with two M4 x 12mm Screws (78) and two
M4 Washers (33).
Do not tighten the Screws
yet.
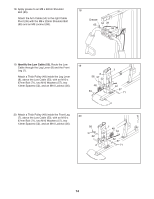
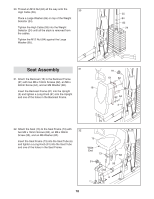
33. Insert the Pad Tube (29) into the Front Leg (7).
Slide a Small Foam Pad (28) onto each side of
the Pad Tube (29). Then, press a Pad Cap (34)
into each Small Foam Pad.
Slide a Small Foam Pad (28) onto each end of
the Leg Lever (8). Then, press a Pad Cap (34)
into each Small Foam Pad.
33
34
29
7
8
28
28
34
78
49
33
90
33
34
34
34
28
28
4
19
17