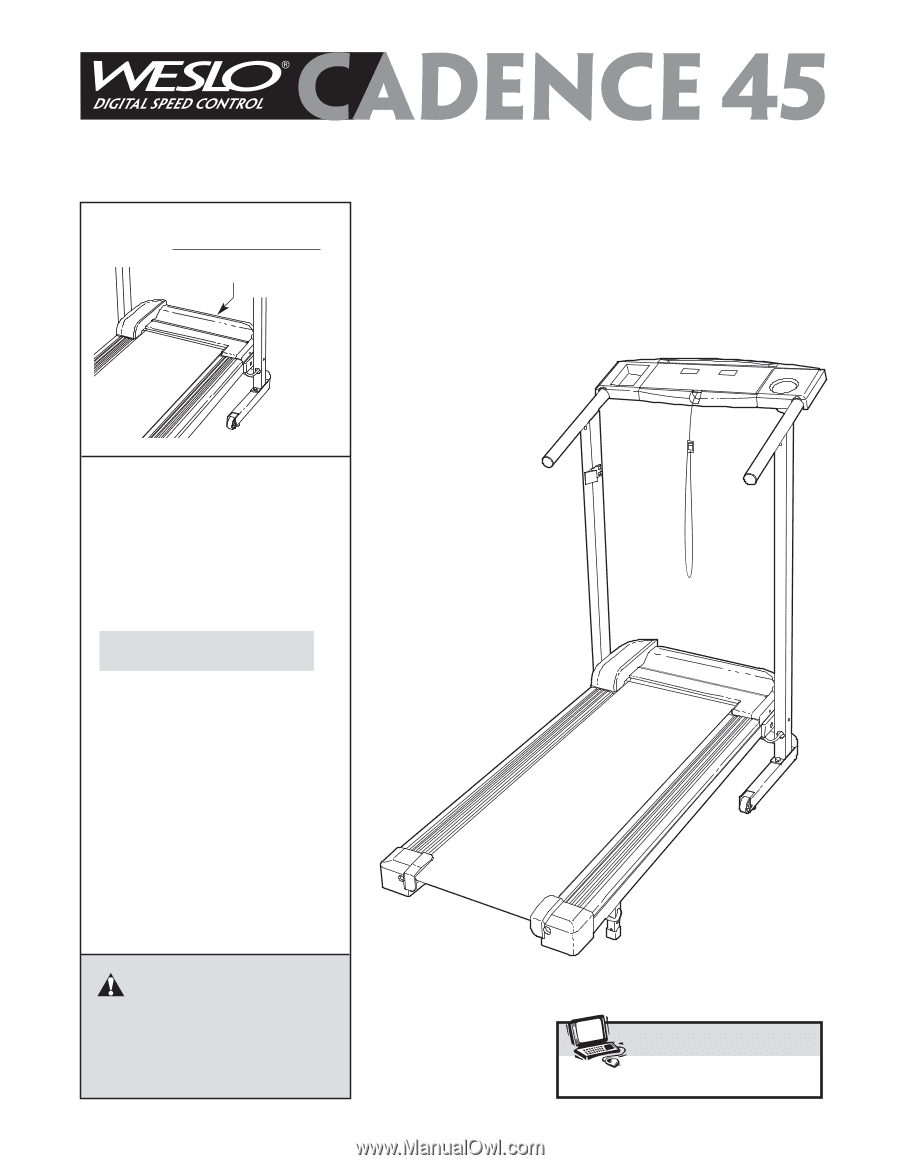
Weslo Cadence 45 User Manual
Weslo Cadence 45 Manual
 |
View all Weslo Cadence 45 manuals
Add to My Manuals
Save this manual to your list of manuals |
Weslo Cadence 45 manual content summary:
- Weslo Cadence 45 | User Manual - Page 1
write: ICON Health & Fitness, Ltd. Unit 4 Revie Road Industrial Estate Revie Road, Beeston Leeds, LS11 8JG UK [email protected] CAUTION Read all precautions and instructions in this manual before using this equipment. Save this manual for future reference. Visit our website at www.iconeurope.com - Weslo Cadence 45 | User Manual - Page 2
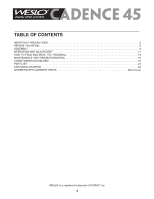
3 BEFORE YOU BEGIN 5 ASSEMBLY 6 OPERATION AND ADJUSTMENT 11 HOW TO FOLD AND MOVE THE TREADMILL 14 MAINTENANCE AND TROUBLESHOOTING 16 CONDITIONING GUIDELINES 18 PART LIST 21 EXPLODED DRAWING 22 ORDERING REPLACEMENT PARTS Back Cover WESLO is a registered trademark of ICON IP, Inc. 2 - Weslo Cadence 45 | User Manual - Page 3
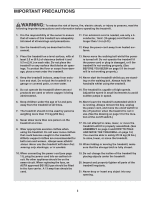
Use the treadmill only as described in this manual. 12. Keep the power cord away from heated surfaces. 3. Place the treadmill on treadmill at a time. 9. Wear appropriate exercise clothes when using the treadmill. Do not wear loose clothes that could become caught in the treadmill. Athletic support - Weslo Cadence 45 | User Manual - Page 4
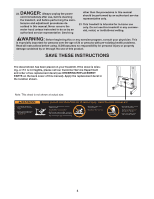
procedures de- scribed in this manual. Never remove the motor hood unless instructed to do so by an authorised service representative. Servicing other than the procedures in this manual should be performed by an authorised service representative only. 23. This treadmill is intended for in-home - Weslo Cadence 45 | User Manual - Page 5
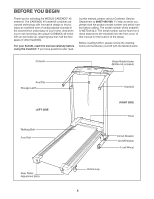
, the unique CADENCE 45 treadmill can be folded up, requiring less than half the floor space of other treadmills. For your benefit, read this manual carefully before using the treadmill. If you have questions after read- ing this manual, please call our Customer Service Department at 08457 - Weslo Cadence 45 | User Manual - Page 6
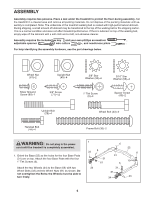
(6)-4 Spacer Screw (40)-2 Upright Bolt (28)-4 Wheel Bolt (33)-2 Handrail Bolt (44)-4 Frame Bolt (36)-2 WARNING: Do not plug in the power cord until the treadmill is completely assembled. 1. Orient the Base (55) so the holes for the four Base Pads (31) are on top. Attach the four Base Pads with - Weslo Cadence 45 | User Manual - Page 7
the Right Upright and the Upright Spacer, and loosely thread the Upright Bolt into the Frame. Repeat this step on the left side of the treadmill. 3 32 3a 40 58 21 Hole 21 53 37 53 37 90 36 Holes 4. With the help of a second person, raise the Left and 4 Right - Weslo Cadence 45 | User Manual - Page 8
Wire Harness (53) to the small hole in the side of the right Handrail (4) 5 with a Silver Ground Screw (89). 4 89 53 6. Place the Console Base (45) on the Handrails (4) (only one Handrail is shown). 6 Insert the Wire Harness (53) through the indicated plastic tie on the Console Base - Weslo Cadence 45 | User Manual - Page 9
(only one Handrail is shown) with four 3/4" Screws (77). Start all four Screws before tightening them; do not overtighten the Screws. 10 Large Hole 4 53 45 77 11. Attach the Storage Latch (38) to the Left Upright (32) with two 3/4" Screws (77). Do not overtighten the 11 Screws. 9 77 38 32 - Weslo Cadence 45 | User Manual - Page 10
12. Lower the Uprights (32, 37) until the Handrails (4) are touching the floor. 12 See drawing 12a. Position the Uprights (32, 37) so that the treadmill Frame (21) is centred between the Uprights. 32, 27 28 Firmly tighten the four Upright Bolts (28). Then, raise the Uprights (32, 37) back to - Weslo Cadence 45 | User Manual - Page 11
cord into an appropriate outlet that is properly installed and earthed in accordance with all local codes and 3 ordinances. Important: The treadmill is not compatible with GFCI-equipped outlets. Outlet FR/ DANGER: Improper connection of the equipment-earthing conductor can result in an in - Weslo Cadence 45 | User Manual - Page 12
when turning on the power. • Always wear the clip (see the drawing above) while operating the treadmill. • Adjust the speed in small increments to avoid sudden jumps in speed. • To reduce the possibility /SPEED DISPLAY on page 13). For simplicity, all instructions in this section refer to miles. 12 - Weslo Cadence 45 | User Manual - Page 13
the on/off switch near the power cord to the "off" position and unplug the power cord. Note: During the first few minutes that the treadmill is used, inspect the alignment of the walking belt, and align it if necessary (see page 17). 3 Follow your progress with the displays. Time/Distance - Weslo Cadence 45 | User Manual - Page 14
FOR STORAGE Unplug the power cord. CAUTION: You must be able to safely lift 20 kg (45 lbs.) to raise, lower, or move the treadmill. 1. Hold the treadmill with your hands in the locations shown at the right. CAUTION: To decrease the possibility of injury, bend your legs and keep your back straight - Weslo Cadence 45 | User Manual - Page 15
as shown. Using your left thumb, press the storage latch and hold it. Pivot the treadmill until the frame and foot rail are past the storage latch. 2. Hold the treadmill firmly with both hands, and lower the treadmill to the floor. To decrease the possibility of injury, bend your legs and keep your - Weslo Cadence 45 | User Manual - Page 16
MAINTENANCE AND TROUBLESHOOTING Most treadmill problems can be solved by following the steps below. Find the symptom that applies, and follow the steps listed. If further assistance is needed, please call our Customer Service Department. PROBLEM: The power does not turn on SOLUTION: a. Make sure - Weslo Cadence 45 | User Manual - Page 17
cord, insert the key, and run the treadmill for a few minutes. Repeat until the walking belt is properly tightened. b 5-7 cm Rear Roller Adjustment Bolts c. If the walking belt still slows when walked on, please call our Customer Service Department. PROBLEM: The walking belt is off-centre or - Weslo Cadence 45 | User Manual - Page 18
35 or individuals with pre-existing health problems. is activity that requires large amounts of exercise, adjust the speed and incline of the treadmill until your heart rate is near the highest number be found by using your heart rate as a guide. The chart below shows recommended heart rates for - Weslo Cadence 45 | User Manual - Page 19
EXERCISE FREQUENCY To maintain or improve your condition, complete three workouts each week, with at least one day of rest be- tween workouts. After a few months, you may complete up to five workouts each week if desired. The key to success is to make exercise a regular and enjoyable part of your - Weslo Cadence 45 | User Manual - Page 20
NOTES 20 - Weslo Cadence 45 | User Manual - Page 21
1 38 1 39 1 40 2 41 4 42 1 43 1 44 4 45 1 46 2 47 2 48 1 49 1 50 1 51 1 52 4 Incline Leg Console Cover Upright Nut Filter Flywheel Belt Guide Screw Wire Harness Grommet 55 1 56 20 57 4" Black Wire, 2 Female User's Manual * Includes all parts shown in the box Note - Weslo Cadence 45 | User Manual - Page 22
22 77 1 77 77 60 46 15 47 82 67 15 66 25 9 73 83 72 35 71 70 71 70 69 61 80 97* 29 9 9 23 3 94 26 65 8 56 51 20 10 85 56 56 95 16 7 81 88 12 71 14 63 13 62 15 74 17 84 59 85 56 52 75 18 95 81 24 5 50 56 12 9 9 27 9 11 22 19 64 15 15 21 30 96 47 - Weslo Cadence 45 | User Manual - Page 23
EXPLODED DRAWING-Model No. WETL0514.0 48 45 2 R0305A 42 4 87 77 68 44 41 38 77 36 90 77 39 44 77 68 53 77 89 4 32 41 87 68 44 77 44 68 37 79 76 9 78 33 34 28 40 58 68 90 55 36 61 31 6 31 49 6 54 86 53 92 93 61 49 31 6 28 68 49 28 68 34 23 31 33 6 - Weslo Cadence 45 | User Manual - Page 24
problems with this product, or if you need to order replacement parts, contact the ICON Health & Fitness, Ltd. office, or write: ICON Health & Fitness, Ltd. Customer Service of the product (WESLO CADENCE 45 treadmill) • the SERIAL NUMBER of the product (see the front cover of this manual) • the KEY
-
 1
1 -
 2
2 -
 3
3 -
 4
4 -
 5
5 -
 6
6 -
 7
7 -
8
-
9
-
10
-
11
-
12
-
13
-
14
-
15
-
16
-
17
-
18
-
19
-
20
-
21
-
22
-
23
-
24
 |
 |
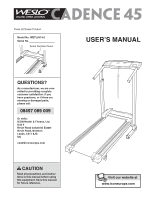
USER’S MANUAL
Serial Number Decal
Model No. WETL0514.0
Serial No.
QUESTIONS?
As a manufacturer, we are com-
mitted to providing complete
customer satisfaction. If you
have questions, or if there are
missing or damaged parts,
please call:
Or write:
ICON Health & Fitness, Ltd.
Unit 4
Revie Road Industrial Estate
Revie Road, Beeston
Leeds, LS11 8JG
UK
CAUTION
Read all precautions and instruc-
tions in this manual before using
this equipment. Save this manual
for future reference.
www.iconeurope.com
Visit our website at
08457 089 009
Class H Fitness Product