Weslo Cadence 855 English Manual - Page 9
Calorie/fat
 |
View all Weslo Cadence 855 manuals
Add to My Manuals
Save this manual to your list of manuals |
Page 9 highlights
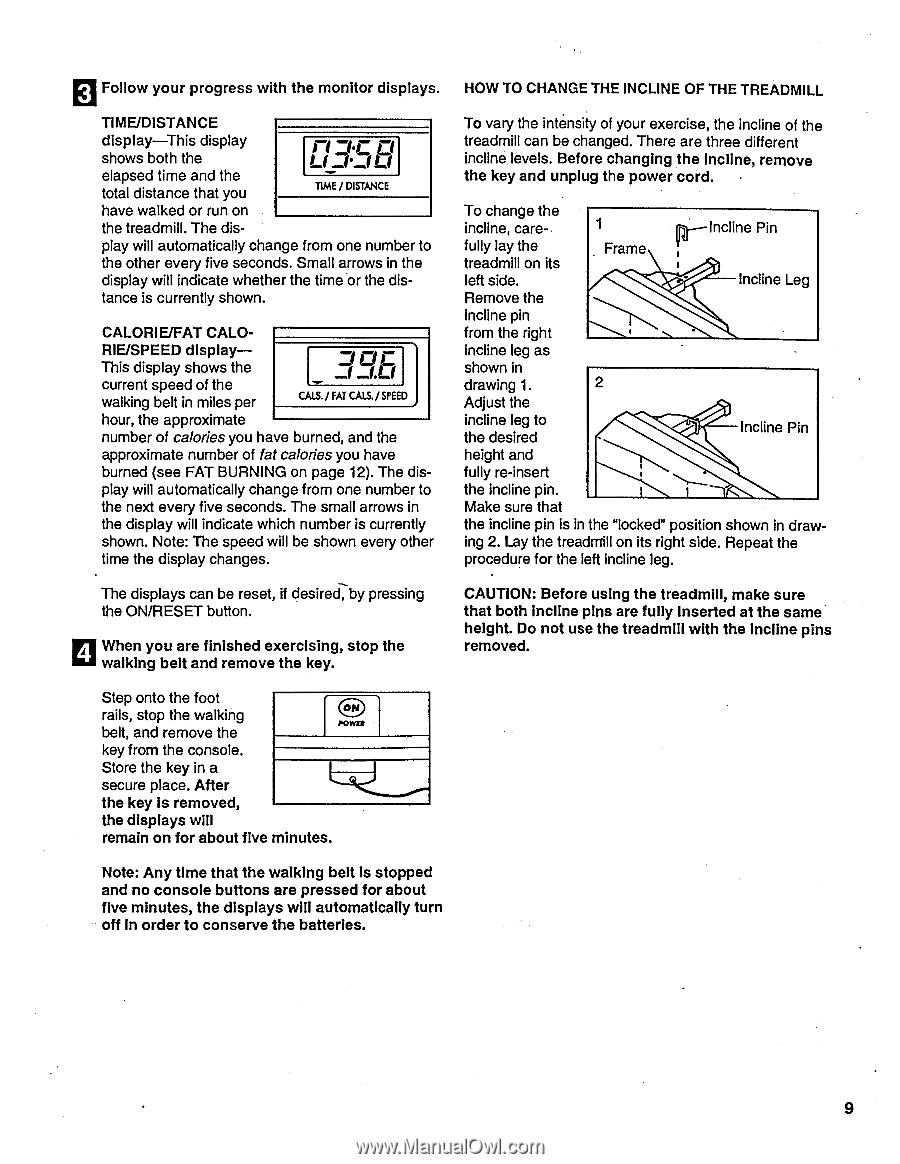
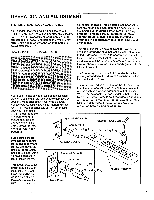
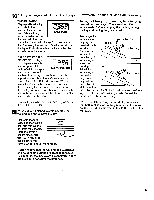
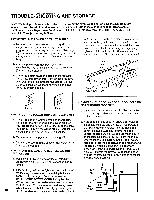
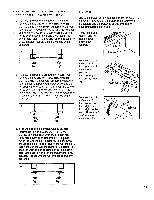
le Follow your progress with the monitor displays. TIME/DISTANCE display-This display shows both the elapsed time and the total distance that you n LI LI LI TIME / DISTANCE have walked or run on the treadmill. The dis- play will automatically change from one number to the other every five seconds. Small arrows in the display will indicate whether the time or the dis- tance is currently shown. CALORIE/FAT CALO- RIE/SPEED display- This display shows the current speed of the walking belt in miles per _71 r. _I.LI CALS./ FAT CALS./ SPEED hour, the approximate number of calories you have burned, and the approximate number of fat calories you have burned (see FAT BURNING on page 12). The dis- play will automatically change from one number to the next every five seconds. The small arrows in the display will indicate which number is currently shown. Note: The speed will be shown every other time the display changes. HOW TO CHANGE THE INCLINE OF THE TREADMILL To vary the intensity of your exercise, the incline of the treadmill can be changed. There are three different incline levels. Before changing the incline, remove the key and unplug the power cord. To change the incline, care- 1 Incline Pin fully lay the treadmill on its Frame left side. Incline Leg Remove the incline pin from the right incline leg as shown in drawing 1. 2 Adjust the incline leg to the desired Incline Pin height and fully re-insert the incline pin. Make sure that the incline pin is in the locked" position shown in draw- ing 2. Lay the treadmill on its right side. Repeat the procedure for the left incline leg. The displays can be reset, if desired, by pressing the ON/RESET button. 4 When you are finished exercising, stop the walking belt and remove the key. CAUTION: Before using the treadmill, make sure that both incline pins are fully Inserted at the same height. Do not use the treadmill with the incline pins removed. Step onto the foot rails, stop the walking ON POWill belt, and remove the key from the console. Store the key in a secure place. After the key is removed, the displays will remain on for about five minutes. Note: Any time that the walking belt is stopped and no console buttons are pressed for about five minutes, the displays will automatically turn off in order to conserve the batteries. 9
-
 1
1 -
2
-
3
-
 4
4 -
 5
5 -
 6
6 -
 7
7 -
 8
8 -
 9
9 -
 10
10 -
 11
11 -
 12
12 -
 13
13 -
 14
14 -
15
-
16
 |
 |