Weslo Cadence Ds11 Treadmill Canadian English Manual - Page 6
Hand tighten four 1 Bolts 16 with Handrail Washers - console
 |
View all Weslo Cadence Ds11 Treadmill manuals
Add to My Manuals
Save this manual to your list of manuals |
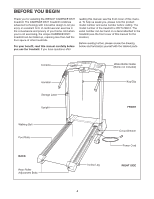
Page 6 highlights
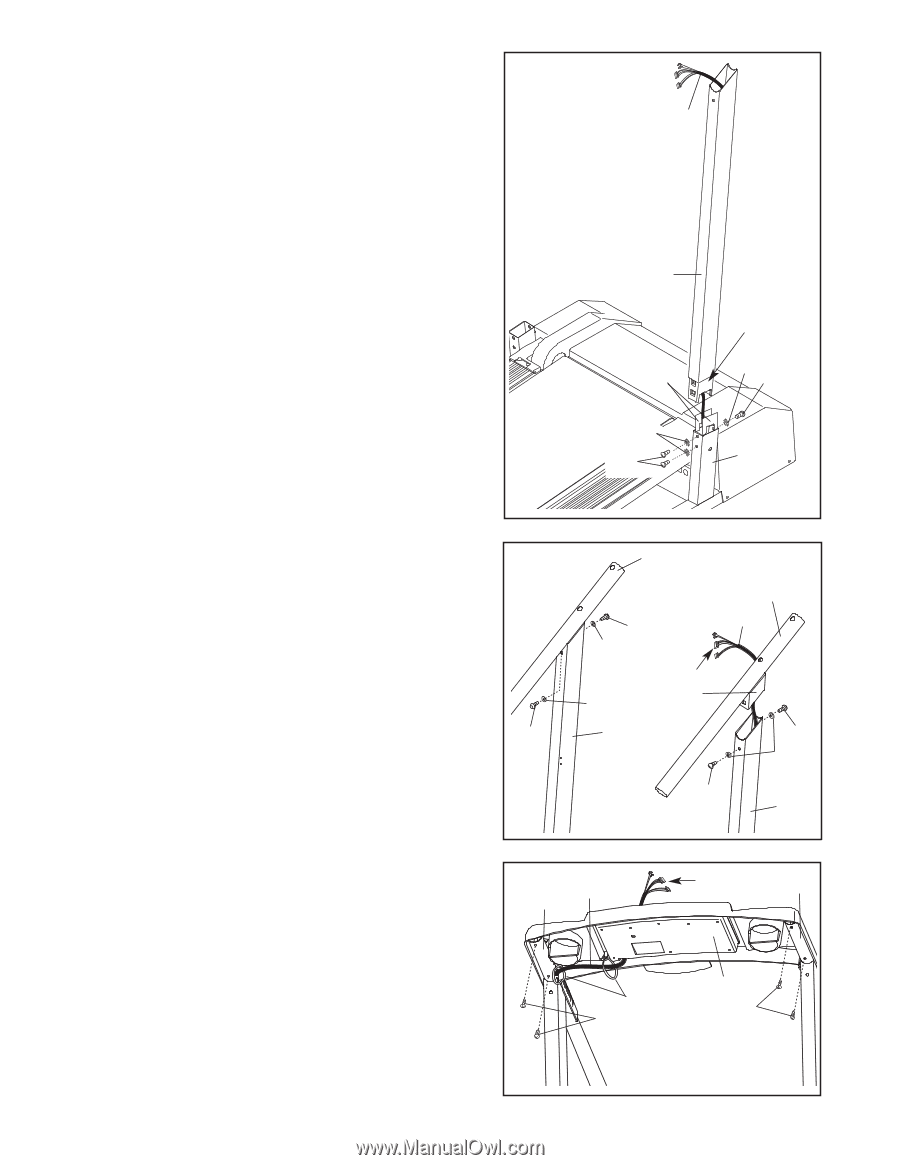
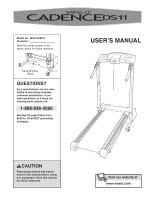
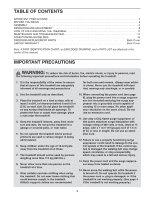
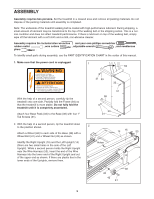
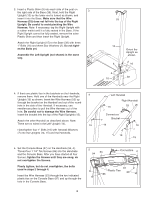
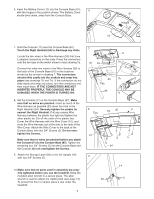
3. Insert a Plastic Shim (9) into each side of the post on 3 the right side of the Base (38). Next, hold the Right Upright (15) so the lower end is turned as shown, and insert it into the Base. Make sure that the Wire Harness (53) does not fall into the top of the Right Upright. Be careful to avoid pinching the Wire Harness. Note: If necessary, tap the Right Upright with a rubber mallet until it is fully seated in the Base. If the Right Upright cannot be fully seated, remove the outer Plastic Shim and then insert the Right Upright. Attach the Right Upright (15) to the Base (38) with three 1" Bolts (16) and three Star Washers (2). Do not tighten the Bolts yet. Assemble the Left Upright (not shown) in the same way. 53 15 9 2 16 Orient the Upright as shown. 2 16 38 4. If there are plastic ties in the brackets on the Handrails, 4 remove them. Hold one of the Handrails near the Right Upright (15) as shown. Insert the Wire Harness (53) up through the bracket on the Handrail and out of the round hole in the side of the Handrail. If necessary, use needlenose pliers to pull the Wire Harness out of the hole. Be careful not to damage the Wire Harness. Insert the bracket into the top of the Right Uprights (15). Attach the other Handrail as described above. Note: There are no wires in the Left Upright (14). 16 Hand tighten four 1" Bolts (16) with Handrail Washers (7) into the Uprights (14, 15) and the Handrails. Left Handrail Right Handrail 16 53 7 Connectors 7 Bracket 14 16 7 16 15 5. Set the Console Base (87) on the Handrails (94, 4). Thread four 1 1/4" Tek Screws (86) into the Handrails and the Console Base. After you have started all four Screws, tighten the Screws until they are snug; do not overtighten the Screws. Firmly tighten, but do not overtighten, the bolts used in steps 2 through 4. Insert the Wire Harness (53) through the two indicated plastic ties on the Console Base (87) and up through the hole in the Console Base. 5 94 53 Connectors 4 87 Plastic Ties 86 86 6
-
 1
1 -
 2
2 -
 3
3 -
 4
4 -
 5
5 -
 6
6 -
 7
7 -
 8
8 -
 9
9 -
 10
10 -
 11
11 -
 12
12 -
13
-
14
-
15
-
16
-
17
-
18
-
19
 |
 |