Weslo Cadence G25 Treadmill English Manual - Page 11
How To Change The Incline Of The Treadmill
 |
View all Weslo Cadence G25 Treadmill manuals
Add to My Manuals
Save this manual to your list of manuals |
Page 11 highlights
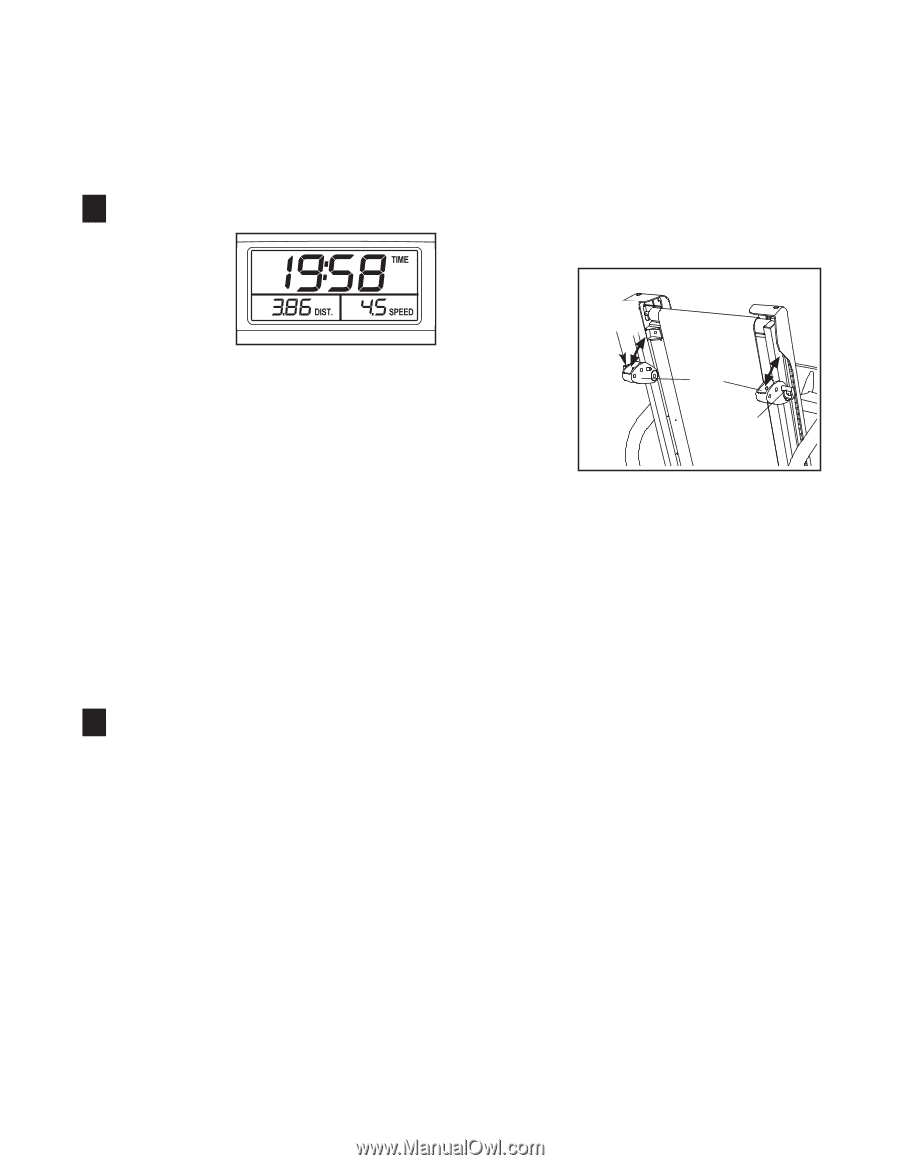
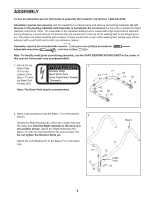
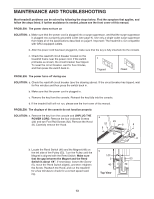
To stop the walking belt, press the Stop button. If the elapsed time is shown in the display (see step 3), the time will begin to flash. secure place. Then, switch the reset/off circuit breaker to the "off" position and unplug the power cord. Note: The first time the treadmill is used, observe the alignment of the walking belt, and center the walking belt if necessary (see page 14). 3 Monitor your progress with the display. As you exercise, the lower left corner of the display can show the elapsed time and the distance (in miles) that you have walked or run. The lower right corner of the display can show the speed of the walking belt (in miles per hour) and the approximate number of calories you have burned. The upper half of the display is the priority display. The priority display can show the elapsed time, the distance that you have walked or run, the speed of the walking belt, or the approximate number of calories you have burned. Press the Priority Display button repeatedly until the priority display shows the information that you are most interested in viewing. Note: While information is shown in the priority display, the information will not be shown in the lower left or right corner of the display. HOW TO CHANGE THE INCLINE OF THE TREADMILL To vary the intensity of your exercise, the incline of the treadmill can be changed. There are three incline levels. Before changing the incline, remove the key and unplug the power cord. Next, fold the treadmill to the storage position (see page 12). To change the incline, first remove Incline the incline pin Pin from one of the incline legs. Adjust the incline leg Incline Leg to the desired height, and fully reinsert Incline Pin the incline pin. Adjust the other incline leg in the same way. CAUTION: Before using the treadmill, make sure that both in- cline legs are at the same height and that both in- cline pins are fully inserted into the incline legs. After you have adjusted the incline legs, lower the treadmill (see page 12). To reset the display, press the Stop button, remove the key, and then reinsert the key. 4 When you are finished exercising, remove the key from the console. Step onto the foot rails, press the Stop button, and remove the key from the console. Keep the key in a 11
-
 1
1 -
2
-
3
-
4
-
5
-
 6
6 -
 7
7 -
 8
8 -
 9
9 -
 10
10 -
 11
11 -
 12
12 -
 13
13 -
 14
14 -
 15
15 -
 16
16 -
17
-
18
-
19
 |
 |