Weslo Eclipse 2 Instruction Manual - Page 5
Assembly, Conditioning Guidelines
 |
View all Weslo Eclipse 2 manuals
Add to My Manuals
Save this manual to your list of manuals |
Page 5 highlights
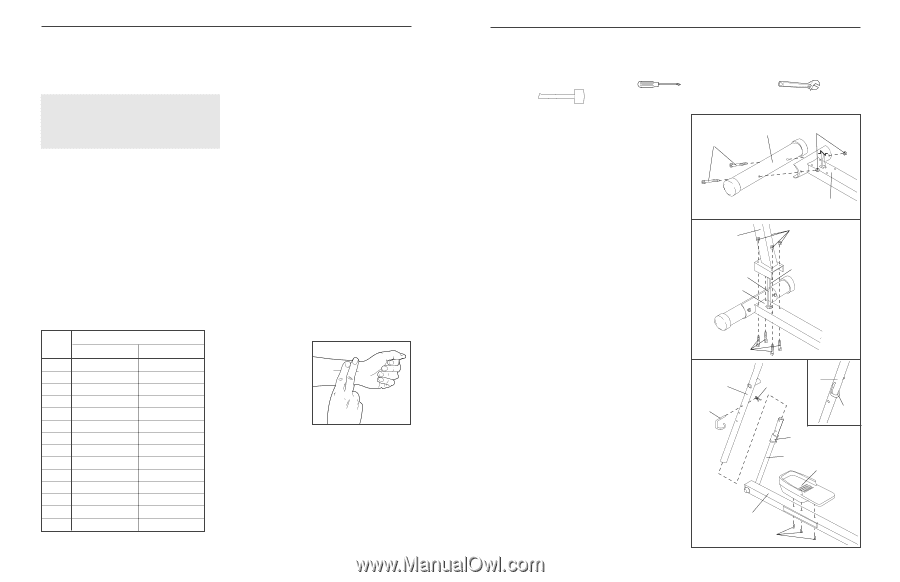
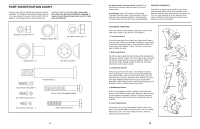
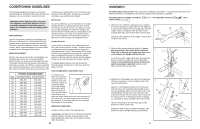
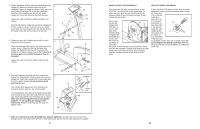
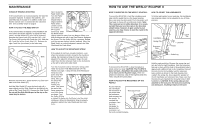
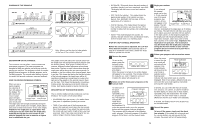
CONDITIONING GUIDELINES The following guidelines will help you to plan your exercise program. Remember that proper nutrition and adequate rest are essential for successful results. is known as your training zone. You can find your training zone in the table below. Training zones are listed according to age and physical condition. WARNING: Before beginning this or any exercise program, consult your physician. This is especially important for individuals over the age of 35 or individuals with pre-existing health problems. WHY EXERCISE? Exercise has proven essential for good health and well-being. Participation in a well-rounded exercise program helps to develop a stronger and more efficient heart, improved respiratory function, increased stamina, better weight management, increased ability to handle stress, and greater self-esteem. EXERCISE INTENSITY Whether your goal is to burn fat or to strengthen your cardiovascular system, the key to achieving the desired results is to exercise with the proper intensity. The proper intensity level can be found by using your heart rate as a guide. For effective exercise, your heart rate should be maintained at a level between 70% and 85% of your maximum heart rate as you exercise. This Burning Fat To burn fat effectively, you must exercise at the proper intensity level for a sustained period of time. During the first few minutes of exercise, your body uses easily accessible carbohydrate calories for energy. Only after the first few minutes does your body begin to use stored fat calories for energy. If your goal is to burn fat, it may be helpful to use the Fat Burn program to help you to reach your goal. (See pages 8 and 9.) Aerobic Exercise If your goal is to strengthen your cardiovascular system, your exercise must be "aerobic." Aerobic exercise is activity that requires large amounts of oxygen for prolonged periods of time. This increases the demand on the heart to pump blood to the muscles, and on the lungs to oxygenate the blood. For effective aerobic exercise, it may be helpful to use the Aerobic program to help you to reach your goal. (See pages 8 and 9.) To develop greater stamina, you may choose the Interval program to help you to reach your goal. (See pages 8 and 9.) HOW TO MEASURE YOUR HEART RATE AGE 20 25 30 35 40 45 50 55 60 65 70 75 80 85 TRAINING ZONE (BEATS/MIN.) UNCONDITIONED CONDITIONED 138-167 136-166 135-164 134-162 132-161 131-159 129-156 127-155 126-153 125-151 123-150 122-147 120-146 118-144 133-162 132-160 130-158 129-156 127-155 125-153 124-150 122-149 121-147 119-145 118-144 117-142 115-140 114-139 To measure your heart rate, stop exercising and place two fingers on your wrist as shown. Take a sixsecond heartbeat count, and multiply the result by ten to find your heart rate. (A six-second count is used because your heart rate drops quickly when you stop exercising.) If your heart rate is too high, decrease the intensity of your exercise. If your heart rate is too low, increase the intensity of your exercise. WORKOUT GUIDELINES A proper workout includes the following parts: A warm-up, consisting of 5 to 10 minutes of stretching and light exercise. A proper warm-up increases the body temperature, heart rate, and circulation in preparation for exercise. 12 ASSEMBLY Assembly requires two persons. Place all parts of the WESLO® ECLIPSE II in a cleared area and remove the packing materials. Do not dispose of the packing materials until assembly is completed. Assembly requires a phillips screwdriver rubber mallet . , two adjustable spanners , and a 1. Hold one of the Stabilisers (68) against the saddle on the front of the Base (1). Make sure that the Stabiliser is turned so the square holes are facing away from the saddle. Attach the Stabiliser with two M10 x 75mm Carriage Bolts (66) and two M10 Nylon Locknuts (54). Attach the other Stabiliser to the saddle on the back of the Base (not shown). 1 66 68 54 2. While another person holds the Upright (2), gently pull the Extension Wire (49) and the Resistance 2 Cable (33) up through the Upright until there is no slack between the Upright and the Base (1). Insert the four M10 x 68mm Bolts (67) up through the Base (1). Slide the Upright (2) onto the Bolts. Be careful to avoid pinching the Extension Wire (49) and the Resistance Cable (33). Tighten an M10 Nylon Locknut (54) onto each Bolt. 2 33 1 1 54 49 67 3. Identify the Left Handlebar (6) and the Left Pedal Leg (3) (there are stickers on the Handlebars and Pedal 3 Legs for identification). 6 3a 6 38 Slide the Left Handlebar (6) onto the left Extension Tube (5). Press the Handlebar Bushing (45) up into 37 the Left Handlebar. Align one of the three holes in the Left Handlebar with the hole in the Extension Tube. Insert the Left Lock Pin (37) into the holes, make sure the Left Lock Pin is in the position shown in drawing 3a, and attach a Spring Clip (38) to the Left Lock Pin. Attach a Pedal (29) to the Left Pedal Leg (3) with three M4 x 16mm Screws (42). 37 45 5 29 Repeat this step to attach the Right Handlebar, right Extension Tube, and Right Pedal Leg (not shown). 3 42 5
-
 1
1 -
 2
2 -
 3
3 -
 4
4 -
 5
5 -
 6
6 -
 7
7 -
 8
8
 |
 |