Westinghouse LTV 32W3 User Manual - Page 13
Side Connectors - service port
 |
UPC - 683728078980
View all Westinghouse LTV 32W3 manuals
Add to My Manuals
Save this manual to your list of manuals |
Page 13 highlights
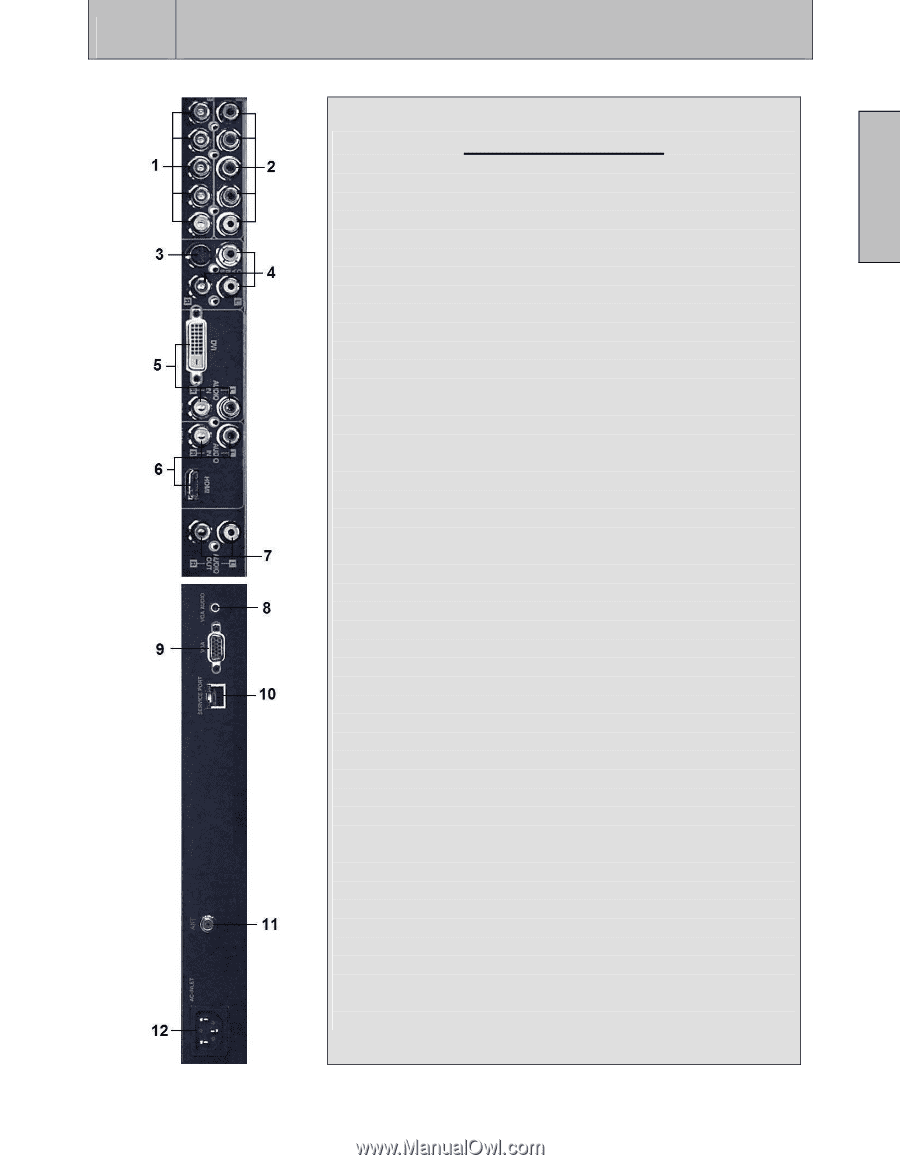
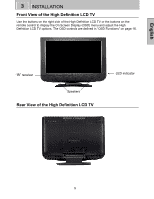
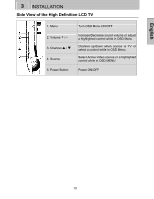
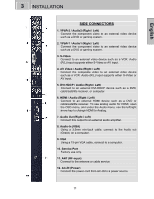
English 3 INSTALLATION SIDE CONNECTORS 1. YPbPr2 / Audio2 (Right / Left) Connect the component video to an external video device such as a DVD or gaming system. 2. YPbPr1 / Audio1 (Right / Left) Connect the component video to an external video device such as a DVD or gaming system. 3. S-Video Connect to an external video device such as a VCR. Audio (R/L) input supports either S-Video or AV input. 4. AV Video / Audio (Right / Left) Connect the composite video to an external video device such as a VCR. Audio (R/L) input supports either S-Video or AV input. 5. DVI-HDCP / Audio (Right / Left) Connect to an external DVI-HDCP device such as a DVD, cable/satellite receiver, or computer. 6. HDMI / Audio (Right / Left) Connect to an external HDMI device such as a DVD or cable/satellite receiver. To use analog audio for HDMI, open the OSD menu, and under the Audio menu, use the left/right arrow key to change HDMI to Analog. 7. Audio Out (Right / Left) Connect this output to an external audio amplifier. 8. Audio-In (VGA) Using a 3.5mm mini-jack cable, connect to the Audio out (Green) on a computer. 9. VGA Using a 15-pin VGA cable, connect to a computer. 10. Service Port Factory use only. 11. ANT (RF-input) Connect to the antenna or cable service. 12. AC-IN (Power) Connect the power cord from AC-IN to a power source. 11
-
 1
1 -
2
-
3
-
4
-
5
-
6
-
7
-
 8
8 -
 9
9 -
 10
10 -
 11
11 -
 12
12 -
 13
13 -
 14
14 -
 15
15 -
 16
16 -
 17
17 -
 18
18 -
19
-
20
-
21
-
22
-
23
-
24
-
25
-
26
-
27
-
28
-
29
-
30
-
31
-
32
-
33
-
34
-
35
-
36
-
37
-
38
 |
 |