Whirlpool CGM2941TQ Installation Instructions
Whirlpool CGM2941TQ Manual
 |
View all Whirlpool CGM2941TQ manuals
Add to My Manuals
Save this manual to your list of manuals |
Whirlpool CGM2941TQ manual content summary:
- Whirlpool CGM2941TQ | Installation Instructions - Page 1
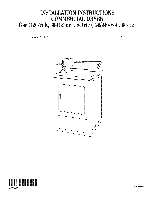
INSTALLATION INSTRUCTIONS COMMERCIAL DRYER Gas (12(!-Volt,60-Hz) or Electric (12(}/24(}-Vol6t,0-Hz) Table of Contents 2 8563800 www,roper.com - Whirlpool CGM2941TQ | Installation Instructions - Page 2
and Parts 5 Electrical Requirements 6 Gas Supply Requirements 7 Venting Requirements 8 iNSTALLATiON iNSTRUCTiONS - GAS DRYER 10 install Coin Slide and Coin Box 10 Make Gas Connection 10 Connect Vent 10 Complete Installation 10 iNSTALLATiON iNSTRUCTiONS- ELECTRIC DRYER ........ 11 install - Whirlpool CGM2941TQ | Installation Instructions - Page 3
reaction that could cause a load to catch fire. Do not repair or replace any part of the dryer or attempt any servicing unless specifically recommended in this Use and Care Guide or in published user-repair instructions that you understand and have the skills to carry out. [] Do not dry articles - Whirlpool CGM2941TQ | Installation Instructions - Page 4
gas [] Caulk gun and caulk (for installing new exhaust vent) [] Pliers [] Putty knife Parts supplied Remove parts bag from dryer drum. Check that all parts were included. [] Wedge cone [] Dryer Installation Instructions" below for minimum spacing requirements. NOTE: The dryer must not be installed - Whirlpool CGM2941TQ | Installation Instructions - Page 5
Minimum Installation Clearances 14" -- (35,6 ore) max, Product Dimensions 27" (68.6 cm) dryer "_ 27" (68.6 cm cm) SIDE VIEW LEFT OR 10-1/4" non coin '- opera tdemodels: 7-1/8" (18.1 cm) coin-operated models: 7-7/8" (20 cm) BACK VIEW ELECTRIC1_ ........ 4-3/4" 13" (12.1. cm) 2k (40.6 cm - Whirlpool CGM2941TQ | Installation Instructions - Page 6
service representative or personnel if you are in doubt as to whether the dryer is properly grounded. Do not modify the plug provided with the dryer: if it will not fit the outlet, have a proper outlet installed by a qualified electrician. SAVE THESE INSTRUCTIONS IMPORTANT: The dryer model/serial - Whirlpool CGM2941TQ | Installation Instructions - Page 7
. Conversion must be done by a qualified service technician. Gas conversion kit part numbers are listed on the gas valve burner base. A. Gas supply line B. Shutoff valve "open" position C. To dryer [] Installed in a confined area: If the dryer is installed in a confined area such as a bathroom - Whirlpool CGM2941TQ | Installation Instructions - Page 8
. Flexible metal vent must be fully extended and supported when the dryer is in its final position. Remove excess flexible metal specification chart, see Whirlpool Service Manual, "Exhausting Whirlpool Dryers," Part No. LIT603197, available from your Whirlpool parts distributor. If dryer is installed - Whirlpool CGM2941TQ | Installation Instructions - Page 9
to or greater than the CFM of all the dryers in the room. [] Back-draft Damper Kits, Part No. 3391910, are available from your Whirlpool dealer and should be installed in each dryer's vent to prevent exhausted air from returning into the dryers and to keep the exhaust in balance within the main - Whirlpool CGM2941TQ | Installation Instructions - Page 10
legs until you reach the diamond mark. Now stand the dryer up. 6. Remove the service door of the meter case by lifting it up at the back. Install the money-accepting device. (Refer to manufacturer's instructions for proper installation.) f. Using a 4" (10.2 cm) clamp, connect vent to exhaust outlet - Whirlpool CGM2941TQ | Installation Instructions - Page 11
the legs until you reach the diamond mark. Now stand the dryer up. 6. Remove the service door of the meter case by lifting it up at the back. Install the money-accepting device. (Refer to manufacturer's instructions for proper installation.) Fire Hazard Use a new UL listed 30 amp power supply cord - Whirlpool CGM2941TQ | Installation Instructions - Page 12
power supply cord/cable through the strain relief. A. Strain relief clamp sections B. Dryer cabinet C. Strain relief screws 4= Complete installation following instructions for your type of electrical connection: • Four-wire (recommended method) • Three-wire (if four-wire is not available) Power - Whirlpool CGM2941TQ | Installation Instructions - Page 13
to outer terminal block screws. Tighten screws. 8. Tighten strain relief screws. 9. Insert tab of the terminal block cover into slot of the dryer rear panel. Secure cover with hold-down screw. t0. After reattaching the terminal cover, connect a separate copper ground wire from the external ground - Whirlpool CGM2941TQ | Installation Instructions - Page 14
. Connect flexible metallic conduit and tighten connector screw. Install direct wire cable through the flexible metallic conduit. _- j A. Conduit connector B. Dryer cabinet C. Connector screw 4= Complete installation following instructions for your type of electrical connection: • Four-wire - Whirlpool CGM2941TQ | Installation Instructions - Page 15
is used up. NOTE: Dryer door must be closed for dryer to operate. When door is open, dryer stops, but timer continues to run. To restart dryer, close door and push START/RESTART button. 4. If drying time is too long, make sure lint screen is clean. 5. Now start the dryer and allow it to complete - Whirlpool CGM2941TQ | Installation Instructions - Page 16
operating or maintaining your dryer not covered in the installation instructions. The Commercial Laundry Support Center is open 24 hours a day, 7 days a week. Just dial 1-800 NO BELTS (1-800-662-3587) -- the call is toll free. When you call, you will need the dryer model number and serial number
-
 1
1 -
 2
2 -
 3
3 -
 4
4 -
 5
5 -
 6
6 -
 7
7 -
8
-
9
-
10
-
11
-
12
-
13
-
14
-
15
-
16
 |
 |
INSTALLATIONINSTRUCTIONS
COMMERCIAL DRYER
Gas (12(!-Volt,60-Hz) or Electric
(12(}/24(}-Volt,
60-Hz)
Table of Contents
........................................................
2
8563800
www,roper.com