Whirlpool EED4100SQ Installation Instructions - Page 1

Whirlpool EED4100SQ - Estate Extra Large 5.9 Cu. Ft. Capacity Dryer Manual

Page 1 highlights

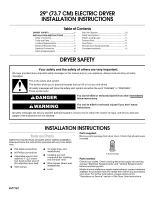
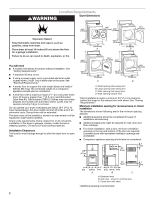
29" (73.7 CM) ELECTRIC DRYER INSTALLATION INSTRUCTIONS Table of Contents DRYER SAFETY 1 INSTALLATION INSTRUCTIONS 1 Table of Contents 1 Tools and Parts 1 Location Requirements 2 Electrical Requirements 3 Electrical Connection 4 Venting Requirements 9 Plan Vent System 10 Install Vent System 11 Install Leveling Legs 11 Connect Vent 11 Level Dryer 11 Reverse Door Swing (Optional 11 Complete Installation 12 DRYER SAFETY Your safety and the safety of others are very important. We have provided many important safety messages in this manual and on your appliance. Always read and obey all safety messages. This is the safety alert symbol. This symbol alerts you to potential hazards that can kill or hurt you and others. All safety messages will follow the safety alert symbol and either the word "DANGER" or "WARNING." These words mean: DANGER You can be killed or seriously injured if you don't immediately follow instructions. WARNING You can be killed or seriously injured if you don't follow instructions. All safety messages will tell you what the potential hazard is, tell you how to reduce the chance of injury, and tell you what can happen if the instructions are not followed. INSTALLATION INSTRUCTIONS Tools and Parts Gather the required tools and parts before starting installation. Read and follow the instructions provided with any tools listed here. Parts supplied: Remove parts package from dryer drum. Check that all parts were included. s Flat-blade screwdriver s #2 Phillips screwdriver s Adjustable wrench that opens to 1" (2.5 cm) or hex-head socket wrench (for adjusting dryer feet) s Vent clamps s Tin snips (new vent installations) s Caulking gun and compound (for installing new exhaust vent) s Wire stripper (direct wire installations) s Level 4 leveling legs Parts needed: Check local codes. Check existing electrical supply and venting and see "Electrical Requirements" and "Venting Requirements" before purchasing parts. Mobile home installations require metal exhaust system hardware available for purchase from the dealer from whom you purchased your dryer. For further information, please reference the "Assistance or Service" section of the Dryer User Instructions. 8577187

  • 1
  • 2
  • 3
  • 4
  • 5
  • 6
  • 7
  • 8
  • 9
  • 10
  • 11
  • 12

29" (73.7 CM) ELECTRIC DRYER
INSTALLATION INSTRUCTIONS
DRYER SAFETY
INSTALLATION INSTRUCTIONS
Tools and Parts
Gather the required tools and parts before starting installation.
Read and follow the instructions provided with any tools listed
here.
Parts supplied:
Remove parts package from dryer drum. Check that all parts were
included.
4 leveling legs
Parts needed:
Check local codes. Check existing electrical supply and venting
and see “Electrical Requirements” and “Venting Requirements”
before purchasing parts.
Mobile home installations require metal exhaust system hardware
available for purchase from the dealer from whom you purchased
your dryer. For further information, please reference the
“Assistance or Service” section of the Dryer User Instructions.
Table of Contents
DRYER
SAFETY
...............................................
1
INSTALLATION INSTRUCTIONS
....................
1
Table of Contents
..........................................
1
Tools and Parts
..............................................
1
Location Requirements
.................................
2
Electrical Requirements
.................................
3
Electrical Connection
.....................................
4
Venting Requirements
...................................
9
Plan Vent System
..................................................
10
Install Vent System
................................................
11
Install Leveling Legs
..............................................
11
Connect Vent
.........................................................
11
Level Dryer
.............................................................
11
Reverse Door Swing (Optional)
.............................
11
Complete Installation
.............................................
12
You can be killed or seriously injured if you don't immediately
You
can be killed or seriously injured if you don't follow
All safety messages will tell you what the potential hazard is, tell you how to reduce the chance of injury, and tell you what can
happen if the instructions are not followed.
Your safety and the safety of others are very important.
We have provided many important safety messages in this manual and on your appliance. Always read and obey all safety
messages.
This is the safety alert symbol.
This symbol alerts you to potential hazards that can kill or hurt you and others.
All safety messages will follow the safety alert symbol and either the word “DANGER” or “WARNING.”
These words mean:
follow instructions.
instructions.
DANGER
WARNING
Flat-blade screwdriver
#2 Phillips screwdriver
Adjustable wrench that
opens to 1" (2.5 cm) or
hex-head socket wrench
(for adjusting dryer feet)
Vent clamps
Tin snips (new vent
installations)
Caulking gun and
compound (for installing
new exhaust vent)
Wire stripper (direct wire
installations)
Level
8577187