Whirlpool EL87TRRRV Use and Care Manual - Page 5
tofollowthese}nstructions - all refrigerator
 |
UPC - 058822011629
View all Whirlpool EL87TRRRV manuals
Add to My Manuals
Save this manual to your list of manuals |
Page 5 highlights
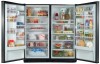
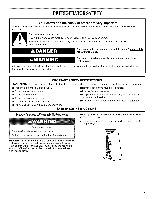
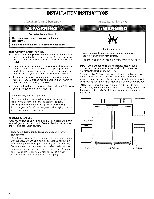
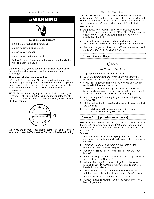
EmectricSah_ockHazard Pmuingtoa grounde3d prongoutieto Donotremovegroundprong. Donotuseanadapter. Donotuseanextensioncord. FaiJurteo followthese}nstructioncsanresum}ntdeath, fire,or emectrical shock. Before you move your refrigerator into its final location, it is important to make sure you have the proper electrical connection. Recommended grounding method A 115 Volt, 60 Hz., AC only 15- or 20-amp fused, grounded electrical supply is required. It is recommended that a separate circuit serving only your refrigerator be provided. Use an outlet that cannot be turned off by a switch. Do not use an extension cord. NOTE: Before performing any type of installation, cleaning, or removing a light bulb, turn the Temperature Control to the off position as shown and then disconnect the refrigerator from the electrical source. q When you are finished, reconnect the refrigerator to the electrical source and reset the Temperature Control to the desired setting. TOOLS NEEDED: %6" hex-head socket wrench, %" hex-head socket wrench, 1/4"hex-head socket wrench, 1/2"hex-head socket wrench, 6/6"hex-head socket wrench, #2 Phillips screwdriver, flatblade screwdriver, %6" open-end wrench, flat 2" putty knife. IMPORTANT: • All graphics referenced in the following instructions are included later in this section after "Final Steps." The graphics shown are for a right-hand swing door (hinges factory installed on the right). • If you only want to remove and replace the door, see the "Remove Door and Hinges" and "Replace Door and Hinges." • Before you begin, turn the control OFF, and remove food and adjustable door or utility bins from door. Remove Door and Hinges 5/16" Hex-Head Hinge Screw 1. Unplug refrigerator or disconnect power. 2. Open refrigerator door and remove base grille from the bottom front of the refrigerator. See Base Grille Graphic 1A. 3. Close the refrigerator door and keep it closed until you are ready to lift it free from the cabinet. NOTE: Provide additional support for the door while the hinges are being moved. Do not depend on the door magnets to hold the door in place while you are working. 4. Remove the parts for the top hinge as shown in Top Hinge Graphic 1B. 5. Lift the refrigerator door free from the lower hinge and cabinet and set aside. 6. Remove 3 hex head hinge screws and bottom hinge assembly. See Bottom Hinge Graphic 1C. Reverse Door (optional on some models) IMPORTANT: If you want to reverse your door so that it opens in the opposite direction, continue with "Reverse Door (optional)" instructions. If you are not reversing the door, see "Replace Door and Hinges." Cabinet 1. Remove the cabinet hinge hole plugs from the cabinet top and move them to the opposite side hinge holes as shown in Graphic 2. 2. Remove the door stop screws from the Bottom Hinge bracket. See Bottom Hinge Graphic 1C 3. Remove the Hinge Pin Nut and Hinge Pin from the hinge bracket. 4. Rotate the hinge bracket for installation on the opposite side of the cabinet. See Graphic 3 5. Reinstall the Hinge Pin Nut and Hinge Pin to the hinge bracket. Hinge Pin must point "up" when hinge bracket is installed to the cabinet. 6. Invert the door stop so that the countersunk holes line up with the screw holes in the hinge assembly. See Graphic 4 7. Reinstall the door stop screws. See Graphic 3. 8. Reinstall the hinge assembly to the cabinet with the 3 hex head hinge screws.
-
 1
1 -
 2
2 -
 3
3 -
 4
4 -
 5
5 -
 6
6 -
 7
7 -
 8
8 -
 9
9 -
 10
10 -
 11
11 -
12
-
13
-
14
-
15
-
16
-
17
-
18
-
19
-
20
-
21
-
22
-
23
-
24
-
25
-
26
-
27
-
28
 |
 |
