Whirlpool GJC3034RC Installation Instructions
Whirlpool GJC3034RC - Pure 30 Inch Smoothtop Electric Cooktop Manual
 |
UPC - 050946996950
View all Whirlpool GJC3034RC manuals
Add to My Manuals
Save this manual to your list of manuals |
Whirlpool GJC3034RC manual content summary:
- Whirlpool GJC3034RC | Installation Instructions - Page 1
de la table de cuisson au plan de travail 16 Achever l'installation 16 COOKTOP SAFETY Your safety and the safety of others are very important. We have provided many important safety messages in this manual and on your appliance. Always read and obey all safety messages. This is the safety alert - Whirlpool GJC3034RC | Installation Instructions - Page 2
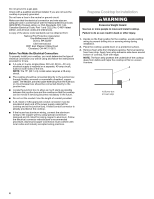
specified in these instructions. IMPORTANT: Observe all governing codes and ordinances. When installing cooktop, use minimum dimensions cm) B. 16 42.1 cm) 30 77.1 cm) 36 92.3 cm) C. 2⁷⁄₈" (7.3 cm) Curved-edge cooktop s The cooktop must be a specified cooktop that is approved to B be installed - Whirlpool GJC3034RC | Installation Instructions - Page 3
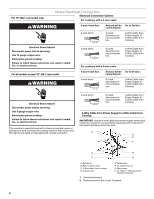
cm) model only: WARNING A. 15" (38.1 cm) on 15" (38.1 cm) models; 30" (76.2 cm) on 30" (76.2 cm) models; 36" (91.4 cm) on 36" (91.4 cm) models B. Combustible Disconnect power before servicing. Use 8 gauge copper wire. Electrically ground cooktop. Failure to follow these instructions can result in - Whirlpool GJC3034RC | Installation Instructions - Page 4
CSA Standards C22.1-94, Canadian Electrical Code, Part 1 and C22.2 No. O-M91-latest cooktop, you must determine the type of electrical connection you will be using and follow the instructions the junction box and the cooktop so that the cooktop can be moved if servicing becomes necessary in the future - Whirlpool GJC3034RC | Installation Instructions - Page 5
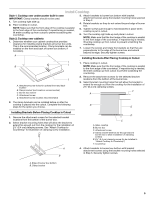
(extends far enough beyond burner box to allow installation of clamping screws) E. 2½" (6.4 cm) clamping screw (to be installed in "Attach Cooktop to Countertop") F. Countertop 4. Attach brackets to burner box bottom with bracket attachment screws using the bracket mounting holes selected in Step - Whirlpool GJC3034RC | Installation Instructions - Page 6
or circuit breaker box 4-Wire Cable from Power Supply to 4-Wire Cable from Cooktop Electrical Shock Hazard Disconnect power before servicing. Use 12 gauge copper wire. Electrically ground cooktop. Failure to follow these instructions can result in death, fire, or electrical shock. 3-wire direct - Whirlpool GJC3034RC | Installation Instructions - Page 7
UL listed wire nuts. 8. Connect the green or bare ground wire from the cooktop cable to the green or bare ground wire (in the junction box) using the UL listed wire nuts. 7. Connect the green or bare ground wire from the cooktop cable to the green or bare ground wire (in the junction box) using the - Whirlpool GJC3034RC | Installation Instructions - Page 8
Use and Care Guide. NOTE: If the cooktop does not work after turning on the power, check that a circuit breaker has not tripped or a house fuse has not blown. See "Troubleshooting" section in the Use and Care Guide for further information. If you need Assistance or Service: Please reference the - Whirlpool GJC3034RC | Installation Instructions - Page 9
et vous disent comment réduire le risque de blessure et ce qui peut se produire en cas de non-respect des instructions. INSTRUCTIONS D'INSTALLATION Outillage et pièces Rassembler les outils et pièces nécessaires avant de commencer l'installation. Outils nécessaires s Mètre-ruban s Marqueur - Whirlpool GJC3034RC | Installation Instructions - Page 10
pour la table de cuisson H. Boîtier de connexion ou prise électrique; 12" (30,5 cm) ou plus depuis la face inférieure du plan de travail; 10" (25 (36,8 cm) pour modèles de 15" (38,1 cm); 29½" (74,9 cm) pour modèles de 30" (76,2 cm); 35½" (90,2 cm) pour modèles de 36" (91,4 cm) J. Distance minimale - Whirlpool GJC3034RC | Installation Instructions - Page 11
tiroir (ou autre obstruction) dans le placard inférieur. Lors de l'installation d'une hotte de cuisine au dessus de cette table de cuisson, suivre les instructions d'installation qui accompagnent la hotte. Pour le modèle de 15" (38,1 cm) uniquement : arrière du placard ou paroi arrière sous le plan - Whirlpool GJC3034RC | Installation Instructions - Page 12
faut établir le type de raccords électriques que l'on utilisera et suivre les instructions indiquées ici. s L'appareil doit être alimenté uniquement par un circuit et installer la table de cuisson. Le non-respect de cette instruction peut causer une blessure au dos ou d'autre blessure. 1. Dé - Whirlpool GJC3034RC | Installation Instructions - Page 13
Installation de la table de cuisson Style 1 : Table de cuisson sur four encastré sous comptoir IMPORTANT : Ne pas utiliser de brides de fixation. 1. Tourner le côté droit de la table de cuisson vers le haut. 2. Placer la table de cuisson dans l'ouverture. REMARQUE : S'assurer que le bord avant de - Whirlpool GJC3034RC | Installation Instructions - Page 14
courant électrique avant d'entreprendre le travail. Utiliser du fil de cuivre de calibre 8. Relier la table de cuisson à la terre. Le non-respect de ces instructions peut causer un décès, un incendie ou un choc électrique. Un conducteur vert ou nu de liaison à la terre est connecté au châssis de la - Whirlpool GJC3034RC | Installation Instructions - Page 15
4. Serrer les vis du connecteur de conduit, le cas échéant. 5. Connecter ensemble les deux connecteurs noirs avec le connecteur de fils (homologation UL). 6. Connecter ensemble les deux connecteurs rouges avec le connecteur de fils (homologation UL). 7. Connecter ensemble les deux connecteurs blancs - Whirlpool GJC3034RC | Installation Instructions - Page 16
d'utilisation et d'entretien pour plus de renseignements. Si vous avez besoin d'assistance ou de service : Se référer à la section "Assistance ou service" du Guide d'utilisation et d'entretien ou contacter le marchand chez qui la table de cuisson a été achetée. 8286066 © 2005. All rights reserved
-
 1
1 -
 2
2 -
 3
3 -
 4
4 -
 5
5 -
 6
6 -
 7
7 -
8
-
9
-
10
-
11
-
12
-
13
-
14
-
15
-
16
 |
 |
ELECTRIC COOKTOP INSTALLATION INSTRUCTIONS
INSTRUCTIONS D’INSTALLATION DE
LA TABLE DE CUISSON
COOKTOP SAFETY
8286066
Table of Contents
Table des Mati
è
res
COOKTOP SAFETY
.................................
1
INSTALLATION INSTRUCTIONS
...........
2
Tools and Parts
.....................................
2
Location Requirements
.........................
2
Electrical Requirements
.........................
3
Prepare Cooktop for Installation
...........
4
Install Cooktop
......................................
5
Make Electrical Connection
..................
6
Attach Cooktop to Countertop
..............
8
Complete Installation
.............................
8
SÉCURITÉ DE LA TABLE DE CUISSON9
INSTRUCTIONS D’INSTALLATION
.......
9
Outillage et pièces
.................................
9
Exigences d’emplacement
....................
9
Spécifications électriques
...................
11
Préparation de la table de cuisson
pour l'installation
.................................
12
Installation de la table de cuisson
.......
13
Raccordement électrique
....................
14
Fixation de la table de cuisson
au plan de travail
.................................
16
Achever l'installation
...........................
16
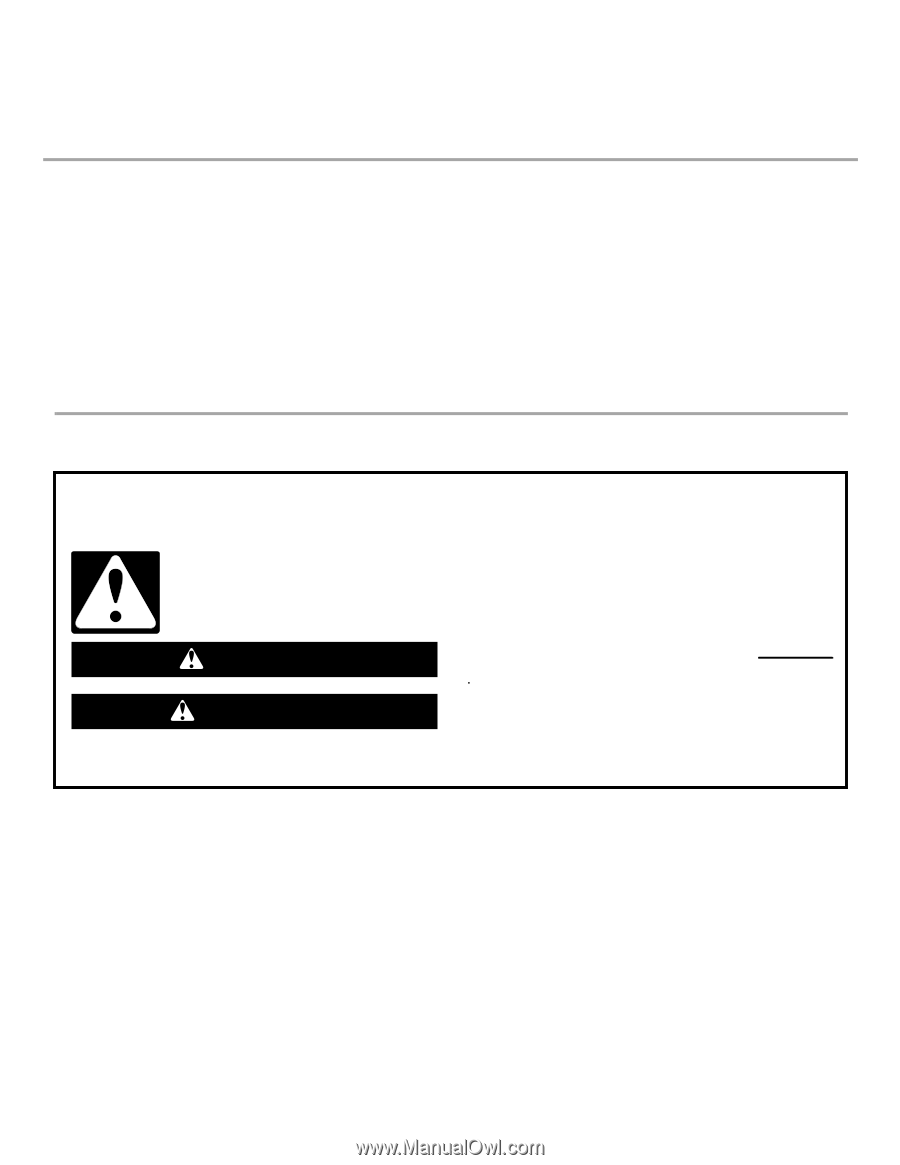
You can be killed or seriously injured if you don't immediately
You
can be killed or seriously injured if you don't follow
All safety messages will tell you what the potential hazard is, tell you how to reduce the chance of injury, and tell you what can
happen if the instructions are not followed.
Your safety and the safety of others are very important.
We have provided many important safety messages in this manual and on your appliance. Always read and obey all safety
messages.
This is the safety alert symbol.
This symbol alerts you to potential hazards that can kill or hurt you and others.
All safety messages will follow the safety alert symbol and either the word “DANGER” or “WARNING.”
These words mean:
follow instructions.
instructions.
DANGER
WARNING
IMPORTANT:
Installer:
Leave installation instructions with the homeowner.
Homeowner:
Keep installation instructions for future reference.
Save installation instructions for local electrical inspector's use.
IMPORTANT :
Installateur :
Remettre les instructions d'installation au propriétaire.
Propriétaire :
Conserver les instructions d'installation pour référence ultérieure.
Conserver les instructions d'installation pour consultation par l'inspecteur local des installations électriques.