Whirlpool GSC308PRQ Installation Instructions
Whirlpool GSC308PRQ Manual
 |
View all Whirlpool GSC308PRQ manuals
Add to My Manuals
Save this manual to your list of manuals |
Whirlpool GSC308PRQ manual content summary:
- Whirlpool GSC308PRQ | Installation Instructions - Page 1
to pass the appliance cable through to the junction box. s Oven support surface must be solid, level and flush with bottom of cabinet cutout. Floor must be able to support a total weight (microwave and built-in oven) of 238 lbs (108 kg). Product Dimensions 27" (68.6 cm) and 30" (76.2 cm) Ovens - Whirlpool GSC308PRQ | Installation Instructions - Page 2
of cabinet door F. 41¹⁄₄" (104.8 cm) cutout height 30" (76.2 cm) models A. 30" (76.2 cm) min. cabinet width B. 1" (2.5 C22.1-94, Canadian Electrical Code, Part 1 and C22.2 No. O-M91 and follow the instructions provided for it s Flexible armored cable from appliance should be connected directly to - Whirlpool GSC308PRQ | Installation Instructions - Page 3
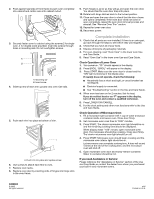
from inside the literature bag. 6. Remove and set aside racks and other parts from inside the oven. Remove Oven Trim IMPORTANT: Use both hands to remove Disconnect power before servicing. Use 8 gauge solid copper wire. Electrically ground oven. Failure to follow these instructions can result in - Whirlpool GSC308PRQ | Installation Instructions - Page 4
6. Complete installation following instructions for your type of electrical connection: 4-wire (recommended) 3-wire (if 4-wire is not available) Electrical Connection Options If your home has: And you will be - Whirlpool GSC308PRQ | Installation Instructions - Page 5
Installation 1. Check that all parts are now installed. If there is an extra part, go back through the supply is connected. s See "Troubleshooting" section in the Use and Care Guide. 4. When oven has been on Service: Please reference the "Assistance or Service" section of the Use and Care Guide - Whirlpool GSC308PRQ | Installation Instructions - Page 6
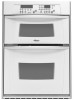
30" (76.2 CM) ELECTRIC BUILT-IN MICROWAVE/OVEN COMBINATION Table of Contents BUILT-IN MICROWAVE/OVEN SAFETY........ 1 INSTALLATION REQUIREMENTS 2 Tools and Parts 2 Location Requirements 2 Electrical Requirements 3 INSTALLATION INSTRUCTIONS in this manual and on your appliance. Always read
-
 1
1 -
 2
2 -
 3
3 -
 4
4 -
 5
5 -
 6
6
 |
 |
2
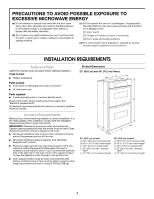
INSTALLATION REQUIREMENTS
Tools and Parts
Gather the required tools and parts before starting installation.
Tools needed
Parts needed
■
A UL listed or CSA approved conduit connector
■
UL listed wire nuts
Parts supplied
■
2 screws (single oven) or 4 screws (double oven)
Check local codes. Check existing electrical supply. See
“Electrical Requirements.”
All electrical connections should be made by a licensed, qualified
electrical installer.
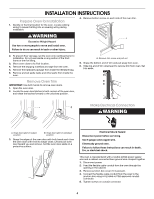
Location Requirements
Make sure you have everything needed for correct installation. It is
the responsibility of the installer to comply with the installation
clearances specified in these instructions.
IMPORTANT:
Observe all governing codes and ordinances.
Cabinet opening dimensions that are shown must be used. Given
dimensions provide minimum clearance with oven.
■
Recessed installation area must provide complete enclosure
around the recessed portion of the oven.
■
Grounded electrical supply is required. See “Electrical
Requirements” section.
■
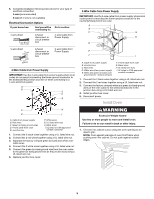
Electrical supply junction box should be located 3" (7.6 cm)
maximum below the support surface when the oven is
installed in a wall cabinet. Drill a 1" (2.5 cm) minimum diameter
hole in the right rear or left rear corner of the support surface
to pass the appliance cable through to the junction box.
■
Oven support surface must be solid, level and flush with
bottom of cabinet cutout. Floor must be able to support a total
weight (microwave and built-in oven) of 238 lbs (108 kg).
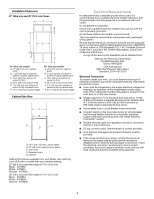
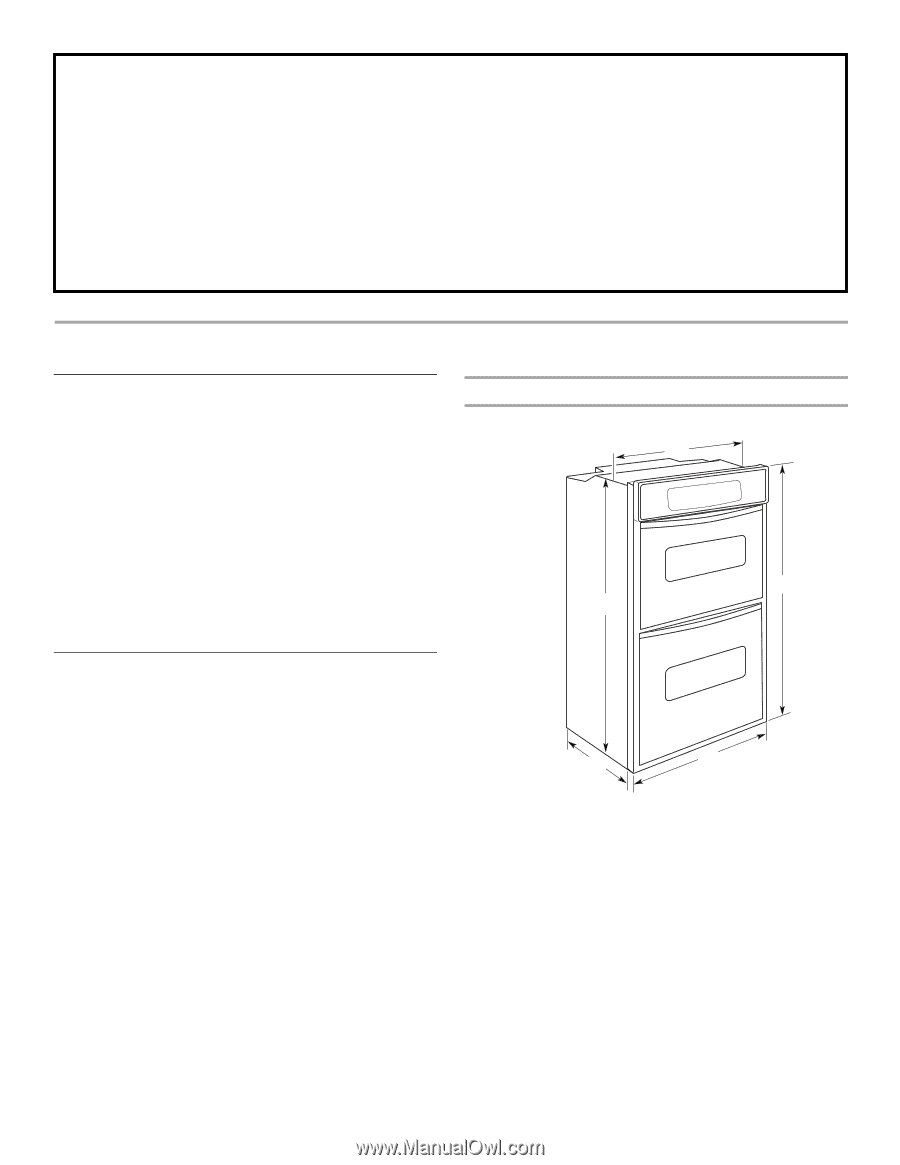
Product Dimensions
27" (68.6 cm) and 30" (76.2 cm) Ovens
PRECAUTIONS TO AVOID POSSIBLE EXPOSURE TO
EXCESSIVE MICROWAVE ENERGY
(a)
Do not attempt to operate this oven with the door open
since open-door operation can result in harmful exposure
to microwave energy. It is important not to defeat or
tamper with the safety interlocks.
(b)
Do not place any object between the oven front face and
the door or allow soil or cleaner residue to accumulate on
sealing surfaces.
(c)
Do not operate the oven if it is damaged. It is particularly
important that the oven door close properly and that there
is no damage to the:
(1)
Door (bent),
(2)
Hinges and latches (broken or loosened),
(3)
Door seals and sealing surfaces.
(d)
The oven should not be adjusted or repaired by anyone
except properly qualified service personnel.
■
Phillips screwdriver
27" (68.6 cm) models
A. 25
³⁄₈
" (64.5 cm) recessed width
B. 42
⁷⁄₁₆
" (107.8 cm) overall height
C. 26
³⁄₄
" (67.9 cm) overall width
D. 23" (58.4 cm) max. recessed
depth
E. 41" (104.1 cm) recessed height
30" (76.2 cm) models
A. 28
³⁄₈
" (71.2 cm) recessed width
B. 42
⁷⁄₁₆
" (107.8 cm) overall height
C. 29
³⁄₄
" (75.6 cm) overall width
D. 23" (58.4 cm) max. recessed
depth
E. 41" (104.1 cm) recessed height
C
A
B
D
E