Whirlpool WED70HEBW Installation Guide - Page 12
Venting Requirements, VENTING - electric dryer
 |
View all Whirlpool WED70HEBW manuals
Add to My Manuals
Save this manual to your list of manuals |
Page 12 highlights
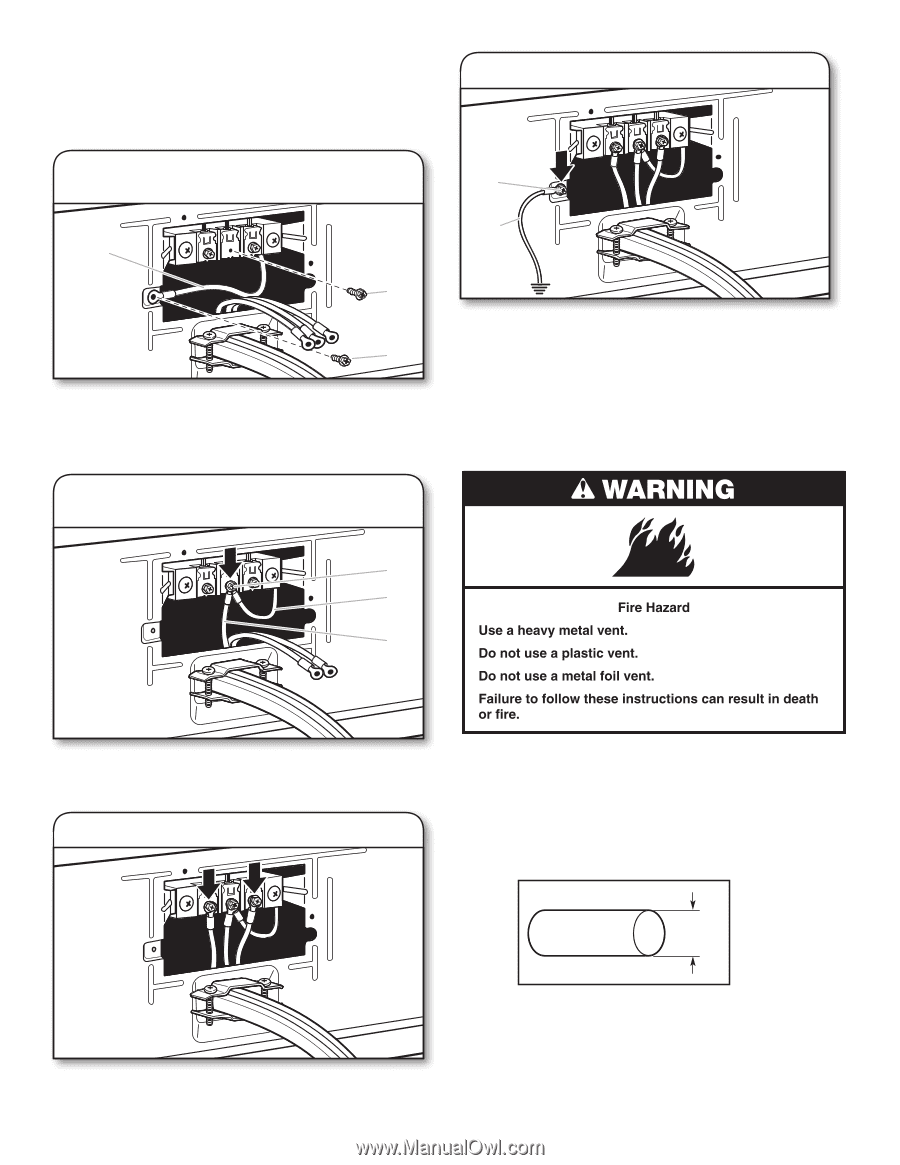
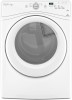
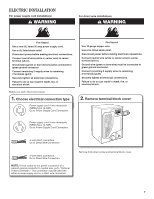
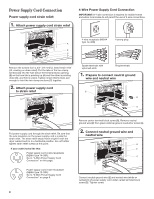
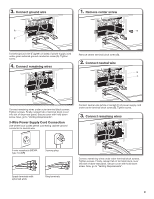
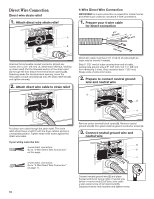
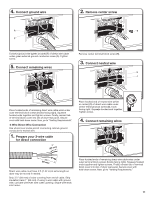
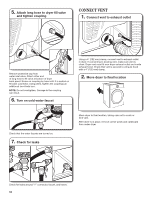
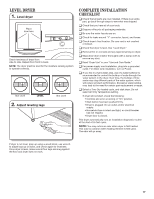
Optional External Ground for 3-Wire Connection (Power Supply Cord Shown) IMPORTANT: You must verify with a qualified electrician that this grounding method is acceptable before connecting. 4. Connect external ground wire 1. Prepare to connect neutral ground wire and neutral wire A G E B A Install the correct strain relief for your electrical connection method, as shown on page 8 or 10. Remove center terminal block screw (B). Remove neutral ground wire (E) from green external ground conductor screw (A). Connect a separate copper ground wire (G) under the green external ground conductor screw (A) to an adequate ground. Finally, reinsert tab of terminal block cover into slot of dryer rear panel. Secure cover with hold-down screw. Now, go to "Venting Requirements." VENTING Venting Requirements 2. Connect neutral ground wire and neutral wire B E C Connect neutral ground wire (E) and neutral wire (white or center wire) (C) of power supply cord or cable under center, terminal block screw (B). Tighten screw. 3. Connect remaining wires WARNING: To reduce the risk of fire, this dryer MUST BE EXHAUSTED OUTDOORS. IMPORTANT: Observe all governing codes and ordinances. Dryer exhaust must not be connected into any gas vent, chimney, wall, ceiling, attic, crawlspace, or a concealed space of a building. Only rigid or flexible metal vent shall be used for exhausting. Place ends of remaining wires under outer terminal block screws. Tighten screws. 12 4" (102 mm) 4" (102 mm) heavy metal exhaust vent ■■ Only a 4" (102 mm) heavy metal exhaust vent and clamps may be used. ■■ Do not use plastic or metal foil vent.
-
 1
1 -
2
-
3
-
4
-
5
-
6
-
 7
7 -
 8
8 -
 9
9 -
 10
10 -
 11
11 -
 12
12 -
 13
13 -
 14
14 -
 15
15 -
 16
16 -
 17
17 -
18
-
19
-
20
-
21
-
22
-
23
-
24
 |
 |