INSTALLATION INSTRUCTIONS
30" (76.2 CM) FREESTANDING GAS RANGES
Table of Contents
RANGE SAFETY
..........................................................................................................
2
INSTALLATION REQUIREMENTS
.............................................................................
4
Tools and Parts
.........................................................................................................
4
Location Requirements
.............................................................................................
4
Electrical Requirements
............................................................................................
6
Gas Supply Requirements
........................................................................................
6
INSTALLATION INSTRUCTIONS
...............................................................................
8
Unpack Range
..........................................................................................................
8
Install Anti-Tip Bracket
.............................................................................................
8
Make Gas Connection
..............................................................................................
9
Verify Anti-Tip Bracket Location
.............................................................................
10
Level Range
............................................................................................................
11
Electronic Ignition System
......................................................................................
11
Replace Oven Racks and Warming Drawer
...........................................................
12
Storage Drawer
.......................................................................................................
13
Complete Installation
..............................................................................................
13
GAS CONVERSIONS
................................................................................................
14
LP Gas Conversion
.................................................................................................
14
Natural Gas Conversion
..........................................................................................
16
ANTI-TIP BRACKET TEMPLATE
............................................................................
19
IMPORTANT:
Save for local inspector's use.
Installer:
Leave installation instructions with the homeowner.
Homeowner:
Keep installation instructions for future reference.
W10196161E

 1
1 2
2 3
3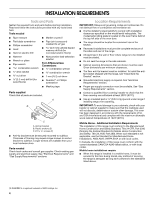 4
4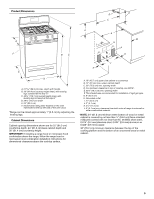 5
5 6
6 7
7