Whirlpool WFG510S0AD Installation Guide - Page 13
Oven Door, Complete Installation
 |
View all Whirlpool WFG510S0AD manuals
Add to My Manuals
Save this manual to your list of manuals |
Page 13 highlights
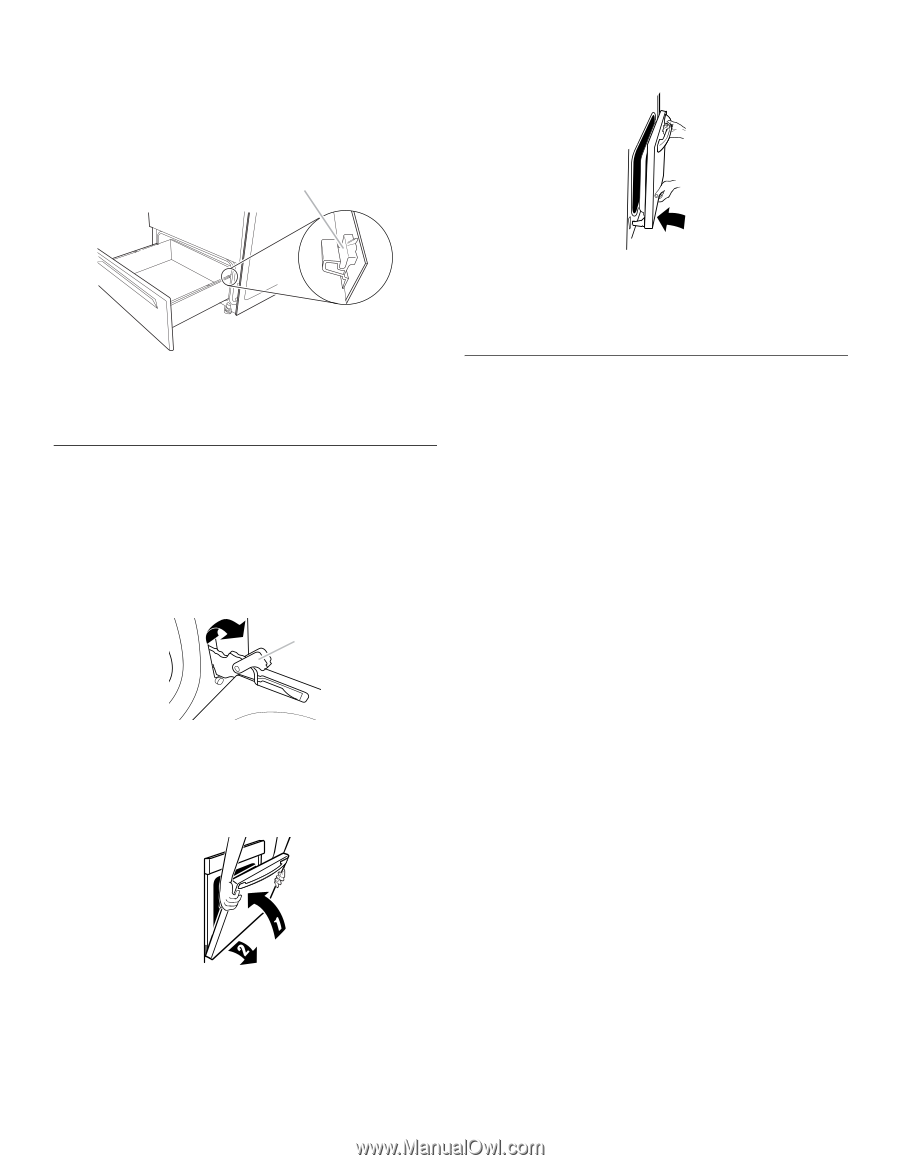
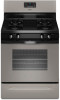
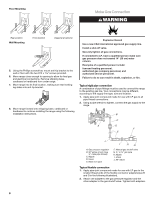
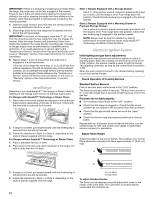
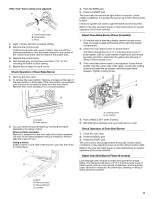
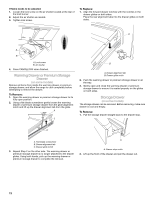
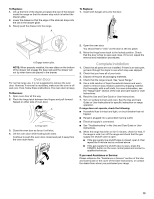
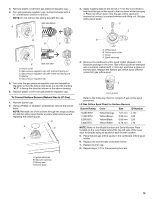
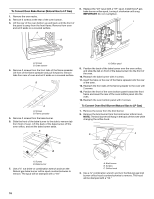
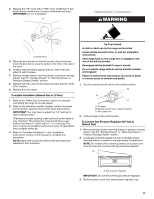
To Replace: 1. Lift up the front of the drawer and place the rear of the drawer inside the range so that the drawer stop notch is behind the drawer glide. 2. Lower the drawer so that the edge of the slide rail drops into the slot in the drawer glide. 3. Slowly push the drawer into the range. A To Replace: 1. Insert both hanger arms into the door. A. Engage drawer glide. NOTE: When properly installed, the rear slides on the bottom of the drawer will engage the base rails and the drawer will not tip when items are placed in the drawer. Oven Door For normal range use, it is not suggested to remove the oven door. However, if removal is necessary, make sure the oven is off and cool. Then, follow these instructions. The oven door is heavy. To Remove: 1. Open oven door all the way. 2. Pinch the hinge latch between two fingers and pull forward. Repeat on other side of oven door. A A. Hinge latch 3. Close the oven door as far as it will shut. 4. Lift the oven door while holding both sides. Continue to push the oven door closed and pull it away from the oven door frame. 2. Open the oven door. You should hear a "click" as the door is set into place. 3. Move the hinge levers back to the locked position. Check that the door is free to open and close. If it is not, repeat the removal and installation procedures. Complete Installation 1. Check that all parts are now installed. If there is an extra part, go back through the steps to see which step was skipped. 2. Check that you have all of your tools. 3. Dispose of/recycle all packaging materials. 4. Check that the range is level. See "Level Range." 5. Use a mild solution of liquid household cleaner and warm water to remove waxy residue caused by shipping material. Dry thoroughly with a soft cloth. For more information, see the "Range Care" section of the Use and Care Guide or User Instructions. 6. Read the Use and Care Guide or User Instructions. 7. Turn on surface burners and oven. See the Use and Care Guide or User Instructions for specific instruction on range operation. If range does not operate, check the following: ■ Household fuse is intact and tight, or circuit breaker has not tripped. ■ Range is plugged into a grounded 3 prong outlet. ■ Electrical supply is connected. ■ See "Troubleshooting" in the Use and Care Guide or User Instructions. 8. When the range has been on for 5 minutes, check for heat. If the range is cold, turn off the range and check that the gas supply line shutoff valve is open. ■ If the gas supply line shutoff valve is closed, open it, then repeat the 5-minute test as outlined above. ■ If the gas supply line shutoff valve is open, press the CANCEL button on the oven control panel and contact a qualified technician. If you need Assistance or Service: Please reference the "Assistance or Service" section of the Use and Care Guide or the cover of the User Instructions, or contact the dealer from whom you purchased your range. 13
-
 1
1 -
2
-
3
-
4
-
5
-
6
-
7
-
 8
8 -
 9
9 -
 10
10 -
 11
11 -
 12
12 -
 13
13 -
 14
14 -
 15
15 -
 16
16 -
 17
17 -
 18
18 -
19
-
20
 |
 |