Whirlpool WFG710H0AH Use & Care Guide - Page 11
Positioning Racks and Bakeware, Split Oven Rack
 |
View all Whirlpool WFG710H0AH manuals
Add to My Manuals
Save this manual to your list of manuals |
Page 11 highlights
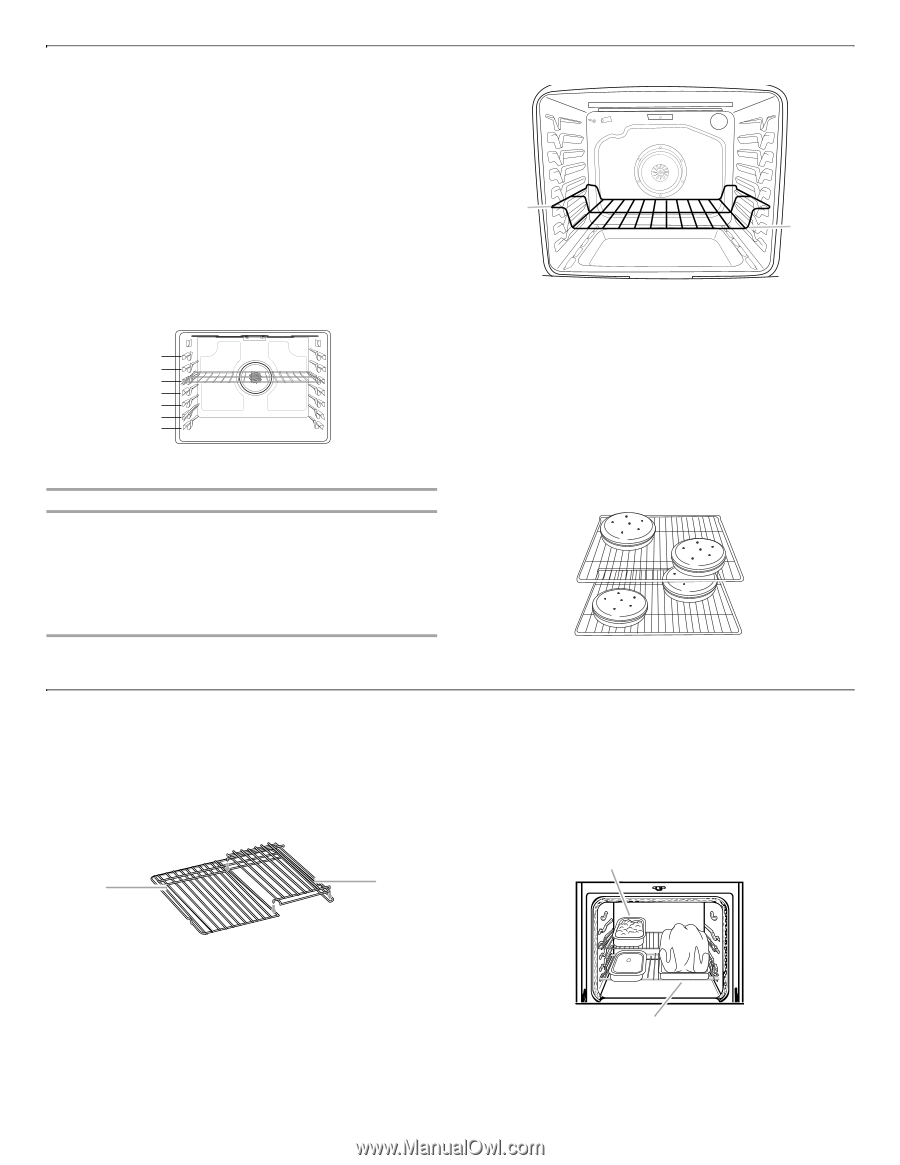
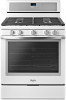
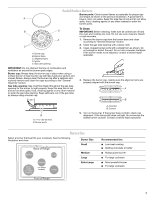
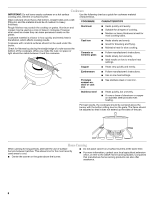
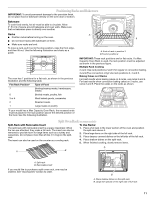
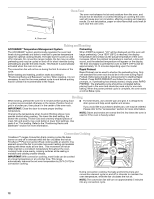
Positioning Racks and Bakeware IMPORTANT: To avoid permanent damage to the porcelain finish, do not place food or bakeware directly on the oven door or bottom. Bakeware To cook food evenly, hot air must be able to circulate. Allow 2" (5 cm) of space around bakeware and oven walls. Make sure that no bakeware piece is directly over another. Racks ■ Position racks before turning on the oven. ■ Do not move racks with bakeware on them. ■ Make sure racks are level. To move a rack, pull it out to the stop position, raise the front edge, and then lift out. Use the following illustration and charts as a guide. A B A. Ends of rack in position 3 B.Food in position 2 7 6 5 4 3 2 1 The oven has 7 positions for a flat rack, as shown in the previous illustration and the following table. Flat Rack Position* Type of Food 7 Broiling/searing meats, hamburgers, steaks 6 Broiled meats, poultry, fish 3 or 4 Most baked goods, casseroles 2 Roasted meats 1 Large roasts or poultry IMPORTANT: These rack positions are for flat racks. If a Max Capacity Oven Rack is used, the rack position must be adjusted as shown in the previous figure. Multiple Rack Cooking 2-rack: Use rack positions 2 and 5 for regular or convection baking. 3-rack (True convection only): Use rack positions 2, 4 and 6. Baking Cakes on 2 Racks For best results when baking cakes on 2 racks, use racks 2 and 5. For best results when convection baking cakes on 2 racks, use racks 2 and 5. Place the cakes on the racks as shown. *If your model has a Max Capacity Oven Rack, the recessed ends must be placed in the rack position above the desired position of the food. See the following illustration. Split Oven Rack (on some models) Split-Rack with Removable Insert To Use Racks: The split-rack with removable insert is a space maximizer. When the two are attached, they make a full rack. The insert can also be removed to provide room for large items such as a turkey and casseroles. Do not place more than 25 lbs (11.3 kg) on the splitrack. The insert can also be used on the counter as a cooling rack. 1. Place a full rack in the lower section of the oven and position the split-rack above it. 2. Place large items on the right side of the full rack. 3. Place deeper, covered dishes on the left side of the full rack. 4. Place shallow dishes on the split-rack. 5. When finished cooking, slowly remove items. A A B A. Split-rack B. Removable insert If you would like to purchase a split-oven rack, one may be ordered. See "Accessories" section to order. B A. Place shallow dishes on the split-rack B. Large item placed on the right side of full-rack 11
-
 1
1 -
2
-
3
-
4
-
5
-
 6
6 -
 7
7 -
 8
8 -
 9
9 -
 10
10 -
 11
11 -
 12
12 -
 13
13 -
 14
14 -
 15
15 -
 16
16 -
17
-
18
-
19
-
20
-
21
-
22
-
23
-
24
-
25
-
26
-
27
-
28
-
29
-
30
-
31
-
32
-
33
-
34
-
35
-
36
-
37
-
38
-
39
-
40
-
41
-
42
-
43
-
44
 |
 |