Whirlpool WRF736SDAM Use & Care Guide - Page 22
Water and Ice Dispensers
 |
View all Whirlpool WRF736SDAM manuals
Add to My Manuals
Save this manual to your list of manuals |
Page 22 highlights
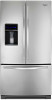
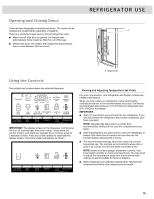
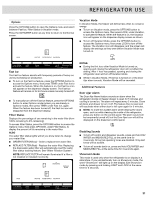
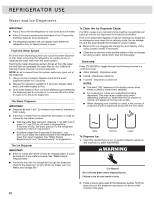
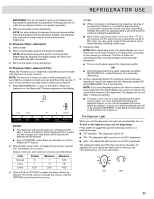
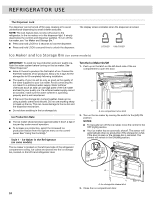
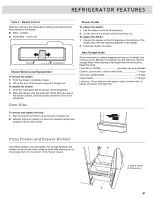
REFRIGERATOR USE Water and Ice Dispensers IMPORTANT: ■ Allow 3 hours for the refrigerator to cool down and chill water. ■ Allow 24 hours to produce the first batch of ice. Discard the first three batches of ice produced. ■ The dispensing system will not operate when either the refrigerator door or freezer drawer is open. Flush the Water System Air in the water dispensing system can cause the water dispenser to drip. After connecting the refrigerator to a water source or replacing the water filter, flush the water system. Flushing the water dispensing system forces air from the water line and filter and prepares the water filter for use. Additional flushing may be required in some households. NOTE: As air is cleared from the system, water may spurt out of the dispenser. 1. Using a sturdy container, depress and hold the water dispenser paddle for 5 seconds. 2. Release the dispenser paddle for 5 seconds. Repeat steps 1 and 2 until water begins to flow. 3. Once water begins to flow, continue depressing and releasing the dispenser pad (5 seconds on, 5 seconds off) until a total of 3 gal. (12 L) has been dispensed. The Water Dispenser IMPORTANT: ■ Dispense at least 1 qt (1 L) of water every week to maintain a fresh supply. ■ If the flow of water from the dispenser decreases, it could be caused by low water pressure. ■ With the water filter removed, dispense 1 cup (237 mL) of water. If 1 cup (237 mL) of water is dispensed in 8 seconds or less, the water pressure to the refrigerator meets the minimum requirement. ■ If it takes longer than 8 seconds to dispense 1 cup (237 mL) of water, the water pressure to the refrigerator is lower than recommended. See "Water Supply Requirements" and "Troubleshooting" for suggestions. The Ice Dispenser IMPORTANT: ■ If the ice cubes are hollow or have an irregular shape, it could be because of low water pressure. See "Water Supply Requirements." ■ Ice travels from the ice storage bin through the dispenser chute to the dispenser. To turn off the ice maker, see "Ice Maker and Storage Bin." To Clean the Ice Dispenser Chute: Humidity causes ice to naturally clump together. Ice particles can build up until the ice dispenser chute becomes blocked. If ice is not dispensed regularly, it may be necessary to empty the ice storage bin and clean the ice delivery chute, the ice storage bin and the area beneath the storage bin every 2 weeks. ■ Remove the ice clogging the storage bin and delivery chute, using a plastic utensil if necessary. ■ Clean the ice delivery chute and the bottom of the ice storage bin using a warm, damp cloth, then dry thoroughly. Dispensing Press ICE/WATER to toggle through the following choices in a continuous loop: ■ Water (default) - Dispenses water ■ Cubed - Dispenses cubed ice. ■ Crushed - Dispenses crushed ice NOTES: ■ The word "ICE" appears on the display screen when either crushed or cubed ice is selected. ■ For crushed ice, cubes are crushed before being dispensed. This may cause a slight delay when dispensing crushed ice. Noise from the ice crusher is normal, and pieces of ice may vary in size. ■ When changing from crushed to cubed, a few ounces of crushed ice will be dispensed along with the first cubes. Water Crushed Cubed To Dispense Ice: 1. Select the desired type of ice. To switch between cubed ice and crushed ice, press ICE/WATER. WARNING Cut Hazard Use a sturdy glass when dispensing ice. Failure to do so can result in cuts. 2. Press a sturdy glass against the dispenser paddle. Hold the glass close to the dispenser opening so ice does not fall outside of the glass. 22
-
 1
1 -
2
-
3
-
4
-
5
-
6
-
7
-
8
-
9
-
10
-
11
-
12
-
13
-
14
-
15
-
16
-
 17
17 -
 18
18 -
 19
19 -
 20
20 -
 21
21 -
 22
22 -
 23
23 -
 24
24 -
 25
25 -
 26
26 -
 27
27 -
28
-
29
-
30
-
31
-
32
-
33
-
34
-
35
-
36
-
37
-
38
-
39
-
40
-
41
-
42
-
43
-
44
-
45
-
46
-
47
-
48
-
49
-
50
-
51
-
52
-
53
-
54
-
55
-
56
-
57
-
58
-
59
-
60
-
61
-
62
-
63
-
64
-
65
-
66
-
67
-
68
-
69
-
70
-
71
-
72
-
73
-
74
-
75
-
76
-
77
-
78
-
79
-
80
-
81
-
82
-
83
-
84
-
85
-
86
-
87
-
88
-
89
-
90
-
91
-
92
-
93
-
94
-
95
-
96
-
97
-
98
-
99
-
100
-
101
-
102
-
103
-
104
-
105
-
106
-
107
-
108
-
109
-
110
-
111
-
112
-
113
-
114
-
115
-
116
-
117
-
118
-
119
-
120
-
121
-
122
-
123
-
124
 |
 |
