Whirlpool WRS322FDAM Installation Guide - Page 6
Handle Installation and Removal, Location Requirements
 |
View all Whirlpool WRS322FDAM manuals
Add to My Manuals
Save this manual to your list of manuals |
Page 6 highlights
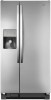
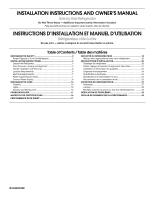
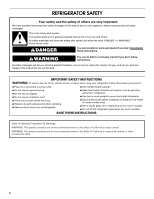
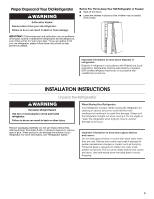
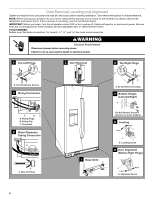
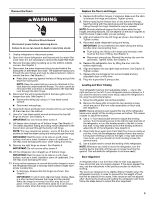
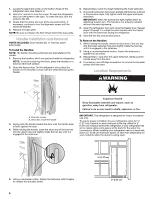
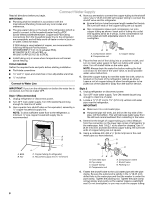
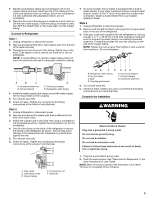
1. Locate the alignment screw on the bottom hinge of the refrigerator door. See Graphic 9. 2. Use a wrench to turn the screw. To raise the refrigerator door, turn the screw to the right. To lower the door, turn the screw to the left. 3. Check that the doors are even at the top and bottom. If necessary, continue to turn the alignment screw until the doors are aligned. 4. Replace the base grille. NOTE: Be sure to refasten the Tech Sheet behind the base grille. Handle Installation and Removal PARTS INCLUDED: Door handles (2 hex key, spare setscrew(s) To Install the Handles: NOTE: The handle mounting setscrews are preinstalled in the handle. 1. Remove the handles, which are packed inside the refrigerator. NOTE: To avoid scratching the finish, place the handles on a towel or other soft surface. 2. Open the freezer door. On the refrigerator door, place the handle on the shoulder screws with the setscrews facing the freezer. 6. Repeat steps 4 and 5 to begin fastening the lower setscrew. 7. Once both setscrews have been partially tightened as outlined in the previous steps, fully tighten both the upper and lower setscrews. IMPORTANT: When the screws feel tight, tighten them an additional quarter-turn. The handle is not properly installed without this extra tightening. 8. Open the refrigerator door and close the freezer door. Repeat steps 2 through 7 to install the other handle onto the freezer door with the setscrews facing the refrigerator. 9. Save the hex key and all instructions. To Remove the Handles: 1. While holding the handle, insert the short end of the hex key into the lower setscrew hole and slightly rotate the hex key until it is engaged in the setscrew. 2. Using a counterclockwise motion, loosen the setscrew a quarter-turn at a time. 3. Repeat steps 1 and 2 for the upper setscrew. Gently pull the handle away from the door. 4. If necessary, use a Phillips screwdriver to remove the shoulder screws from the door. Location Requirements WARNING A B A. Shoulder screws B. Setscrews inside the handle 3. Firmly push the handle toward the door until the handle base is flush against the door. 4. While holding the handle, insert the short end of the hex key into the upper hole and slightly rotate the hex key until it is engaged in the setscrew. Explosion Hazard Keep flammable materials and vapors, such as gasoline, away from refrigerator. Failure to do so can result in death, explosion, or fire. IMPORTANT: This refrigerator is designed for indoor household use only. To ensure proper ventilation for your refrigerator, allow for ¹⁄₂" (1.27 cm) of space on each side and at the top. Allow for 2" (5.08 cm) of space behind the refrigerator. If your refrigerator has an ice maker, allow extra space at the back for the water line connections. When installing your refrigerator next to a fixed wall, leave a 2" (5.08 cm) minimum space on each side (depending on your model) to allow the doors to swing open. 5. Using a clockwise motion, tighten the setscrew until it begins to contact the shoulder screw. 6 1/2" (1.27 cm) 2" (5.08 cm)
-
 1
1 -
 2
2 -
 3
3 -
 4
4 -
 5
5 -
 6
6 -
 7
7 -
 8
8 -
 9
9 -
 10
10 -
 11
11 -
 12
12 -
13
-
14
-
15
-
16
-
17
-
18
-
19
-
20
-
21
-
22
-
23
-
24
-
25
-
26
-
27
-
28
-
29
-
30
-
31
-
32
-
33
-
34
-
35
-
36
 |
 |