Xerox 2006NPC DocuColor 2006 Performing Setup from the Printer Control Panel - Page 7
Specify network information, Ethernet Speed-Auto Detect/10 Twisted Pair/10
 |
UPC - 042215475440
View all Xerox 2006NPC manuals
Add to My Manuals
Save this manual to your list of manuals |
Page 7 highlights
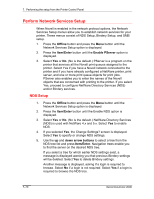
7. Performing the setup from the Printer Control Panel Specify network information 1. Press the Offline button and press the Menu button until the I/O Port Setup option is displayed. 2. Press the Item/Enter button to display the following options. Enter information as required: • Ethernet-Off/On. (On is the default.) Select On to enable Ethernet communication. • Ethernet Speed-Auto Detect/10 Twisted Pair/10 AUI/100. (Auto Detect is the default.) Select Auto Detect to detect the speed at which data can be transferred automatically over the Ethernet network or, optionally, to specify the speed and cabling of the Ethernet network. • Parallel Port-Off/On. (On is the default.) In addition to receiving print jobs over Ethernet, the printer can receive jobs from a computer through the high-speed parallel port. Select On to enable printing through the parallel port. • I/O Timeout-5-300 Seconds. (30 seconds is the default.) If the parallel port is On, use this option to specify how long the printer waits without receiving data from the parallel port before deciding that the current job is complete. During the timeout, the printer cannot receive new jobs through the parallel port, but it continues to receive network print jobs. • Ignore EOF-Yes/No. (Yes is the default.) If the parallel port is On, use this option to specify that the printer should ignore end-of-file (EOF) messages in a file. To print PostScript files in binary format (not ASCII), set this option to Yes. When the option is set to Yes, the printer uses the value you entered for the parallel port timeout to determine when it has reached the end of the file. Xerox DocuColor 2006 7-7
-
 1
1 -
 2
2 -
 3
3 -
 4
4 -
 5
5 -
 6
6 -
 7
7 -
 8
8 -
 9
9 -
 10
10 -
 11
11 -
 12
12 -
13
-
14
-
15
-
16
 |
 |
