Xerox 5550DN User Guide (English) - Page 127
Sending Personal, Personal Saved, Secure, Proof, or Saved Print Jobs
 |
UPC - 095205740783
View all Xerox 5550DN manuals
Add to My Manuals
Save this manual to your list of manuals |
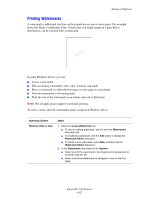
Page 127 highlights
Advanced Options Sending Personal, Personal Saved, Secure, Proof, or Saved Print Jobs Use a supported driver to specify a job as a personal, personal saved, secure, proof, or saved print job. Operating System Steps Windows 2000 or later Mac OS X (version 10.3 and higher) 1. Select the Paper/Output tab. 2. Select the job type under Job Type. 3. In the dialog box: ■ For a secure job, enter your four-digit passcode. ■ For a proof print or a shared saved print job, enter the name you want to give this job. ■ For a personal saved job, enter your four-digit passcode and enter the name you want to give this job. 4. Click the OK button. In the Print dialog box, select the job type from the Job Types drop-down list. ■ For a secure print or personal saved job, enter a four digit number, ranging from 0000 through 9999, in the Numeric Password field. ■ For a proof print or saved print job, enter a document name (up to 20 alpha characters) in the Document Name field. Phaser® 5550 Printer 4-66
-
 1
1 -
2
-
3
-
4
-
5
-
6
-
7
-
8
-
9
-
10
-
11
-
12
-
13
-
14
-
15
-
16
-
17
-
18
-
19
-
20
-
21
-
22
-
23
-
24
-
25
-
26
-
27
-
28
-
29
-
30
-
31
-
32
-
33
-
34
-
35
-
36
-
37
-
38
-
39
-
40
-
41
-
42
-
43
-
44
-
45
-
46
-
47
-
48
-
49
-
50
-
51
-
52
-
53
-
54
-
55
-
56
-
57
-
58
-
59
-
60
-
61
-
62
-
63
-
64
-
65
-
66
-
67
-
68
-
69
-
70
-
71
-
72
-
73
-
74
-
75
-
76
-
77
-
78
-
79
-
80
-
81
-
82
-
83
-
84
-
85
-
86
-
87
-
88
-
89
-
90
-
91
-
92
-
93
-
94
-
95
-
96
-
97
-
98
-
99
-
100
-
101
-
102
-
103
-
104
-
105
-
106
-
107
-
108
-
109
-
110
-
111
-
112
-
113
-
114
-
115
-
116
-
117
-
118
-
119
-
120
-
121
-
 122
122 -
 123
123 -
 124
124 -
 125
125 -
 126
126 -
 127
127 -
 128
128 -
 129
129 -
 130
130 -
 131
131 -
 132
132 -
133
-
134
-
135
-
136
-
137
-
138
-
139
-
140
-
141
-
142
-
143
-
144
-
145
-
146
-
147
-
148
-
149
-
150
-
151
-
152
-
153
-
154
-
155
-
156
-
157
-
158
-
159
-
160
-
161
-
162
-
163
-
164
-
165
-
166
-
167
-
168
-
169
-
170
-
171
-
172
-
173
-
174
-
175
-
176
-
177
-
178
-
179
-
180
-
181
-
182
-
183
-
184
-
185
-
186
-
187
-
188
-
189
-
190
-
191
-
192
-
193
-
194
-
195
-
196
-
197
-
198
-
199
-
200
-
201
-
202
-
203
-
204
-
205
-
206
-
207
-
208
-
209
-
210
-
211
-
212
-
213
-
214
-
215
-
216
-
217
-
218
-
219
-
220
-
221
-
222
-
223
-
224
-
225
-
226
-
227
-
228
-
229
-
230
-
231
-
232
-
233
-
234
-
235
-
236
-
237
 |
 |
