Xerox 850DX AccXES Client Tools User's Guide version 10.0 (English)
Xerox 850DX - Phaser Color Solid Ink Printer Manual
 |
UPC - 042215454865
View all Xerox 850DX manuals
Add to My Manuals
Save this manual to your list of manuals |
Xerox 850DX manual content summary:
- Xerox 850DX | AccXES Client Tools User's Guide version 10.0 (English) - Page 1
AccXES Client Tools 10.0 User Guide 701P41529 May 2004 - Xerox 850DX | AccXES Client Tools User's Guide version 10.0 (English) - Page 2
®, AccXES, The Document Company, and the identifying product names and numbers herein are trademarks of XEROX CORPORATION. Adobe Acrobat and Photo Shop are registered trademarks of Adobe Systems Incorporated. InstallAnywhere is a registered trademark of ZeroG Software Inc. Mac OS X is a registered - Xerox 850DX | AccXES Client Tools User's Guide version 10.0 (English) - Page 3
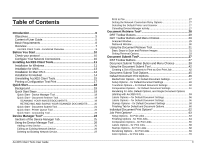
an Existing Network Device 26 Deleting an Existing Network Device 27 AccXES Client Tools User Guide Print to File 27 Setting the Network Connection Retry Options 27 Selecting the Default Printer and Scanner 27 Canceling Device Manager activity 27 Document Retrieve Tool 28 DRT Toolbar Buttons - Xerox 850DX | AccXES Client Tools User's Guide version 10.0 (English) - Page 4
AccXES Client Tools User Guide 4 Printer Queue Tool 72 Printer Queue Toolbar Buttons 72 Using the Printer Queue Tool 73 Accounting 79 Appendix 2: Paper Sizes 81 Paper and Roll Sizes for AccXES Compliant Printers 81 Appendix 3: Collate and Reverse Print Order 82 Collate and Reverse Print - Xerox 850DX | AccXES Client Tools User's Guide version 10.0 (English) - Page 5
guide is to enable the user of the AccXES Client Tools (ACT) to do the following: Ÿ To connect to an AccXES supported scanner and an AccXES supported printer color images. Content of User Guide Basic system requirements are included in this user guide, as well as instructions on how to install and - Xerox 850DX | AccXES Client Tools User's Guide version 10.0 (English) - Page 6
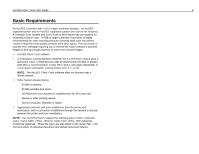
Guide 6 Basic Requirements An AccXES Controller with v 4.0 or higher controller firmware, an AccXES supported printer and an AccXES supported Client Tools software. Ÿ A workstation running Windows 2000/XP, NT 4.0 (minimum service pack 3 and 16 bit color), or RedHat Linux with an Intel Pentium 90 - Xerox 850DX | AccXES Client Tools User's Guide version 10.0 (English) - Page 7
are the device setup settings on AccXES Client Tools User Guide the Device Manager Tab, Document Retrieve preferences, and Accounting Submit Tool, on the View menu select Document Submit. NOTE: The AccXES printers support the following types of files: CalComp, Cals1, Cals2, NIRS, HPGL, HPGL - Xerox 850DX | AccXES Client Tools User's Guide version 10.0 (English) - Page 8
AccXES Client Tools User Guide 8 The Printer Queue Tab provides the means for you to view the submitted job's status in the printer queue, change a job priority, and cancel a print job. Mismatched jobs are indicated in red in the printer queue and are resolved according to what options you select - Xerox 850DX | AccXES Client Tools User's Guide version 10.0 (English) - Page 9
printer scanner and printer, via printer. Ÿ Saves document set as a single printers. AccXES Controller Ÿ Controls the AccXES scanner and printer printer. Ÿ Sends print queue status information to the Printer printer. Ÿ Sends scanned media usage data to the Controller. AccXES Compliant Printer - Xerox 850DX | AccXES Client Tools User's Guide version 10.0 (English) - Page 10
step-by-step setup instructions provided in the Network Admin Guide/Controller Setup Tool available on the Xerox website at http://www.xerox.com. (To read are recommended for support of non-TCP/IP networking environments only. Configure Your Network Connections At the printer user interface, or - Xerox 850DX | AccXES Client Tools User's Guide version 10.0 (English) - Page 11
. The default is C:\Program Files\ AccXES. Click the Next button. AccXES Client Tools User Guide Ÿ On the "Choose Shortcut Location" screen, select On the Desktop, if you want an AccXES Client Tools shortcut to show on your desktop. (Otherwise each time you want to use the software you will need to - Xerox 850DX | AccXES Client Tools User's Guide version 10.0 (English) - Page 12
Guide From the Internet Ÿ First uninstall any present version of the software on your PC. Download the AccXES Client Tools from the Xerox website as follows. Ÿ Go to http://www.xerox.com. Ÿ Choose Support & Drivers the Act preferences folder must be manually removed. The ACT preferences directory was - Xerox 850DX | AccXES Client Tools User's Guide version 10.0 (English) - Page 13
the AccXES Client Tools CD-ROM. NOTES: AccXES Client Tools does not support a parallel port on Solaris; therefore it will not be listed on the AccXES Client Tools from the Xerox website at http://www.xerox.com. (See the instructions in the Windows section of this guide, entitled "From the Internet") - Xerox 850DX | AccXES Client Tools User's Guide version 10.0 (English) - Page 14
shown here are for MacOSX 10.3.x.) From the Internet Ÿ Download the AccXES Client Tools from the Xerox website at http://www.xerox.com. (See the instructions in the Windows section of this guide, entitled "From the Internet".) 14 Installation for RedHat From CD-ROM Ÿ To install an application on - Xerox 850DX | AccXES Client Tools User's Guide version 10.0 (English) - Page 15
Act folder where your files were stored if you do not need to access them anymore (/.XES/Act ). AccXES Client Tools User Guide 15 - Xerox 850DX | AccXES Client Tools User's Guide version 10.0 (English) - Page 16
AccXES Client Tools User Guide MacOSX To uninstall the application on a UNIX system, execute the following commands: * cd /UninstallerData/ * ./Uninstall_AccXES or * Navigate to the AccXES install directory - Xerox 850DX | AccXES Client Tools User's Guide version 10.0 (English) - Page 17
printer, print a CONFIGURATION Test Print from your printer user interface, or from the Web PMT by selecting Printer Scan to Net need to be enabled on the printer. A Color feature key license is needed for scanning printer is using. This version will also show in the Printer Identification section of the - Xerox 850DX | AccXES Client Tools User's Guide version 10.0 (English) - Page 18
AccXES Client Tools Ÿ Use the CD-ROM, or download it from the Xerox website. Configure your network connections at the printer user interface, or Web PMT, so that the Subnet Mask, IP the ...Tool" sections in this user guide. Also see Appendix 5 for a list of features and how to locate each feature. - Xerox 850DX | AccXES Client Tools User's Guide version 10.0 (English) - Page 19
Printer Identification information will now appear in the bottom sections of the screen. Ÿ For more practice, see the "Using the Device Manager Tool" section of this user guide. AccXES Client Tools User Guide section of the scanner control panel and select Photo & Normal. In the Ready to Scan screen - Xerox 850DX | AccXES Client Tools User's Guide version 10.0 (English) - Page 20
your file system. Ÿ For more practice, see the "Using the Document Retrieve Tool" section of this user guide. 20 Ÿ Go to the "DRT Toolbar Button and Menu Choices" table in this user guide for a quick reference to the DRT features. Ÿ See the Appendix for a table of default settings and navigational - Xerox 850DX | AccXES Client Tools User's Guide version 10.0 (English) - Page 21
the Document Submit window. NOTE: The AccXES printers support the following types of files: CalComp, Cals1, Guide Ÿ Select the "Print document set" toolbar button to send this set of documents to the printer using the default settings. The changes will show in all documents that are listed which - Xerox 850DX | AccXES Client Tools User's Guide version 10.0 (English) - Page 22
Menu Choices" table in this user guide for a quick reference of how to use the Document Submit Tool features. Ÿ See the Appendix for a table of default settings and navigational paths to the various AccXES Client Tools features. Quick Start - Printer Queue Tool Before using this tool, configure - Xerox 850DX | AccXES Client Tools User's Guide version 10.0 (English) - Page 23
are the AMT Administrator, go to the AccXES Account Management Tool User Guide to learn how to install and use the tool. Ÿ For AccXES firmware before 7.0, you can use the Accounting Tab as follows. Go to the printer user interface, or Web PMT, or the scanner user interface. Set the Accounting - Xerox 850DX | AccXES Client Tools User's Guide version 10.0 (English) - Page 24
AccXES Client Tools User Guide Device Manager Tool* The Device Manager Tool (DMT) lists the names of all devices (printer and scanner) to which you can connect your workstation's AccXES Client Tools. This graphic shows one user's choices, with details for the selected device being shown in the - Xerox 850DX | AccXES Client Tools User's Guide version 10.0 (English) - Page 25
Tools User Guide the print Printer Model and Printer Version values will show as "UNKNOWN". Before using a serial port device as a default printer, the user will want to update the printer identification information by pressing the Get Printer ID toolbar button. When a device that does not support - Xerox 850DX | AccXES Client Tools User's Guide version 10.0 (English) - Page 26
Client Tools User Guide Using the Device Manager Tool Adding a New Device You can only create new devices with connections to network printers and scanners. can change. Accept the information and the list of supported media types (for printer versions 8.0 or greater) by selecting the Accept the device - Xerox 850DX | AccXES Client Tools User's Guide version 10.0 (English) - Page 27
the Universal Naming Convention (UNC: \\server\printer). UNC is valid only on the Windows Device Manager screen. Selecting the Default Printer and Scanner In the printer and scanner columns, click next to try making connection to your printer and scanner, if the connection is not made on - Xerox 850DX | AccXES Client Tools User's Guide version 10.0 (English) - Page 28
AccXES Client Tools User Guide 28 Document Retrieve Tool* The Document Retrieve Tool (DRT) page is . Launch raster editor for selected image. Save all images and remove them from Retrieved list. Show the retrieval setup dialog. Help for this page. In addition to these toolbar buttons, you - Xerox 850DX | AccXES Client Tools User's Guide version 10.0 (English) - Page 29
. Retrieve selected scanned image(s). Select all images Retrieve > Retrieve All Retrieve All Retrieve > Image Edit > Select All Retrieve Image Select All AccXES Client Tools User Guide 29 - Xerox 850DX | AccXES Client Tools User's Guide version 10.0 (English) - Page 30
AccXES Client Tools User Guide 30 Retrieved Window Select a file name in the Retrieved window before doing any of the following. File Options Toolbar Button Add files to document set - Xerox 850DX | AccXES Client Tools User's Guide version 10.0 (English) - Page 31
Retrieval Options". This is found in the next section of this user guide. 2. Check that the "Auto Preview" box is checked on the Retrieval the Image Quality section of the scanner control panel and select Photo, Line, Normal, or Photo & Normal. In the scanner control panel screen select the Preview - Xerox 850DX | AccXES Client Tools User's Guide version 10.0 (English) - Page 32
AccXES Client Tools User Guide 32 4. Retrieve your images manually or automatically as follows. Manually retrieving images: If you scanned JPEG images at the scanner, select the Retrieval Options toolbar button. From the drop down menu, select which file extension - Xerox 850DX | AccXES Client Tools User's Guide version 10.0 (English) - Page 33
Directory, File Prefix, and Retrieval fields. AccXES Client Tools User Guide Scan Directory - In this text field, enter the Scan Directory Scan Directory value if you change from a printer using a less than 7.0 AccXES firmware version to a printer using a 7.0 or greater AccXES firmware version. - Xerox 850DX | AccXES Client Tools User's Guide version 10.0 (English) - Page 34
AccXES Client Tools User Guide 34 Retrieval Directory - Select where on your file system that you want the files to be stored when they are retrieved. Use the Browse button to locate the directory's path. - Xerox 850DX | AccXES Client Tools User's Guide version 10.0 (English) - Page 35
C:\ACT Images\MYSCAN_20000425_0001.TIF The Raster Editor section is where you specify which raster editor (such as Photo Shop or Paint Shop Pro) you will be using for editing retrieved documents before you save them. Editor For some editors, no entry is required. AccXES Client Tools User Guide 35 - Xerox 850DX | AccXES Client Tools User's Guide version 10.0 (English) - Page 36
AccXES Client Tools User Guide 36 When you select a retrieved image file name in the to the Retrieved window. An "Invalid File Format" message will occur when raster editors do not support certain file formats. The bottom of the Retrieval Setup dialog contains the following buttons: OK - Press - Xerox 850DX | AccXES Client Tools User's Guide version 10.0 (English) - Page 37
Tab is where you create a set of documents to send to the printer as a single print job. The set can be saved as a single Insert document(s) document(s) document(s) document(s) document(s) AccXES Client Tools User Guide Print document set *Edit Default *Job Options Help for this Options screen - Xerox 850DX | AccXES Client Tools User's Guide version 10.0 (English) - Page 38
AccXES Client Tools User Guide 38 Document Submit Toolbar Button and Menu Choices Each of of document set Toolbar Button Toolbar Menu Document > Add Document Cancel document submission to the printer - click Cancel button Clear the Document Submit window Clear All - remove all documents from - Xerox 850DX | AccXES Client Tools User's Guide version 10.0 (English) - Page 39
with the Document Options of a named file. Edit > Delete Edit > Deselect All Document > Edit Document > Edit Document > Open Delete Deselect All AccXES Client Tools User Guide 39 - Xerox 850DX | AccXES Client Tools User's Guide version 10.0 (English) - Page 40
AccXES Client Tools User Guide 40 DST Tab Feature Document Options - Save As - Save the Document Options of the selected (highlighted) document to a named file. Insert Document from file system - Xerox 850DX | AccXES Client Tools User's Guide version 10.0 (English) - Page 41
System Administrator. Viewer Toolbar Button Toolbar Menu Edit > Select All Right Click Menu Select All Edit > Configure Viewer Edit > Launch Viewer AccXES Client Tools User Guide 41 - Xerox 850DX | AccXES Client Tools User's Guide version 10.0 (English) - Page 42
AccXES Client Tools User Guide Using the Document Submit Tool Creating a Set of Documents to All of these tabs are explained in detail in the "Default Document Print Options" section of this user guide. NOTE: If you want to change the options of individual documents, double click on the file name - Xerox 850DX | AccXES Client Tools User's Guide version 10.0 (English) - Page 43
to has AccXES firmware less that 7.0, then the Document Submit screen will show just the Account ID field, where you should enter your account and you go from a printer that uses AccXES firmware version 7.0 and greater, to one that uses an AccXES AccXES Client Tools User Guide firmware less than the - Xerox 850DX | AccXES Client Tools User's Guide version 10.0 (English) - Page 44
User Guide Ÿ To observe the progress of the jobs being printed, click on the Printer Queue Tab and press the "Get the list of active jobs in xds file will be created on your file system and the documents will still show on the Document Submit screen. Ÿ Clear the Document Submit window and reset the - Xerox 850DX | AccXES Client Tools User's Guide version 10.0 (English) - Page 45
are also applied to any other documents that you add to the Document Submit window. Go to the "Default Document Print Options" section of this guide for more details. Document Options Double click on the file name in the Document Submit window to go to the individual document print option tabs - Xerox 850DX | AccXES Client Tools User's Guide version 10.0 (English) - Page 46
set of tabs will appear, which are explained in this section of the user guide. NOTE: If you want to change print options for an individual document, Submit window, then select Document > Edit. The tabs that appear will show the first document's options. These options are explained in this "Default - Xerox 850DX | AccXES Client Tools User's Guide version 10.0 (English) - Page 47
printer to select the best media size installed in the printer. When a media size is loaded in the printer. Media Type - Click on this to the printer. Media Source - Select the printer's drawer location of the ", the printer will select the widest roll installed in the printer to print - Xerox 850DX | AccXES Client Tools User's Guide version 10.0 (English) - Page 48
AccXES Client Tools User Guide 48 Color Section (only for color inkjet printers) To specify ink limit and/or gamma settings for document or default options, a specific media type that supports color must first be selected. Additionally, these settings for document or default options cannot be - Xerox 850DX | AccXES Client Tools User's Guide version 10.0 (English) - Page 49
Guide Description - Any information that you type into the description field will show PostScript rendering path. If you have problems printing a PDF file, unselect this PostScript file type. If a color printer is attached, selecting this feature will saturated (bold). For Photo document types, the - Xerox 850DX | AccXES Client Tools User's Guide version 10.0 (English) - Page 50
User Guide Transform Options - for Default Document Settings The Transform Tab allows you to specify scaling, rotation, mirroring, and justification of a document. Transformation Options: Scaling - Specify the method of scaling as "Disabled", "Fixed", or "Scale to Fit". The Scale to Fit option shows - Xerox 850DX | AccXES Client Tools User's Guide version 10.0 (English) - Page 51
how the document (called a "constituent page") will be placed on the media (called the "Canvas") during page composition. AccXES Client Tools User Guide This tab is only enabled when page composition is enabled on the Job Options > Composition page, as follows. Ÿ Select the Job Options toolbar - Xerox 850DX | AccXES Client Tools User's Guide version 10.0 (English) - Page 52
AccXES Client Tools User Guide 52 Scale to Fit - Make this selection for the printer to scale the constituent page to fit on the allocated space. For roll media, the image is scaled so that the width fits the media - Xerox 850DX | AccXES Client Tools User's Guide version 10.0 (English) - Page 53
> double click a document title > Rendering Tab AccXES Client Tools User Guide Apply Rendering checkbox - Select this checkbox to enable the rendering features on this list box to set the Document Type to autoselect, graphics, photo, or lines & text. Vector Halftone - This parameter sets the - Xerox 850DX | AccXES Client Tools User's Guide version 10.0 (English) - Page 54
AccXES Client Tools User Guide 54 especially those drawn in filled areas. The factory default setting Line Width (pixels) - Use this setting to improve visibility of fine lines. Depending on your printers resolution, lines that are only a few pixels wide may appear light and/or be difficult to - Xerox 850DX | AccXES Client Tools User's Guide version 10.0 (English) - Page 55
the only valid option. Print Quality Mode - In general, the more bi-directional passes that the printer makes to create the image, the higher quality the output will be, but the longer it will pass bi-directional printing, and BEST is 4-pass bidirectional printing. AccXES Client Tools User Guide 55 - Xerox 850DX | AccXES Client Tools User's Guide version 10.0 (English) - Page 56
AccXES Client Tools User Guide Labels Options - for Default Document Settings The Default Document Labels Tab lets you create a label that will become part of the default options that are - Xerox 850DX | AccXES Client Tools User's Guide version 10.0 (English) - Page 57
of the label based on the media output. When you stand to the left of the printer, with the printed document sets coming out of the printer and going to your left, the X and Y positions are as follows. Label Location (white) and a value of 100 is all black. AccXES Client Tools User Guide 57 - Xerox 850DX | AccXES Client Tools User's Guide version 10.0 (English) - Page 58
Client Tools User Guide 58 Stamps Options - for Default Document Settings The Stamps Tab is where you specify what stamp file you want applied to your documents. Any stamp file that is loaded on the printer can be used. Stamps can be any file format that the AccXES Client Tools supports, which are - Xerox 850DX | AccXES Client Tools User's Guide version 10.0 (English) - Page 59
printer, as follows: Ÿ On the Web PMT, select Printer Defaults > Printer Setup > Stamps. Ÿ To use a stamp that is already on the printer, write down the filename of one of the stamps listed in the Printer on the Update Printer button. A "File Uploaded now be listed in the Printer Resident Stamps list for - Xerox 850DX | AccXES Client Tools User's Guide version 10.0 (English) - Page 60
Guide Finishing Tab for Default and Document Options (Folding selections are only for monochrome printers with an attached folder.) If the finishing settings which show (If the printer selected on the Device Manager Tab has AccXES firmware prior to version 9.0, and it supports bi-directional - Xerox 850DX | AccXES Client Tools User's Guide version 10.0 (English) - Page 61
the title block. Intelligent Title Block - (If you are accessing a printer that is using an AccXES Firmware version of 9.0 or greater.) For Each check box will only be enabled if the selected finisher program supports the associated option. Cross Fold - When this box contains a Tools User Guide 61 - Xerox 850DX | AccXES Client Tools User's Guide version 10.0 (English) - Page 62
settings. Ÿ After you have modified the document's options, an X will show next to the file name in the Modified column of the Document Submit each option, go to the "Default Document Print Option" section of this guide. There you will find details of the same available options, except that those - Xerox 850DX | AccXES Client Tools User's Guide version 10.0 (English) - Page 63
has AccXES firmware less that 7.0, then the Document Submit screen will show just the Account ID field, where you should enter your account . System default values can be created for three different types of default printers: color, monochrome, or unknown. These values will be used whenever the - Xerox 850DX | AccXES Client Tools User's Guide version 10.0 (English) - Page 64
AccXES Client Tools User Guide Finishing Options - for Print Jobs Sample Finishing Tab with Selected Options Reverse Print Order - This check box allows documents in the Document Submit window to be sent to the printer in the reverse order that they are listed. This "Print Reverse Order" option is - Xerox 850DX | AccXES Client Tools User's Guide version 10.0 (English) - Page 65
to display the list of folding options available to you with the type of folder that is connected to your printer. The default is whatever is set on the Web PMT. The selection is limited to Folder Bypass when the will be added to an edge of the folded document. AccXES Client Tools User Guide 65 - Xerox 850DX | AccXES Client Tools User's Guide version 10.0 (English) - Page 66
User Guide Composition that will print out together on the single media. To manually change the individual document options, double click on each type differs from the previous page, or if the maximum printer length has been reached, the printer will cut the job between pages. Setting the feature to - Xerox 850DX | AccXES Client Tools User's Guide version 10.0 (English) - Page 67
have already applied these options. The Auto Compose checkbox will be unselected upon any entry to the Job Print Options Dialog. AccXES Client Tools User Guide 67 - Xerox 850DX | AccXES Client Tools User's Guide version 10.0 (English) - Page 68
Go to the "Labels Tab - for Default Document Settings" section of this guide for an explanation of the same Labels options. NOTE: The Apply Label that are using a document specific stamp. The job stamp will override the printer's default stamp. To enable this job feature you must select the Apply - Xerox 850DX | AccXES Client Tools User's Guide version 10.0 (English) - Page 69
page. For an explanation of the rendering options, see the page entitled, "Rendering for Jobs, Default Options, and Single Document Options". AccXES Client Tools User Guide 69 - Xerox 850DX | AccXES Client Tools User's Guide version 10.0 (English) - Page 70
AccXES Client Tools User Guide Color Options - for Print Jobs Printer default color settings are made on the Make Cyan, Magenta, Yellow, and Black color ink selections. Ink Limit is used to change the maximum amount of ink used in printing. Valid values for Ink Limit are 1% to 100%. Gamma is used - Xerox 850DX | AccXES Client Tools User's Guide version 10.0 (English) - Page 71
Ÿ You can repeat this process for each listed color media type Ÿ Select OK. AccXES Client Tools User Guide 71 - Xerox 850DX | AccXES Client Tools User's Guide version 10.0 (English) - Page 72
AccXES Client Tools User Guide 72 Printer Queue Tool* Select the Printer Queue tab to view the status of documents that you have sent to the printer from the Document Submit window. Through this tool you can also cancel a print job. At the bottom of the Printer Queue Tool page are listed the paper - Xerox 850DX | AccXES Client Tools User's Guide version 10.0 (English) - Page 73
Using the Printer Queue Tool Select this toolbar button to view all jobs in the print queue (completed job submission. To change the priority of a print job, highlight the job name in the Printer Queue window and select this toolbar button. To cancel a submitted job, highlight the job name in the - Xerox 850DX | AccXES Client Tools User's Guide version 10.0 (English) - Page 74
Tab cannot be accessed. Instead, the AccXES Account Management Tool will be tracking the media usage details for multiple printers. See the Account Management Tool Administrator's Guide for Details. The information in this "Accounting Tool" section is only for use with AccXES firmware less than - Xerox 850DX | AccXES Client Tools User's Guide version 10.0 (English) - Page 75
ID - Type in the account.sub-account number for which you want to retrieve usage data from the printer and the scanner. These account numbers should be the same as were assigned to you by the system administrator data displayed in square feet or square decimeters. AccXES Client Tools User Guide 75 - Xerox 850DX | AccXES Client Tools User's Guide version 10.0 (English) - Page 76
Guide Using the Accounting Tool Querying for Account Data Ÿ Type in the password, if one is required on the scanner or printer (in the printer sub-account(s) that you specified. 76 The following shows an example of querying for account 3 data, which shows all of the data for the main 3.0 account - Xerox 850DX | AccXES Client Tools User's Guide version 10.0 (English) - Page 77
Saving the Accounting Data Ÿ After the queried scanning and printing usage data shows in the Accounting page window, press the Write Account Data to File toolbar button to invoke the the file without a file extension you will be prompted to choose a file type. AccXES Client Tools User Guide 77 - Xerox 850DX | AccXES Client Tools User's Guide version 10.0 (English) - Page 78
AccXES Client Tools User Guide Creating and Printing an Accounting Report Ÿ If you saved your accounting accounting data to a file, you may want to clear out the account so that only new data will show in future queries. Ÿ To reset an account back to 0, go to the Web PMT Accounting > Reset Account - Xerox 850DX | AccXES Client Tools User's Guide version 10.0 (English) - Page 79
printer and on so that the executable file can access the folder to create the correct .FIN file. FIN File - Creating a file for your AccXES Client To ols to connect to the folder: Ÿ Go to http://www.xerox.com. Ÿ Choose Support & Drivers folder (see the arrows). AccXES Client Tools User Guide 79 - Xerox 850DX | AccXES Client Tools User's Guide version 10.0 (English) - Page 80
Tools User Guide 80 Ÿ Selecting the executable xesfin.exe will generate the above instructions to create the FIN file, using the format of xesfin IP address folder.fin (see the example in the circle above, where the IP address is 13.142,199.2). A "successfully created" message will show when the - Xerox 850DX | AccXES Client Tools User's Guide version 10.0 (English) - Page 81
Sizes for AccXES Compliant Printers To view the current list of sizes for your printer, in the Web PMT select PRINTER DEFAULTS > PROCESSING DEFAULTS > Media > Media Size and Media Type drop down menus (or go to Appendix 2 in the XEROX WIDE FORMAT COPY SYSTEM User Guide). AccXES Client Tools User - Xerox 850DX | AccXES Client Tools User's Guide version 10.0 (English) - Page 82
Client Tools User Guide 82 Appendix 3: Collate and Reverse Print Order Collate and Reverse Print Order Combinations Three documents (A, B, C) were sent from the Document Submit screen to a printer which prints the documents face up. Each page that comes out of the printer, therefore, stacks face - Xerox 850DX | AccXES Client Tools User's Guide version 10.0 (English) - Page 83
The PostScript language supports the ability to job and behave according to PostScript Language Reference Manual. [If PostScript collation parameter is true, PostScript files in the job and behave according to PostScript Language Reference Manual [see item 1]. Ÿ A PostScript setting of Collation = - Xerox 850DX | AccXES Client Tools User's Guide version 10.0 (English) - Page 84
Client Tools User Guide 84 Printing PostScript Files Using the DST in the AccXES Client Tools If the PostScript file does not contain the settings for Collation, Folding, or Copies: Ÿ The settings within the Document Submit Tool will always take precedence over the default printer settings, and - Xerox 850DX | AccXES Client Tools User's Guide version 10.0 (English) - Page 85
-PostScript file #1> 1 copy of - This is caused by the PostScript file containing the settings: Collation = True and Copies = 3 AccXES Client Tools User Guide 85 - Xerox 850DX | AccXES Client Tools User's Guide version 10.0 (English) - Page 86
AccXES Client Tools User Guide 86 EXAMPLES With Folding set in DST and a PostScript file is first within the Document List. EXAMPLE 3: Your settings: - In the Document Submit Tool include " - Xerox 850DX | AccXES Client Tools User's Guide version 10.0 (English) - Page 87
> 1 copy - 1 copy - This is caused by the PostScript file containing a setting to collate the documents. AccXES Client Tools User Guide 87 - Xerox 850DX | AccXES Client Tools User's Guide version 10.0 (English) - Page 88
AccXES Client Tools User Guide 88 Appendix 5: Navigational Paths and Default Values for AccXES Client Tools Options FEATURE AccXES firmware version in use by the printer Account ID DEFAULT GenericAccountID Add documents to a set Auto Compose Off Auto Preview On Auto Rotate On Automatic - Xerox 850DX | AccXES Client Tools User's Guide version 10.0 (English) - Page 89
ForcePlot =On Manual = Off - for default document AccXES Client Tools User Guide NAVIGATIONAL PATH TO LOCATE THE FEATURE Document Submit > Edit.) > File Format: select Cals1 or Cals2 Printer Queue Tab > select job title > , or Cancel Apply Ink Limit and/or Apply Gamma boxes > OK > Go - Xerox 850DX | AccXES Client Tools User's Guide version 10.0 (English) - Page 90
AccXES Client Tools User Guide FEATURE Color options - for single document(s) DEFAULT Copies, number Options: Go to Document Submit Tab> Job Options Button> Color Tab > Select media type > Select Apply Ink Limit and/or Apply Gamma boxes > OK > Go to Document Submit Tab > double click on file name - Xerox 850DX | AccXES Client Tools User's Guide version 10.0 (English) - Page 91
default options Document options Document Set, create a set Document Set, job options Document Set, open existing set AccXES Client Tools User Guide NAVIGATIONAL PATH TO LOCATE THE FEATURE Document Submit Tab > > Setup Tab > Update Defaults button Document Submit Tab > Double click on - Xerox 850DX | AccXES Client Tools User's Guide version 10.0 (English) - Page 92
AccXES Client Tools User Guide FEATURE Document, add to a set DEFAULT Document, edit options Finishing Tab> select folder type> (If the printer selected on the Device Manager Tab has AccXES firmware prior to version 9.0, and it supports bi-directional communication, you also need to select a - Xerox 850DX | AccXES Client Tools User's Guide version 10.0 (English) - Page 93
, or double click on file name > Setup Tab > File Format: JPEG , or double click on file name, (or select a filename > Document > AccXES Client Tools User Guide 93 - Xerox 850DX | AccXES Client Tools User's Guide version 10.0 (English) - Page 94
AccXES Client Tools User Guide 94 FEATURE DEFAULT NAVIGATIONAL PATH TO LOCATE THE FEATURE Label defaults , (or select Job > Job Options) > Composition tab AccXES compliant printers: Set same media types in the printer user interface for each roll. WIDE FORMAT PRINT SYSTEM 8855: Press the - Xerox 850DX | AccXES Client Tools User's Guide version 10.0 (English) - Page 95
Images Off Page Composition Paste copied document options Paste document PDF Plot Nesting Printer default NAVIGATIONAL PATH TO LOCATE THE FEATURE Document Submit Tab > , or double Document Submit Tab > , (or select Job > Job Options) > Composition tab AccXES Client Tools User Guide 95 - Xerox 850DX | AccXES Client Tools User's Guide version 10.0 (English) - Page 96
Guide ), or right click on file name > Preview. If preview does not show, check that "Create Preview" is enabled on the scanner. Document Retrieve Tab Setup tab Document Submit Tab or Printer Queue Tab > Tab , (or Document Submit Tab > > Setup Printer Queue Tab > Printer Queue Tab > , or Web - Xerox 850DX | AccXES Client Tools User's Guide version 10.0 (English) - Page 97
preferences) AccXES Client Tools User Guide NAVIGATIONAL PATH TO LOCATE THE FEATURE > Print, (or Job > Print) Document Submit Tab or Printer Queue Tab> Job > Job Options> Setup Tab , or Document button to locate path of the raster editor (like Photo Shop) Document Retrieve Tab > right click on a - Xerox 850DX | AccXES Client Tools User's Guide version 10.0 (English) - Page 98
AccXES Client Tools User Guide 98 FEATURE DEFAULT Retrieve all scanned images in specified account Retrieve scanned images automatically Retrieve selected scanned images Retrieved image, add to document set Retrieved - Xerox 850DX | AccXES Client Tools User's Guide version 10.0 (English) - Page 99
> Retrieve Image) Document Retrieve Tab > All Device Manager Tab , or Image > Keep All, (or Image > Keep Image), or right click > Keep AccXES Client Tools User Guide 99 - Xerox 850DX | AccXES Client Tools User's Guide version 10.0 (English) - Page 100
AccXES Client Tools User Guide FEATURE Select All DEFAULT Single Page Job Stamp, for a default document Stamp, for a job Stamp, for single document(s) Stamps defaults TIFF Apply Stamp=Off Rotation= - Xerox 850DX | AccXES Client Tools User's Guide version 10.0 (English) - Page 101
name, (or select a filename > Document > Document Submit Tab or , (or Job > Job Options) > Setup tab. If Accounting is enabled and your printer uses AccXES firmware version 7.0 or higher, you must also enter an assigned Account ID. Edit > Configure Viewer Edit > Launch Viewer AccXES Client - Xerox 850DX | AccXES Client Tools User's Guide version 10.0 (English) - Page 102
Quick Start, 3, 18 Summary of features, 85 Uninstalling, 3, 15 User Guide Content, 3, 5 Using the Accounting Tool, 4, 23, 73 Using the Tool, 3, 20, 31 Using the Document Submit Tool, 3, 22, 41 Using the Printer Queue Tool, 4, 70 Appendix Default Values, 4, 78 Navigational Paths, 4, 78 Auto compose - Xerox 850DX | AccXES Client Tools User's Guide version 10.0 (English) - Page 103
, 89, 95, 97 Folder Add folder, 63, 77 Folder method, 63, 77 Folder type, 58, 63, 77 Sort bin, 58, 63 AccXES Client Tools User Guide Title block, 58, 59, 63 Folder Type, 63, 76, 77, 89 Help screens - Default Web Browser, 5 HPGL file format, 6, 21, 48, 56, 90 Installing AccXES - Xerox 850DX | AccXES Client Tools User's Guide version 10.0 (English) - Page 104
AccXES Client Tools User Guide Plot nesting, 64 PostScript File format, 4, 6, 21, 48, 62, 79, 80, 81 19, 26 Using the Document Retrieve Tool, 3, 20, 31 Using the Document Submit Tool, 3, 22, 41 Using the Printer Queue Tool, 4, 70 Raster Editor, 28, 30, 33, 34, 35, 52, 94 Rendering Options, 3, 52, 67 - Xerox 850DX | AccXES Client Tools User's Guide version 10.0 (English) - Page 105
This page has been intentionally left blank. AccXES Client Tools User Guide 105 - Xerox 850DX | AccXES Client Tools User's Guide version 10.0 (English) - Page 106
Prepared by: Xerox Corporation Global Knowledge & Language Services 800 Phillips Road Building 845-17S Webster, New York 14580-9791 USA Printed in the United States of America XEROX™, AccXES, and acronym, are trademarks of Xerox Corporation 2004. All other product names mentioned herein are
-
 1
1 -
 2
2 -
 3
3 -
 4
4 -
 5
5 -
 6
6 -
 7
7 -
8
-
9
-
10
-
11
-
12
-
13
-
14
-
15
-
16
-
17
-
18
-
19
-
20
-
21
-
22
-
23
-
24
-
25
-
26
-
27
-
28
-
29
-
30
-
31
-
32
-
33
-
34
-
35
-
36
-
37
-
38
-
39
-
40
-
41
-
42
-
43
-
44
-
45
-
46
-
47
-
48
-
49
-
50
-
51
-
52
-
53
-
54
-
55
-
56
-
57
-
58
-
59
-
60
-
61
-
62
-
63
-
64
-
65
-
66
-
67
-
68
-
69
-
70
-
71
-
72
-
73
-
74
-
75
-
76
-
77
-
78
-
79
-
80
-
81
-
82
-
83
-
84
-
85
-
86
-
87
-
88
-
89
-
90
-
91
-
92
-
93
-
94
-
95
-
96
-
97
-
98
-
99
-
100
-
101
-
102
-
103
-
104
-
105
-
106
 |
 |

AccXES Client Tools
10.0 User Guide
701P41529
May
2004