Xerox M118i Scan to E-Mail Quick Setup Guide - Page 3
Enabling Scan to E-mail, Set the Administrator E-mail Address - scan to email
 |
UPC - 095205219265
View all Xerox M118i manuals
Add to My Manuals
Save this manual to your list of manuals |
Page 3 highlights
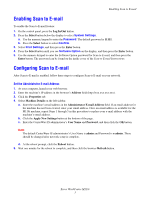
Enabling Scan to E-mail Enabling Scan to E-mail To enable the Scan to E-mail feature: 1. On the control panel, press the Log In/Out button. 2. Press the Select button below the display to select System Settings. a. Use the numeric keypad to enter the Password. The default password is 11111. b. Press the Select button to select Confirm. 3. Select Print Settings, and then press the Enter button. 4. Press the Select button until you see Software Option on the display, and then press the Enter button. 5. Use the numeric keypad to enter the Software Option password for Scan to E-mail, and then press the Enter button. The password can be found on the inside cover of the Scan to E-mail Instructions. Configuring Scan to E-mail After Scan to E-mail is enabled, follow these steps to configure Scan to E-mail on your network. Set the Administrator E-mail Address 1. At your computer, launch your web browser. 2. Enter the machine's IP address in the browser's Address field (http://xxx.xxx.xxx.xxx). 3. Click the Properties tab. 4. Select Machine Details on the left sidebar. a. Enter the machine's email address in the Administrator E-mail Address field. If an email address for the machine has not been created, enter your email address. Once an email address is available for the M118i machine, repeat Steps 1 through 5 in this procedure to replace your e-mail address with the machine's email address. b. Click the Apply New Settings button at the bottom of the page. c. Enter the CentreWare IS administrator's User Name and Password, and then click the OK button. Note The default CentreWare IS administrator's User Name is admin and Password is x-admin. These should be changed after network setup is complete. d. At the reboot prompt, click the Reboot button. 5. Wait one minute for the reboot to complete, and then click the browser Refresh button. Xerox WorkCentre M118i 3
-
 1
1 -
 2
2 -
 3
3 -
 4
4 -
 5
5
 |
 |
