Xerox P8EX Spire CXP8000 Color Server Software Installation Guide
Xerox P8EX - DocuPrint B/W Laser Printer Manual
 |
UPC - 095205085853
View all Xerox P8EX manuals
Add to My Manuals
Save this manual to your list of manuals |
Xerox P8EX manual content summary:
- Xerox P8EX | Spire CXP8000 Color Server Software Installation Guide - Page 1
Software Installation Guide English Spire CXP8000 Color Server for Xerox DocuColor 8000 Digital Press version 1.0 731-00293A-EN www.creo.com - Xerox P8EX | Spire CXP8000 Color Server Software Installation Guide - Page 2
Creo products and services referred to in Xerox Corporation in the U.S. and/or other countries. Other brand or product names are the trademarks or registered trademarks of their respective owners. No copying, distribution, publication, modification, or incorporation of this document, in whole or part - Xerox P8EX | Spire CXP8000 Color Server Software Installation Guide - Page 3
Application Software 15 Disk Striping ...15 Using the Configuration Wizard...24 Installing and Configuring Novell Client for Spire 37 Configuring the McAfee VirusScan ...37 Enabling Unix Connectivity...37 Activating Windows XP...38 Backing Up the Creo System Partition ...41 Performing a Test Print - Xerox P8EX | Spire CXP8000 Color Server Software Installation Guide - Page 4
This page is intentionally left blank. - Xerox P8EX | Spire CXP8000 Color Server Software Installation Guide - Page 5
and recovery procedure at any time that you want to back up and restore the Creo system partition and the job list database. • Windows XP activation is not required. To reinstall the software configuration: • Perform either a complete overwrite of the entire system or only a system partition. • When - Xerox P8EX | Spire CXP8000 Color Server Software Installation Guide - Page 6
2 Spire CXP8000 Color Server 1.0 Software Installation Guide The following scenarios will assist you in the following software and configuration: • Windows XP Professional • MS Service Pack 1a • Internet Explorer 6.0 • Spire CXP8000 Color Server for Xerox DocuColor 8000 Digital Color Press • - Xerox P8EX | Spire CXP8000 Color Server Software Installation Guide - Page 7
Server Software 3 Disk Configuration The following table outlines the Spire CXP8000 color server disk configuration: Disk 0 Disk 1 Disk 2 Disk 3 C: Windows XP Professional software Creo application D: Spool files Shared files Output directory files APR high-resolution files Backup folder Image - Xerox P8EX | Spire CXP8000 Color Server Software Installation Guide - Page 8
4 Spire CXP8000 Color Server 1.0 Software Installation Guide Backing Up and Restoring the Software We recommend that you restore the software , insert CD #1A, and proceed to step 4. 1. Turn on your computer. 2. Place CD #1A (Windows XP Fast Install) in the DVD-ROM drive. 3. Restart the computer. - Xerox P8EX | Spire CXP8000 Color Server Software Installation Guide - Page 9
, and press ENTER. The Norton Ghost window appears. If a Norton License Agreement window appears, click OK to continue. The files on partition C are copied to an image file on partition D. The process takes about three minutes to complete. 7. A message appears instructing you to remove the CD from - Xerox P8EX | Spire CXP8000 Color Server Software Installation Guide - Page 10
6 Spire CXP8000 Color Server 1.0 Software Installation Guide 4. In the Scripts window, double-click Backup_Joblist.bat. 5. When the backup is complete, the following message appears. - Xerox P8EX | Spire CXP8000 Color Server Software Installation Guide - Page 11
Backup. 2. If your Spire color server is on, and the Spire workspace is open: a. Exit the workspace. b. Place CD #1A (Windows XP Fast Install) into the DVD-ROM drive. c. On the Windows desktop, follow the path, Start > Shut Down > Restart > OK. Wait until the PC DOS 7.1 Startup menu appears. If your - Xerox P8EX | Spire CXP8000 Color Server Software Installation Guide - Page 12
Installation Guide 3. When the PC DOS Start Up menu appears, the following options are available: • Creo Software Complete Overwrite Installation • Creo Software Preservation Installation . 7. If you press Y (Yes), the Norton Ghost window appears, and the files on partition D are restored to - Xerox P8EX | Spire CXP8000 Color Server Software Installation Guide - Page 13
the Spire CXP8000 color server workspace is open, exit the workspace and proceed to step 3. 1. Turn on your computer. 2. Exit the Spire application. 3. On the Windows desktop, double-click My Computer, and follow the path, D: > Backup > Scripts. 4. In the Scripts - Xerox P8EX | Spire CXP8000 Color Server Software Installation Guide - Page 14
10 Spire CXP8000 Color Server 1.0 Software Installation Guide The following message appears. 5. Press Y to continue. The following window appears. 6. Press any key to continue. You have completed Restoring the Job List Database. - Xerox P8EX | Spire CXP8000 Color Server Software Installation Guide - Page 15
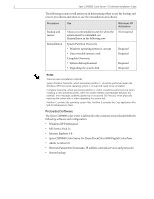
Xerox/Creo supported application is loaded on the Spire CXP8000 color server. Such applications have to be reloaded after the Complete Overwrite installation is completed. • Creo Software Preservation Installation #1: • CD #1A and #1B (Windows XP Professional Fast Install) One CD #2: • CD #2 (Spire - Xerox P8EX | Spire CXP8000 Color Server Software Installation Guide - Page 16
Spire CXP8000 Color Server 1.0 Software Installation Guide Reinstalling the Software Complete Overwrite When possible available) Install Novell Client for Spire (if required) Install virus protection software (highly recommended) Enable UNIX connectivity (if required) Activate Windows XP Back up - Xerox P8EX | Spire CXP8000 Color Server Software Installation Guide - Page 17
ˆ Gateway, WINS address, and DNS information ˆ Required AppleTalk zone ˆ IPX information For more details, refer to the Xerox Installation and Planning Guide. Reinstalling the Windows XP Professional Operating System 1. If your Spire color server is on, and the Spire color server workspace is open - Xerox P8EX | Spire CXP8000 Color Server Software Installation Guide - Page 18
to open the next part of the image. Please either insert the next disk and choose OK. 4. Remove the CD #1A from the DVD-ROM, insert CD # 1B, and click OK. The system copies files and automatically restarts. This process takes about eight minutes. 5. When the Windows XP Professional Setup screen - Xerox P8EX | Spire CXP8000 Color Server Software Installation Guide - Page 19
installation starts. 4. When the License Agreement window opens, click Yes to continue the Spire CXP8000 color server installation. 5. When the installation is to activate Windows XP, ignore it until you have completed configuring the system. For more information, see Activating Windows XP on page - Xerox P8EX | Spire CXP8000 Color Server Software Installation Guide - Page 20
16 Spire CXP8000 Color Server 1.0 Software Installation Guide The Computer Management window appears. 2. Maximize the window. Establishing the Correct Disk Striping Procedure 1. In the Computer Management window, verify that Disks 1, 2 and 3 are labelled Dynamic. Perform the procedure: Striping - Xerox P8EX | Spire CXP8000 Color Server Software Installation Guide - Page 21
Disks. Foreign disks are any hard disks that were recognized as dynamic disks from a previous installation. 3. Verify that the Foreign disk group (3 of 3 disks) check box is selected, and click OK. The following window appears. 4. Click OK. The dynamic disks are striped as shown in the following - Xerox P8EX | Spire CXP8000 Color Server Software Installation Guide - Page 22
18 Spire CXP8000 Color Server 1.0 Software Installation Guide 5. Close the Computer Management window. 6. The Image Disks File System is not Formatted message appears. Click OK. 7. You have completed Disk Striping. • If configuration recovery information is available, proceed to - Xerox P8EX | Spire CXP8000 Color Server Software Installation Guide - Page 23
Reinstalling the Spire CXP8000 Color Server Software 19 4. Verify that the Computer Management window appears similar to the following illustration. 5. Proceed to Converting the Disks to Dynamic Disks. Converting the Disks to Dynamic Disks 1. Position the mouse pointer in - Xerox P8EX | Spire CXP8000 Color Server Software Installation Guide - Page 24
20 Spire CXP8000 Color Server 1.0 Software Installation Guide 4. Verify that the Computer Management window appears similar to the following illustration. Creating a Striped Volume 1. Position the mouse pointer in the white area to the right of the first disk, right- - Xerox P8EX | Spire CXP8000 Color Server Software Installation Guide - Page 25
Reinstalling the Spire CXP8000 Color Server Software 21 2. Click Next. 3. Select Striped Volume, and click Next. The following window appears. 4. Select Disk 2 and click Add, then select Disk 3 and click Add. - Xerox P8EX | Spire CXP8000 Color Server Software Installation Guide - Page 26
22 Spire CXP8000 Color Server 1.0 Software Installation Guide 5. Disks 1, 2, and 3 are listed under Selected. Click Next. The following window appears. 6. Select the Do not assign a drive letter or drive path option, and click Next. 7. Select the Do not format this volume option, and click Next. - Xerox P8EX | Spire CXP8000 Color Server Software Installation Guide - Page 27
New Volume wizard, click Finish. Confirming the Disk Striping After you click Finish, the following window appears. 1. Confirm that the Computer Management window appears as illustrated in the previous window, and verify that the drive letters have been removed. 2. Close the Computer Management - Xerox P8EX | Spire CXP8000 Color Server Software Installation Guide - Page 28
24 Spire CXP8000 Color Server 1.0 Software Installation Guide 4. To make sure that the changes take effect, restart the Spire CXP8000 color server. On the Windows desktop, follow the path: Start > Shut Down > Restart > OK. You have completed Disk Striping. 5. After the computer restarts, the - Xerox P8EX | Spire CXP8000 Color Server Software Installation Guide - Page 29
Reinstalling the Spire CXP8000 Color Server Software 25 Configuring the Spire CXP8000 Color Server for the First Time The Spire CXP8000 color server Configuration Wizard automatically appears the first time you turn on the Spire CXP8000 color server. ¾ Verify that the First Time Configuration - Xerox P8EX | Spire CXP8000 Color Server Software Installation Guide - Page 30
26 Spire CXP8000 Color Server 1.0 Software Installation Guide Configuring the Host Name The Spire CXP8000 is taken from the computer name you typed during the Windows XP Professional Fast Installation, see Reinstalling the Operating System (Windows XP) on page 13. 1. Verify that the correct host - Xerox P8EX | Spire CXP8000 Color Server Software Installation Guide - Page 31
Server Software 27 The Computer Name Changes dialog box appears. Attention: Do not change the Workgroup or Domain in the following step 3 unless instructed. If you are changing the Domain/Workgroup, verify that you have the user name and password for the Domain/ Workgroup. 3. In the Computer - Xerox P8EX | Spire CXP8000 Color Server Software Installation Guide - Page 32
28 Spire CXP8000 Color Server 1.0 Software Installation Guide 1. Check that the Date and Time are set correctly, and click Next. Otherwise, click Change. 2. Set the Date and Time correctly. 3. Select the Time Zone tab. 4. Set the time zone and click OK. 5. Click Next. - Xerox P8EX | Spire CXP8000 Color Server Software Installation Guide - Page 33
. Configuring the IP Address 1. The Spire CXP8000 color server is set to DHCP server configuration. Click Next to continue. 2. If you would like to specify a specific IP address, click the Change button. - Xerox P8EX | Spire CXP8000 Color Server Software Installation Guide - Page 34
30 Spire CXP8000 Color Server 1.0 Software Installation Guide The Local Area Connection Properties dialog box appears, (also subnet mask and default gateway) information, refer to the Xerox Installation and Planning Guide. 4. Click OK. 5. In the Local Area Connection Properties dialog box, click OK. - Xerox P8EX | Spire CXP8000 Color Server Software Installation Guide - Page 35
Reinstalling the Spire CXP8000 Color Server Software 31 Configuring the AppleTalk Zone This option enables you to change the AppleTalk network zone that your Spire CXP8000 color server will appear in. Note: This option only applies to networks that contain Macintosh computers. 1. Click the Change - Xerox P8EX | Spire CXP8000 Color Server Software Installation Guide - Page 36
32 Spire CXP8000 Color Server 1.0 Software Installation Guide 2. Open the This system will appear in zone list. 3. Select the required zone from the list. 4. Click OK. 5. In the Local Area Connection Properties dialog box, click OK. 6. Click Next. - Xerox P8EX | Spire CXP8000 Color Server Software Installation Guide - Page 37
the Spire CXP8000 Color Server Software 33 Completing the Configuration After the configuration is complete, the View Configuration window appears. 1. Click Close. The following window appears. 2. Click Finish to complete the First-time setup. When the backup is complete, the following message - Xerox P8EX | Spire CXP8000 Color Server Software Installation Guide - Page 38
34 Spire CXP8000 Color Server 1.0 Software Installation Guide Changing the Administrator Name and User Password (Optional) To change the administrator name and password: 1. On the Windows desktop, right-click My Computer and select Manage. 2. Expand the Local Users and Groups tree, and select - Xerox P8EX | Spire CXP8000 Color Server Software Installation Guide - Page 39
. Note: When restoring the configuration all the custom tables/sets will be added to the system (for example, imported user-defined imposition templates, new virtual printers, and downloaded fonts). - Xerox P8EX | Spire CXP8000 Color Server Software Installation Guide - Page 40
36 Spire CXP8000 Color Server 1.0 Software Installation Guide 7. Click OK. The following message appears. 8. Click Yes. After the recovery is complete, the following confirmation message appears. 9. Click OK. 10. Click Next in Step 2 Recovery window. The View Configuration window appears. - Xerox P8EX | Spire CXP8000 Color Server Software Installation Guide - Page 41
applications, and on the Windows desktop, click Start > Installing and Configuring Novell Client for Spire If you want to install and configure the Novell Client for the Spire color server, see Appendix C, Installing Xerox® DocuColor 8000 Digital Color Press User Guide, Chapter 3-Unix Connectivity. - Xerox P8EX | Spire CXP8000 Color Server Software Installation Guide - Page 42
Color Server 1.0 Software Installation Guide Activating Windows XP Windows XP contains software-based product activation technology, which means that you need to activate your copy of Windows XP in order to use it. There are two methods by which you can activate Windows XP, both of which are - Xerox P8EX | Spire CXP8000 Color Server Software Installation Guide - Page 43
to register, select the No, I don't want to register now, let's just activate windows option. If you do want to register your copy of Windows XP, select the Yes, I want to register and activate Windows at the same time option. 5. Click Next. The Collecting registration data screen appears. 6. If - Xerox P8EX | Spire CXP8000 Color Server Software Installation Guide - Page 44
1.0 Software Installation Guide 7. Congratulations, you have successfully activated your copy of Windows XP. 8. Click OK to quit the Let's activate Windows wizard. Activating Windows XP by Phone 1. On the Windows desktop, click Start > Activate Windows. The Let's activate Windows wizard appears - Xerox P8EX | Spire CXP8000 Color Server Software Installation Guide - Page 45
Reinstalling the Spire CXP8000 Color Server Software 41 3. Click Next. The Activate Windows by phone screen appears. 4. Follow the instructions on the Activate Windows by phone screen. 5. Repeat steps 3 to 8 of the previous (Internet) procedure to complete the activation process. Backing Up the - Xerox P8EX | Spire CXP8000 Color Server Software Installation Guide - Page 46
CXP8000 Color Server 1.0 Software Installation Guide Reinstalling the Software Preservation Installation Note: To enable the Database on page 5. The Software Preservation Installation mirrors the Software Complete Overwrite Installation (including Windows XP activation), but does not affect the - Xerox P8EX | Spire CXP8000 Color Server Software Installation Guide - Page 47
: Formatting erases all data stored in the Storage folder. It is recommended to back up your data, if possible, to an external device. 1. On the Windows desktop, follow the path: Start > CXP8000 > CXP8000 Tools > Format Image Disks. The following message appears. 2. Close all open - Xerox P8EX | Spire CXP8000 Color Server Software Installation Guide - Page 48
44 Spire CXP8000 Color Server 1.0 Software Installation Guide 3. Click OK. 4. Click OK. 5. Click OK. 6. To enable the changes to take effect, restart your computer. - Xerox P8EX | Spire CXP8000 Color Server Software Installation Guide - Page 49
desk top, select My Computer and right-click New Volume (F:). 2. From the menu select Format. The Format New Volume (F:) window appears. 3. Select the Format options you require, and click Start. 4. After the formatting is complete, click OK. 5. Click Close. The Formatting Complete message appears - Xerox P8EX | Spire CXP8000 Color Server Software Installation Guide - Page 50
46 Spire CXP8000 Color Server 1.0 Software Installation Guide The Computer Management window appears, similar to the following example. You have completed all the procedures and are ready to use your external SCSI device. - Xerox P8EX | Spire CXP8000 Color Server Software Installation Guide - Page 51
server and a Novell NDS server, in a Novell working environment, is provided in the Spire CXP8000 Color Server for Xerox DocuColor 8000 Digital Color Press, User Guide. Installing Novell Client for Spire 1. Close the Spire workspace and the Spire application. 2. Close all other applications. 3. On - Xerox P8EX | Spire CXP8000 Color Server Software Installation Guide - Page 52
Color Server 1.0 Software Installation Guide 4. Click Install. 5. Click Reboot. 6. You have completed Installing Novell Client for Spire. Proceed to Configuring Novell Client for Spire. Configuring Novell Client for Spire 1. After the system reboots, the Novell Setup window appears. 2. Type the - Xerox P8EX | Spire CXP8000 Color Server Software Installation Guide - Page 53
in the Novell Setup window. 4. Type the Context Name. If you do not know the name, click Browse. 5. Double-click the appropriate Context Name. The Context Name appears in the Novell Setup window. 6. Click OK. The Spire workspace appears. 7. You have completed Installing Novell Client for Spire - Xerox P8EX | Spire CXP8000 Color Server Software Installation Guide - Page 54
50 Spire CXP8000 Color Server 1.0 Software Installation Guide Uninstalling Novell Client for Spire Uninstall Novell and select Properties. 5. Clear the Novell for Client for Windows check box. 6. Make sure that Novell for Client for Windows is selected, and click the Uninstall button. 7. Click - Xerox P8EX | Spire CXP8000 Color Server Software Installation Guide - Page 55
. Note: It is recommended to close all applications before installing and configuring the McAfee VirusScan. After installing the McAfee VirusScan, perform the following configuration procedures. 1. Right-click the VShield icon in the Windows Taskbar and follow the path, Properties > System Scan. - Xerox P8EX | Spire CXP8000 Color Server Software Installation Guide - Page 56
52 Spire CXP8000 Color Server 1.0 Software Installation Guide The following window appears. 2. Clear the Outbound files check box, and select the Exclusion tab. The following window appears. - Xerox P8EX | Spire CXP8000 Color Server Software Installation Guide - Page 57
Configuring the McAfee VirusScan 53 3. Click the Add button. 4. Type D:\Output in the File or folder to exclude area, and click OK. The following window appears. - Xerox P8EX | Spire CXP8000 Color Server Software Installation Guide - Page 58
54 Spire CXP8000 Color Server 1.0 Software Installation Guide 5. Select the Action tab. The following window appears. 6. In the Possible actions area, clear the Delete File, Move File, and Exclude File check boxes. 7. In the When a virus is found area, open - Xerox P8EX | Spire CXP8000 Color Server Software Installation Guide - Page 59
VirusScan 55 9. Open the VirusScan console by following the path, Programs > Network Associates > VirusScan Console. 10. In the VirusScan Console window, double-click AutoUpdate. In the Task Properties window, select the Schedule tab. 11. Select the Enable check box and in the Run area select - Xerox P8EX | Spire CXP8000 Color Server Software Installation Guide - Page 60
This page is intentionally left blank. - Xerox P8EX | Spire CXP8000 Color Server Software Installation Guide - Page 61
D:\Sample_files\Color_files\ATF US (Letter or Tabloid)\ATF_tab.PS. 3. Double-click on the file to add it to the list for importing. 4. Select Virtual Printer: ProcessPrint. 5. Click Submit. The file is processed, printed, and sent to the Storage Folder. Note: If the job is not printed or is waiting - Xerox P8EX | Spire CXP8000 Color Server Software Installation Guide - Page 62
This page is intentionally left blank.
-
 1
1 -
 2
2 -
 3
3 -
 4
4 -
 5
5 -
 6
6 -
 7
7 -
8
-
9
-
10
-
11
-
12
-
13
-
14
-
15
-
16
-
17
-
18
-
19
-
20
-
21
-
22
-
23
-
24
-
25
-
26
-
27
-
28
-
29
-
30
-
31
-
32
-
33
-
34
-
35
-
36
-
37
-
38
-
39
-
40
-
41
-
42
-
43
-
44
-
45
-
46
-
47
-
48
-
49
-
50
-
51
-
52
-
53
-
54
-
55
-
56
-
57
-
58
-
59
-
60
-
61
-
62
 |
 |

www.creo.com
Software
Installation Guide
English
Spire CXP8000 Color Server
for Xerox DocuColor 8000
Digital Press
version 1.0
731-00293A-EN