Yamaha 140 Owner's Manual
Yamaha 140 Manual
 |
UPC - 027108937908
View all Yamaha 140 manuals
Add to My Manuals
Save this manual to your list of manuals |
Yamaha 140 manual content summary:
- Yamaha 140 | Owner's Manual - Page 1
YDP-160 YDP-140 Owner's Manual For information on assembling the keyboard stand, refer to the instructions at the end of this manual. IMPORTANT - Check your power supply - (YDP-160) Make sure that your local AC mains voltage matches the voltage specified on the name plate on the bottom panel. In - Yamaha 140 | Owner's Manual - Page 2
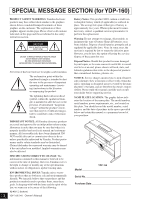
instruction section. CAUTION RISK OF ELECTRIC SHOCK DO NOT OPEN CAUTION: TO REDUCE THE RISK OF ELECTRIC SHOCK. DO NOT REMOVE COVER (OR BACK). NO USER-SERVICEABLE PARTS INSIDE. REFER SERVICING TO QUALIFIED SERVICE PERSONNEL. See bottom of Keyboard Yamaha. ) 2 YDP-160/140 Owner's Manual Battery Notice - Yamaha 140 | Owner's Manual - Page 3
YDP-140) This product utilizes batteries or an external power supply (adapter). DO NOT connect this product to any power supply or adapter other than one described in the manual, on the name plate, or specifically recommended by Yamaha contact a qualified service representative to perform the - Yamaha 140 | Owner's Manual - Page 4
and remove any dirt or dust which may have accumulated on it. Power cord (YDP-160) • Use YDP-140) • (Users within Canada or U.S.) Use the specified adaptor (PA-150 or an equivalent recommended by Yamaha Then have the instrument inspected by qualified Yamaha service personnel. • Never insert or remove an - Yamaha 140 | Owner's Manual - Page 5
the power cord from the AC outlet. Then have the instrument inspected by qualified Yamaha service personnel. • Do not place vinyl, plastic or rubber objects on the instrument, since this might discolor the panel or keyboard. • Do not rest your weight on, or place heavy objects on the instrument, and - Yamaha 140 | Owner's Manual - Page 6
Welcome Thank you for purchasing the Yamaha Digital Piano! We recommend that you read this manual carefully so that you can take full advantage of the advanced and convenient functions of your new digital piano. We also recommend that you keep this manual in a safe, convenient place for future - Yamaha 140 | Owner's Manual - Page 7
Operation Guide (separate sheet) • "50 Greats for the Piano" (Music Book) • AC Power cord (YDP-160) • Bench* • AC Power adaptor (YDP-140)* Users within Canada or U.S.: PA-150 or an equivalent Others: PA-5D or an equivalent * Included or optional depending on locale. Tuning Unlike an acoustic piano - Yamaha 140 | Owner's Manual - Page 8
Yamaha YDP-160/140 digital piano offers a rich and versatile range of sounds, which are created using Yamaha's proprietary sampling tone-generation system, "AWM Dynamic Stereo Sampling." The AWM (Advanced Wave Memory) is a sampling system which creates sound close to that of an acoustic instrument - Yamaha 140 | Owner's Manual - Page 9
Song Data from a Computer to the Digital Piano 32 Transmitting Song Data from the Digital Piano to a Computer 33 Backing up Data and Initializing the Settings 33 Troubleshooting 34 Options 34 Keyboard Stand Assembly 35 Index 39 Appendix Specifications 41 YDP-160/140 Owner's Manual 9 7 - Yamaha 140 | Owner's Manual - Page 10
These buttons enable you to select a song to play back from voice demo songs or from "50 Greats for the Piano." (pages 16, 17) They also enable you to change the voice or tempo. (pages 19, 24) [MASTER VOLUME] Adjust the volume level using this control (page 14). 8 10 YDP-160/140 Owner's Manual - Yamaha 140 | Owner's Manual - Page 11
Connect the pedal cord (page 37). Bottom of the keyboard MIDI PEDAL OUT IN [AC IN] (YDP-160) Connect the included power cord here. (page seen when viewed from the rear of the instrument. Bottom of the keyboard [DC IN 12V] (YDP-140) Connect the included power adaptor here. (page 13) Pedals Use - Yamaha 140 | Owner's Manual - Page 12
Digital Piano Before Using the Digital Piano AC outlet. Then have the instrument inspected by qualified Yamaha service personnel. Music Rest To raise the music rest: 1. as far as it will go. 2. Raise the two metal supports (at the rear of the music rest). 3. Gently lower YDP-160/140 Owner's Manual 10 - Yamaha 140 | Owner's Manual - Page 13
Before Using the Digital Piano Connecting the Power Cord (YDP-160) Read the instructions below very carefully to make sure that you correctly connect the power cord. YDP-140 users should skip to the next section "Connecting the Power Adaptor (YDP-140)" for information on connecting the power - Yamaha 140 | Owner's Manual - Page 14
Before Using the Digital Piano Turning the Power On Press the [POWER] (YDP-160) or [STANDBY/ON] (YDP-140) switch on the right end of the keyboard to turn on the power to the unit. The power indicator located below the left end of the keyboard lights up. [POWER] (YDP-160)/ [STANBY/ON] (YDP-140) Power - Yamaha 140 | Owner's Manual - Page 15
period of time, or your hearing may be damaged. Before Using the Digital Piano Bottom of the keyboard Using the Headphone Hanger (for YDP-160 only) A headphone hanger is included in the package so that you may be damaged. Standard stereo phone plug 13 PHONES PHONES YDP-160/140 Owner's Manual 15 - Yamaha 140 | Owner's Manual - Page 16
other demo songs are Yamaha's original pieces (©2008 Yamaha Corporation). Key C1 E1(YDP-160) D 1(YDP-140) F1(YDP-160) G1(YDP-160) E1(YDP-140) G 1(YDP-160) Voice Name GRAND PIANO 1 Nr.6, BWV.530 Composer W. A. Mozart J. S. Bach J. S. Bach J. S. Bach J. S. Bach 16 YDP-160/140 Owner's Manual 14 - Yamaha 140 | Owner's Manual - Page 17
demo. Press the [DEMO/SONG] button to stop playback. Listening to 50 Piano Preset Songs Listening to 50 Piano Preset Songs This digital piano provides performance data for 50 piano songs as well as voice demo 50 piano preset songs will not be transmitted via MIDI. 15 YDP-160/140 Owner's Manual 17 - Yamaha 140 | Owner's Manual - Page 18
the [DEMO/SONG] button. Selecting a Song Playback Channel If a song loaded from the computer uses a voice that is not supported by DEMO/SONG] button and the [PIANO/ VOICE] button simultaneously, press the B6 key. All channels 1 through 16 will produce the sound. B6 16 18 YDP-160/140 Owner's Manual - Yamaha 140 | Owner's Manual - Page 19
wish to select a particular voice directly, press and hold down the [PIANO/ VOICE] button, then press one of the C1-A1 (YDP-160) or C1-F1 (YDP-140) keys. Turn the [MASTER VOLUME] control to adjust the volume level while playing the keyboard. C1 D1 F1 G1 The lowest key C1 D1 E1 F1 G1 - Yamaha 140 | Owner's Manual - Page 20
functions in the same way as a damper pedal on an acoustic piano. When the damper pedal is pressed, notes sustain longer. Releasing Sostenuto (Center) Pedal If you play a note or chord on the keyboard and press the sostenuto pedal while the note(s) are held, those notes YDP-160/140 Owner's Manual - Yamaha 140 | Owner's Manual - Page 21
digital reverb effects that add extra depth and expression to the sound to create a realistic acoustic ambience. Procedure While holding down the [PIANO keys while holding down the [PIANO/VOICE] button. The depth range is higher keys. While holding down the [PIANO/VOICE] button, press the A4 key - Yamaha 140 | Owner's Manual - Page 22
the volume of Voice 1 in relation to Voice 2. F 5 C6 F 6 -6 -4 -2 +1 +3 +6 -5 -3 -1 0 +2 +4 +5 The highest key 2. Exit Dual mode and return to normal play mode. While holding down the [PIANO/VOICE] button, press one of the C1-A1 (YDP160) or C1-F1 (YDP-140) keys. 22 YDP-160/140 Owner's Manual 20 - Yamaha 140 | Owner's Manual - Page 23
semitones). [DEMO/SONG] + [PIANO/VOICE] + F 2 key: Transposes the pitch down by six semitones. [DEMO/SONG] + [PIANO/VOICE] + keyboard. Fine-tuning the Pitch You can fine-tune the pitch of the entire instrument. This function is useful when you play the digital piano YDP-160/140 Owner's Manual 23 - Yamaha 140 | Owner's Manual - Page 24
Selecting & Playing Voices Using the Metronome Your digital piano features a built-in metronome (a device that keeps an accurate tempo) that is convenient for practicing. 120 while the metronome is stopped, press the [METRONOME], [+] and [-] buttons simultaneously. 24 YDP-160/140 Owner's Manual 22 - Yamaha 140 | Owner's Manual - Page 25
depending on how fast or strong you hit the keys (keyboard touch). Select an appropriate keyboard touch for the voices, songs or your taste. This setting down the [PIANO/VOICE] button, press one of the A6-C7 keys to select the desired touch sensitivity. A6 C7 23 YDP-160/140 Owner's Manual 25 - Yamaha 140 | Owner's Manual - Page 26
digital piano down the [PIANO/VOICE] button, press one of the C1-A1 (YDP160) or C1-F1 (YDP-140) keys to engage Record mode while a demo song is playing. Recording REC] button to engage Record mode. Without playing the keyboard, press the [REC] button again to apply the YDP-160/140 Owner's Manual 24 - Yamaha 140 | Owner's Manual - Page 27
or [-] button to change the song tempo. If you are using the metronome (page 24) during demo song playback, press the [+] or [-] button to change the song tempo. You can also press keys to change To cancel the erase operation, press the [REC] button again. 25 YDP-160/140 Owner's Manual 27 - Yamaha 140 | Owner's Manual - Page 28
transmit the voice demo songs and the 50 piano preset songs from this instrument to another MIDI device. For more information on the transmission and reception of song data, refer to "Transmitting Song Data between the Computer and the Digital Piano" on page 32. 26 28 YDP-160/140 Owner's Manual - Yamaha 140 | Owner's Manual - Page 29
Digital Piano to a Computer Connecting the Digital Piano to a Computer Connecting the digital piano to a computer using the MIDI connectors enables you to transfer MIDI data between the piano the piano and (such as a Yamaha UX16) to connect user's manual that to the user's manual that came with the - Yamaha 140 | Owner's Manual - Page 30
, the keyboard of this instrument does not play the internal voices. Procedure While holding down the [DEMO/SONG] and [PIANO/VOICE] buttons simultaneously, press the C6 key. Pressing the C6 key repeatedly toggles between Local Control On and Off. C6 28 30 YDP-160/140 Owner's Manual The highest - Yamaha 140 | Owner's Manual - Page 31
channel (the keyboard voice does 6). Procedure While holding down the [DEMO/SONG] and [PIANO/VOICE] buttons simultaneously, press the C voice you are playing on the keyboard will not be affected by the Procedure While holding down the [DEMO/SONG] and [PIANO/VOICE] buttons simultaneously, press the - Yamaha 140 | Owner's Manual - Page 32
a sequencer that supports SMF. This instrument also supports SMF. While Musicsoft Downloader is operating, the [REC] and [PLAY] button indicators on the piano light up. Before you use this instrument, close the Musicsoft Downloader window and quit the application. 30 32 YDP-160/140 Owner's Manual - Yamaha 140 | Owner's Manual - Page 33
Transmitting Song Data between the Computer and the Digital Piano Transmitting Song Data from the Digital Piano to a Computer Musicsoft Downloader enables you to transfer the user note that initializing the settings will delete your recorded song (user song). YDP-160/140 Owner's Manual 33 31 - Yamaha 140 | Owner's Manual - Page 34
connected. Make sure to securely insert the pedal cord into the [PEDAL] jack (page 37). Options BC-100 Bench A comfortable bench styled to match your Yamaha digital piano. UX16 USB-MIDI interface HPE-150 Headphones 32 34 YDP-160/140 Owner's Manual - Yamaha 140 | Owner's Manual - Page 35
Stand Assembly Keyboard Stand Assembly CAUTION • Be careful not to confuse parts, 1-3 Attach D and E to C by finger-tightening the long screws 1 (6 × 20mm). E 1-2 C 1-3 D 1-1 L Headphone hanger set (YDP-160 only) 4 × 10 mm thin screws ×2 5 Headphone hanger 33 YDP-160/140 Owner's Manual 35 - Yamaha 140 | Owner's Manual - Page 36
L R R Keyboard Stand Assembly 2. Attach B. Depending on the model of digital piano you purchased, the surface color of one side of B may be different from the other side. In this case, position B so that the side of the surface color similar to D and E faces the player. 2-1 Place the lower side of - Yamaha 140 | Owner's Manual - Page 37
PEDAL NLET Keyboard Stand Assembly 7-2 Connect the plug on the power cord to the rear panel connector. YDP-140 7-1 Connect the power cord (for YDP-160) or power adaptor (for YDP-140) to the unit. YDP-160 7-1 Set the headphone hanger. (for YDP-160 only) Use the included two screws 5 (4 × - Yamaha 140 | Owner's Manual - Page 38
Keyboard Stand Assembly After completing the assembly, please check the following. • Are there any parts left over? → Review the assembly procedure and correct any errors. • Is this instrument clear of doors and other Do not Hold here. hold here. Do not hold here. 36 38 YDP-160/140 Owner's Manual - Yamaha 140 | Owner's Manual - Page 39
14 Preset songs ➝ 50 Piano Preset Songs 17 Program Change 31 R REC 10, 26 Recording your Performance 26 Reverb 21 Right Pedal 20 S SMF 32 Soft Pedal 20 Song 17 Song Playback Channel 18 Sostenute Pedal 20 Stand 35-37 Standard MIDI File 32 STANDBY/ON 10 YDP-160/140 Owner's Manual 39 37 - Yamaha 140 | Owner's Manual - Page 40
Index Start/Stop playback 50 Piano Preset Songs 17 Demo Songs 16 T Tempo 24 Touch Sensitivity 25 Transmitting Song Data 32 Transporting 7 Transposition 23 Troubleshooting 34 U User Song 26 V Voice 19 40 YDP-160/140 Owner's Manual 38 - Yamaha 140 | Owner's Manual - Page 41
Effect Volume Controls Pedal Demo Songs Recording Function Recording/Playback Format Loading song data from a computer Jacks/Connectors Main Amplifiers Speakers Dimensions [W × D × H] (with music rest) Weight Accessories YDP-160 YDP-140 GH(Graded Hammer) keyboard GHS(Graded Hammer Standard - Yamaha 140 | Owner's Manual - Page 42
to the presence of important operating and maintenance (servicing) instructions in the literature accompanying the product. IMPORTANT SAFETY INSTRUCTIONS 1 Read these instructions. 2 Keep these instructions. 3 Heed all warnings. 4 Follow all instructions. 5 Do not use this apparatus near water - Yamaha 140 | Owner's Manual - Page 43
YDP-160/140 FCC INFORMATION (U.S.A.) 1. IMPORTANT NOTICE: DO NOT MODIFY THIS UNIT! This product, when installed as indicated in the instructions contained in this manual, meets FCC requirements. Modifications not expressly approved by Yamaha problem Yamaha Corporation of America, Electronic Service - Yamaha 140 | Owner's Manual - Page 44
Tel: 819-7551 SINGAPORE Yamaha Music Asia Pte., Ltd. #03-11 A-Z Building 140 Paya Lebor Road, Singapore 409015 Tel: 747-4374 TAIWAN Yamaha KHS Music Co., Ltd. -8650 Tel: +81-53-460-2312 HEAD OFFICE Yamaha Corporation, Pro Audio & Digital Musical Instrument Division Nakazawa-cho 10-1, Naka-ku,
-
 1
1 -
 2
2 -
 3
3 -
 4
4 -
 5
5 -
 6
6 -
 7
7 -
8
-
9
-
10
-
11
-
12
-
13
-
14
-
15
-
16
-
17
-
18
-
19
-
20
-
21
-
22
-
23
-
24
-
25
-
26
-
27
-
28
-
29
-
30
-
31
-
32
-
33
-
34
-
35
-
36
-
37
-
38
-
39
-
40
-
41
-
42
-
43
-
44
 |
 |
YDP-160
YDP-140
For information on assembling the keyboard stand, refer to the instructions at the end of this manual.
IMPORTANT
— Check your power supply —
(YDP-160)
Make sure that your local AC mains voltage matches the voltage specified on the name plate on the bottom
panel. In some areas a voltage selector may be provided on the bottom panel of the main keyboard unit near the
power cord. Make sure that the voltage selector is set for the voltage in your area. The voltage selector is set at
240V when the unit is initially shipped.
To change the setting use a "minus" screwdriver to rotate the selector dial so that the correct voltage appears
next to the pointer on the panel.
Owner's Manual
EN