Yamaha Audiogram3 Owners Manual
Yamaha Audiogram3 Manual
 |
View all Yamaha Audiogram3 manuals
Add to My Manuals
Save this manual to your list of manuals |
Yamaha Audiogram3 manual content summary:
- Yamaha Audiogram3 | Owners Manual - Page 1
English USB AUDIO INTERFACE AUDIOGRAM 3 Owner's Manual BMeoOddieewndu'ennmgespalron'ilseituMnganual Manual de instrucciones औѻCઆ0໌ॻ(10.11.30) Deutsch Français Español РRуuсsсsiкaиnй EN DE FR ES RU JA AUDIOGRAM 3 Owner's Manual 1 - Yamaha Audiogram3 | Owners Manual - Page 2
INFORMATION STATEMENT (DECLARATION OF CONFORMITY PROCEDURE) Responsible Party : Yamaha Corporation of America Address : 6600 Orangethorpe Ave., Buena Park, Calif. 90620 Telephone : 714-522-9011 Type of Equipment : COMPUTER RECORDING SYSTEM Model Name : AUDIOGRAM 3 This device complies with Part 15 - Yamaha Audiogram3 | Owners Manual - Page 3
set all volume levels to minimum. Handling caution • When turning on the AC power in your audio system, always turn on monitor speakers LAST, to avoid speaker damage. When turning the power off, monitor USB cable from the device immediately. Then have the device inspected by qualified Yamaha service - Yamaha Audiogram3 | Owners Manual - Page 4
and cannot be held responsible for the results of the use of this manual and the software. • This disk containing the software is not meant for use with an audio/visual system (CD player, DVD player, etc.). Do not attempt to use the disk on equipment other than a computer. • Future upgrades of - Yamaha Audiogram3 | Owners Manual - Page 5
Thank you for choosing a Yamaha AUDIOGRAM 3 Computer Recording System. The AUDIOGRAM 3 includes a USB audio interface for digital audio data transfer, and Cubase AI DAW (Digital Audio Workstation) software for Windows® and Macintosh® computer operating systems. With the AUDIOGRAM 3 and your personal - Yamaha Audiogram3 | Owners Manual - Page 6
connects to your computer via the supplied USB cable. Stereo audio data is transferred in both directions-from the interface to the computer, and vice-versa-via the USB connection (44.1 kHz or 48 kHz sampling frequency). No Driver Installation Required (page 8) The AUDIOGRAM system uses the standard - Yamaha Audiogram3 | Owners Manual - Page 7
the PHANTOM +48V switch (★) on when using a phantom-powered condenser microphone. Microphone Keyboard, etc. Audio system Headphones To connect a device such as a microphone: To connect an instrument such as an electric guitar or bass: USB cable Cubase AI Computer AUDIOGRAM 3 Owner's Manual 7 - Yamaha Audiogram3 | Owners Manual - Page 8
and log on to the Administrator account. 2 Insert the included DVD-ROM into the computer's DVD-ROM drive. 3 Follow the on-screen instructions to install the Cubase AI software. NOTE • In order to have continuous use of Cubase AI, including support and other benefits, you will need to register the - Yamaha Audiogram3 | Owners Manual - Page 9
you connect to the computer's USB connector, or change the connection to a different USB port, a driver installation display may appear. If this occurs, wait until the installation is complete before proceeding. 4 Turn the power to the audio system (monitor speakers). AUDIOGRAM 3 Owner's Manual 9 - Yamaha Audiogram3 | Owners Manual - Page 10
to the PDF manual provided with the software. Cubase AI Setup 1 Set the computer output to the maximum level. For details on how to make the setting refer to the "The recorded sound is too low in level." section in the "Troubleshooting" on page 20. 2 Launch Cubase AI. Windows: Click [Start] → [All - Yamaha Audiogram3 | Owners Manual - Page 11
Switch]. Mac: Select [VST Audio System] in the [Devices] field on the left side of the window. Select [USB Audio CODEC] in the [ASIO Driver] field on the right side of the window. A dialog box will appear asking "Do you want to switch the ASIO driver?". Click [Switch]. AUDIOGRAM 3 Owner's Manual 11 - Yamaha Audiogram3 | Owners Manual - Page 12
Quick Guide 5 Select [ASIO DirectX Full Duplex Driver](Windows), [USB Audio CODEC](Mac) in the [Devices] field on the left side of the Device Setup window, and click [Control Panel] on the right side of the window. Windows: The ASIO Direct Sound Full Duplex Setup dialog box will be displayed. Check - Yamaha Audiogram3 | Owners Manual - Page 13
, and then switch to [ASIO DirectX Full Duplex Driver]. Also set the [Outputs] in the same way, and then close the window. Mac: If "Not Connected" is selected in the [Audio Device] field, click on the "Not Connected" indication, and then switch to [USB Audio CODEC]. Also set the [Outputs] in the - Yamaha Audiogram3 | Owners Manual - Page 14
on. 3 Play the instrument to be recorded, and adjust the AUDIOGRAM LEVEL controls so that the Clipping indicator never lights. Clipping indicator 4 Specify the point at which you want to start recording via the ruler at the top of the window for the project. Click the black area - Yamaha Audiogram3 | Owners Manual - Page 15
and minimum noise: For optimum sound quality with minimum noise, the AUDIOGRAM signal levels should be set as high as possible without clipping. Check signal levels to be sent to Cubase AI for recording using the AUDIOGRAM level indicators while the Cubase monitoring button ( ) is turned off. Adjust - Yamaha Audiogram3 | Owners Manual - Page 16
( ) on the left side of the channel strip to open the VST audio channel settings window. Click Inserts 1 and select "Reverb - RoomWorks SE." NOTE For further details refer to the pdf manual provided with the Cubase AI software. It's a good idea to lower the channel fader a bit before adding an - Yamaha Audiogram3 | Owners Manual - Page 17
44.1 kHz, and 16 bit. 9 Click [Export]. Progress of the mixdown operation will be shown in a progress window. When the progress window closes the mixdown is complete. NOTE Files created by mixdown can be directly played back using the Windows Media Player, or iTunes. AUDIOGRAM 3 Owner's Manual 17 - Yamaha Audiogram3 | Owners Manual - Page 18
Connector Connects the AUDIOGRAM interface to a USB port on your computer via the supplied USB cable. In addition to transferring audio data between the AUDIOGRAM interface and the computer, the USB cable supplies power from the computer to the AUDIOGRAM interface. NOTE Yamaha recommends that you - Yamaha Audiogram3 | Owners Manual - Page 19
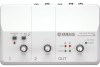
. A PHONES Jack Connects a pair of headphones to this jack. The PHONES jack outputs the same signal as the STEREO OUT jacks. 5 Level indicator Adjusts the monitor level. Input 3 LEVEL Record controls Playback 6 OUT LEVEL control Cubase AI Output AUDIOGRAM 3 Owner's Manual 19 - Yamaha Audiogram3 | Owners Manual - Page 20
Panel], then double-click the "Sounds and Audio Devices" icon to open the "Sounds and Audio Devices Properties" dialog window. 2. Click the "Audio" tab. 3. Set "Sound playback: Default device" and "Sound recording: Default device" to "USB Audio CODEC." 4. Click [OK]. 20 AUDIOGRAM 3 Owner's Manual - Yamaha Audiogram3 | Owners Manual - Page 21
output" select "USB Audio CODEC". ❑ Is the sound output of the Cubase AI application assigned properly? For setup details refer to page 8 of the Quick Guide. The recorded sound is too low in level. ❑ Is the computer's output level setting too low? We recommend that you set the computer output to the - Yamaha Audiogram3 | Owners Manual - Page 22
conver- sion quality" to "Good." Don't change these settings if you are not familiar with your computer's operating system. Check that the file system is set properly, and make sure that you have a plenty of free memory (more than 128 megabytes). If the audio files you are recording or playing are - Yamaha Audiogram3 | Owners Manual - Page 23
level of CH 1, 2 x 1 48 V, only for CH1 x 1 Adjusts the overall signal x 1 Red x 1 2 points (green, red) x 1 Green USB bus-powered 180 x 61 x 112 mm 490 g Cubase AI DVD-ROM USB cable Owner's Manual ■ Dimensional Diagrams W: 180 H: 61 52 2 108 D: 112 36 Unit: mm 128 AUDIOGRAM 3 Owner's Manual - Yamaha Audiogram3 | Owners Manual - Page 24
AUDIOGRAM 3 Owner's Manual COMBO MIC A [-60 to -16dBu] INPUT 1 MIC B [-60 to -16dBu] INST [-44 to 0dBu] PHANTOM (+48V) MIC/INST Hi-Z [-6dBu] HA Level (Gain) [10 LPF LIN RIN LPF [-6dBu] [-20dBu] LPF LO RO USB AUDIO D- USB D+ GND +3.7V REG Vbus (+5V) SSPND LPF 12MHz IN Specifications - Yamaha Audiogram3 | Owners Manual - Page 25
the written consent of the manufacturer. • Yamaha makes no representations or warranties with regard to the use of the software and documentation and cannot be held responsible for the results of the use of this manual and the software. • This disk is NOT for audio/visual purpose. Do not attempt to - Yamaha Audiogram3 | Owners Manual - Page 26
Musical Instruments Division Nakazawa-cho 10-1, Naka-ku, Hamamatsu, Japan 430-8650 Tel: +81-53-460-2432 Yamaha Web Site (English only) http://www.yamahasynth.com/ Yamaha Manual Library http://www.yamaha.co.jp/manual/ ASIA THE PEOPLE'S REPUBLIC OF CHINA Yamaha Music & Electronics (China) Co.,Ltd
-
 1
1 -
 2
2 -
 3
3 -
 4
4 -
 5
5 -
 6
6 -
 7
7 -
8
-
9
-
10
-
11
-
12
-
13
-
14
-
15
-
16
-
17
-
18
-
19
-
20
-
21
-
22
-
23
-
24
-
25
-
26
 |
 |

1
AUDIOGRAM 3 Owner’s Manual
AUDIOGRAM 3
Owner’s Manual
C0 (10.11.30)
English
Deutsch
Français
Español
日本語
Russian
Owner’s Manual
Bedienungsanleitung
Mode d’emploi
Manual de instrucciones
Руководство пользователя
取扱説明書
USB AUDIO INTERFACE
Русский
English
Deutsch
Français
Español
日本語
FR
ES
RU
JA
EN
DE