Yamaha DJX-IIB Owner's Manual
Yamaha DJX-IIB Manual
 |
View all Yamaha DJX-IIB manuals
Add to My Manuals
Save this manual to your list of manuals |
Yamaha DJX-IIB manual content summary:
- Yamaha DJX-IIB | Owner's Manual - Page 1
Owner's Manual - Yamaha DJX-IIB | Owner's Manual - Page 2
MESSAGE SECTION This product utilizes batteries or an external power supply (adapter). DO NOT connect this product to any power supply or adapter other than one described in the manual, on the name plate, or specifically recommended by Yamaha. WARNING: Do not place this product in a position where - Yamaha DJX-IIB | Owner's Manual - Page 3
or modify them in any way. The instrument contains no user-serviceable parts. If it should appear to be malfunctioning, discontinue use immediately and have it inspected by qualified Yamaha service personnel. • Do not expose the instrument to rain, use it near water or in damp or wet conditions, or - Yamaha DJX-IIB | Owner's Manual - Page 4
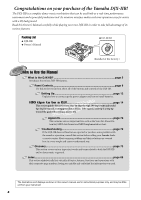
, Preset Pattern list, MIDI data format and MIDI implementation chart. Troubleshooting page 70 If the DJX-IIB does not function as expected or you have some problem with the sound or operation, consult this section before calling your Yamaha dealer or service center. Most common problems and their - Yamaha DJX-IIB | Owner's Manual - Page 5
to the DJX-IIB! The DJX-IIB "hears" the beat (from a connected CD player, MD player, etc.) and automatically locks into the rhythm by auto-adjusting the bpm of the DJX-IIB's pattern. G MIDI Compatibility for Even Greater DJ Performance Power ...........page 65 Grow your own patterns! With MIDI, you - Yamaha DJX-IIB | Owner's Manual - Page 6
Manual 4 What is the DJX-IIB 5 Contents 6 Panel Controls 8 Top Panel 8 Changing the Scratch Pad CD 10 Rear Panel & Connections 11 Setting Up (Power supply connections) ........12 Switching On the Power 13 Data Backup & Initialization 13 100 Tips to be a DJ! 14 Chapter 1 Pattern Player - Yamaha DJX-IIB | Owner's Manual - Page 7
DJX-IIB as the master 65 Tip 98 Sync applications - using the DJX-IIB as the slave 66 Tip 99 Get more Patterns 67 Tip 100 Create your own Patterns 68 Appendix 70 Troubleshooting 70 Error Message List 71 Specifications 72 Glossary 73 Pattern List 75 Voice List 76 Drum Kit List 78 MIDI - Yamaha DJX-IIB | Owner's Manual - Page 8
Panel Controls Top Panel q This is the DJX-IIB! P !8 01 o i !0 e !1 01 t !4 !2 w y r u !3 !6 !5 !7 N Be careful! Avoid pressing three or more panel buttons simultaneously. Doing so can cause the DJX-IIB to behave erratically. 8 - Yamaha DJX-IIB | Owner's Manual - Page 9
button stops playback of the Patterns and Scratch loops. Start the DJX-IIB's patterns by pressing one of the PATTERN PLAYER buttons and stop them by pressing the PATTERN STOP button. !3 SCRATCH PAD 26 This amazing feature emulates a real turntable. Turning or rocking the CD back and forth lets you - Yamaha DJX-IIB | Owner's Manual - Page 10
or CD-ROM) on the Scratch Pad. 4 Replace and tighten the screw. I About the included CD-ROM The included CD-ROM contains the following data: DJX-II/IIB Premium CD-ROM • Live Movie at DJX Satellite • DJX-II/IIB Function Guide - a fun way to get to know the DJX-IIB and its features! • Pattern Launcher - Yamaha DJX-IIB | Owner's Manual - Page 11
Rear Panel & Connections Panel Controls • Connect the AC adaptor (PA-5B, PA-5C or other adaptor specifically recommended by Yamaha) to the power supply jack. See page 12 for details. Refer to page 13. CD MD A standard pair of stereo headphones can be plugged in here for private practice or late - Yamaha DJX-IIB | Owner's Manual - Page 12
Setting Up (Power supply connections) Although the DJX-IIB will run either from an optional AC adaptor or batteries, Yamaha recommends use of the more environmentally safe AC adaptor. Follow the instructions below according to the power source you intend to use. The batteries should be considered - Yamaha DJX-IIB | Owner's Manual - Page 13
, and/or remove the batteries from the instrument. Data Backup & Initialization Except for the User Pattern data, all DJX-IIB panel settings are reset to their initial settings whenever the power is turned on. The Use Pattern data is backed up (i.e. retained in memory) as long as an AC adaptor is - Yamaha DJX-IIB | Owner's Manual - Page 14
......... Advanced tricks and techniques ... Power user features Chapter 1 Pattern Player Basics Start your DJ apprenticeship right here! The Patterns are the basic building blocks of the DJX-IIB sound - they're the rhythmic foundation for everything else on this dance machine. 1 Work out with the - Yamaha DJX-IIB | Owner's Manual - Page 15
. The A/B BANK button is on and Pattern button 1 flashes. (The flashing Pattern button indicates Bank select standby.). Flashes Notice that Pattern A1 is still playing. It will only change if you press another Pattern button.. 3 Press Pattern button 3. Now Pattern B3 is playing. 4 Select Bank A again - Yamaha DJX-IIB | Owner's Manual - Page 16
it up! As you learned in Tip 2 above, each of the DJX-IIB's Patterns has ten different Variations. The main Patterns are played with buttons 1, 3, and 5, while the fill-in Patterns are played with buttons 2 and 4. (Fillin Patterns are usually used as dynamic breaks or transitions.) In general, the - Yamaha DJX-IIB | Owner's Manual - Page 17
Player Basics q e w q p 01 Flashes w 01.03 e p 03 Current Pattern - now playing. New Pattern - waiting in standby. The new Pattern is up and playing! G Exploring other Patterns Category # Pattern Name TECHNO 01 Japan Beatz 05 Detroit DISCOMANIA CLUB VIBES 11 Disco House 17 Hard - Yamaha DJX-IIB | Owner's Manual - Page 18
"! The key to great timing is knowing where the "one" is. And the "one" is the first beat in a four-beat Pattern. Another key to timing is feeling the downbeats (four downbeats to a Pattern). The DJX-IIB makes this easy to do! Check this out: While the Pattern is playing, the dot in the bpm display - Yamaha DJX-IIB | Owner's Manual - Page 19
for special effects and sudden tempo changes. Actually, the DJX-IIB takes care of this for you - automatically! If you change Patterns while a Pattern is playing, the bpm setting stays the same. However, if you stop the Pattern and start a new one, the bpm is automatically reset to best suit the - Yamaha DJX-IIB | Owner's Manual - Page 20
the sound of the effect. (Each effect lets you control a different key parameter.) Changes the depth of the Pattern is playing back and/or while you're playing the Scratch Pad can overload the processing power of the DJX-IIB manually. q Start the Pattern. w Select the desired effect, turn the Effect on, - Yamaha DJX-IIB | Owner's Manual - Page 21
new set of pitches and harmonics, for a massively dynamic metallic sound. Use the CONTROL knob to change the frequency of the oscillator. Use this sparingly! You'll want to save this awesome, powerful effect for certain climactic parts of your performance - and then blow people away! 11 Flanger This - Yamaha DJX-IIB | Owner's Manual - Page 22
! Use the CONTROL knob on this happening effect to change the "slice" patterns, and come up with new rhythms on the fly! 14 Delay Delay is a popular effect that repeats the sound in rhythm. (There's a related Echo effect; see Tip 15 below.) And check this out - no rocket science needed! The DJX-IIB - Yamaha DJX-IIB | Owner's Manual - Page 23
above), Echo produces repeats of the sound for rhythmic effect. However, the CONTROL knob is used to change the number of repeats (also called "feedback"). Naturally, the DJX-IIB automatically syncs this effect to the bpm of the Pattern. 16 Lo-Fi Need to grunge up your sound, but Distortion is too - Yamaha DJX-IIB | Owner's Manual - Page 24
Chapter 3 Isolator Basics More sonic control to you! The Isolator lets you tailor the sound just the way you want it - phat and round, thin and edgy, or big and banging! - Yamaha DJX-IIB | Owner's Manual - Page 25
Chapter 4 Filter Basics Pump up the energy on the dance floor a serious notch or two with these powerful filter tools! 19 Cutoff and Resonance The CUTOFF and RESONANCE knobs control the filter effects. And what are "filter effects," you ask? Well, filters have been used for a long time with analog - Yamaha DJX-IIB | Owner's Manual - Page 26
and work the Scratch Pad while the Pattern's playing back - adding your own rhythmic parts and accents to the mix! Rock the Scratch Pad back and forth with your finger. Set the Crossfader to around the center. No need for vinyl here - leave your records at home! The DJX-IIB has a whopping total - Yamaha DJX-IIB | Owner's Manual - Page 27
the first downbeat, then rock it back (counter-clockwise) on the second downbeat, and so on. Notice that the scratch sound is actually a musical part that changes with the chords in the Pattern. Tap your foot or your heel with the beats (count out loud if you want, too!), and try to hit - Yamaha DJX-IIB | Owner's Manual - Page 28
and back) on every beat! For this example, call up P39 and play V B5. For your scratching, try out Scratch 01 and rock the pad back and forth in short 1/8 turns. One Two Three Four 23 Sixteenth-note scratching Now let's go a little bit faster. Since sixteenth notes are half the value of eighth - Yamaha DJX-IIB | Owner's Manual - Page 29
hi-hat groove - that's where the shuffle is! One Two Three Four 25 Triggering drum loops from the Scratch Pad A common DJ technique is to scratch a vinyl loop a couple of times, then let the rhythm play. On the DJX-IIB, you can do the same thing! Call up Scratch 01 and press the LOOP button (the - Yamaha DJX-IIB | Owner's Manual - Page 30
The DJX-IIB's Scratch Pad has a slew of special sound effects you can fly into your tracks and give your mixes a unique, dynamic touch. Select Scratch 63. Turn the Scratch Pad clockwise to get one sound effect, and turn it counterclockwise to get a different sound! 63 28 Scratch low, scratch high - Yamaha DJX-IIB | Owner's Manual - Page 31
and tools listed below. DJX-II/IIB Premium CD-ROM • Live Movie at DJX Satellite • DJX-II/IIB Function Guide - a fun way to get to know the DJX-IIB and its features! • Pattern Launcher Application - for loading new Patterns to the DJX-IIB! • Extra Patterns - a selection of specially programmed - Yamaha DJX-IIB | Owner's Manual - Page 32
up to speed and some DJ tricks up your sleeve, it's time to work on the Parts! This chapter gives you the keys to improvising interesting arrangements and instrumental textures. Not to mention creating some slammin' and smokin' tracks! 32 What is a Part? The DJX-IIB Patterns are made up of several - Yamaha DJX-IIB | Owner's Manual - Page 33
ve muted several Parts, you can turn them all back on again instantly! Simply press LOOP - do this on the "one" downbeat - Pattern, spin the pad counter-clockwise two full rotations. (Make sure Part Mixer is selected!) This takes the Part mix down to the bare bones! Now, start V A1. Let the Pattern - Yamaha DJX-IIB | Owner's Manual - Page 34
Basics The DJX-IIB has a feather-touch Crossfader - just like those found on real DJ mixers - that lets you crossfade between your beats and your scratching! 35 Work the Crossfader! This short-throw, feather-touch Crossfader gives you easy and fast control over the Pattern/Scratch balance. The - Yamaha DJX-IIB | Owner's Manual - Page 35
37 Crossfader cuts This is one of the most basic moves in the DJ's collection of Crossfader techniques - cutting in with a scratch. Hit a Pattern and keep the Crossfader all the way to the left so that only the Pattern is heard. While the Pattern is playing, work the Scratch Pad (even though you can - Yamaha DJX-IIB | Owner's Manual - Page 36
subdued. To change the key, hold down the KEY SHIFTER button and simultaneously turn the Scratch Pad. The amount of shift is shown in the display (-5 to 0 to +6, re using the DJX-IIB with an external sound source, such as CD or vinyl - letting you match the key of the Pattern to the key on - Yamaha DJX-IIB | Owner's Manual - Page 37
gradually bring the bpm up in speed to get the groove really happening! N Be careful! If the Pattern is stopped and you turn the scratch pad past 280.0, "Sync" appears in the display and the DJX-IIB goes into the Sync Mode (see page 66). To get out of this mode, simply turn the - Yamaha DJX-IIB | Owner's Manual - Page 38
create your own smooth fade-ins and fade-outs. One specific trick you can try is to fade out a Pattern down to silence, then quickly bring MASTER VOLUME up to normal and burst in with a new Pattern! 42 Travel light! Small and light, the DJX-IIB is made for the road! And with the two - Yamaha DJX-IIB | Owner's Manual - Page 39
the knob back and forth quickly and create a wahwah like trembling effect. r Stop the Pattern. q Start the Pattern. w Set RESONANCE to about 2 or 3 o'clock. e Turn the CUTOFF knob. 44 Wah-wah scratching Here's a cool effect you can use to funkify your tracks! It's like running a turntable - Yamaha DJX-IIB | Owner's Manual - Page 40
feature! You'll never have to worry about your Scratch Pad Drum Loops drifting out of time - the DJX-IIB automatically matches up the bpm of the loops to the bpm of the Pattern. (For information on playing Drum Loops, see Tip 25.) However, the DJX-IIB can't sync up your loops if you don't play - Yamaha DJX-IIB | Owner's Manual - Page 41
best way to do that! First, simultaneously hold down PATTERN and turn the Scratch Pad to call up the new Pattern number. Remember to keep holding down PATTERN! Then - just at the "one" downbeat in the Pattern - press the desired Pattern button. Both the Pattern number and the Variation number change - Yamaha DJX-IIB | Owner's Manual - Page 42
into the groove! At the same time, call up the new Pattern by simultaneously holding down PATTERN and turning the Scratch Pad. Remember to keep holding down PATTERN! Then - right on the "one" downbeat - press PATTERN STOP. Keep counting while you hold the button - 1 - 2 - 3 - 4! Finally, on the - Yamaha DJX-IIB | Owner's Manual - Page 43
Chapter 9 Pattern Player Power Tips 51 One-bar Patterns - all in a row! Nearly all of the DJX-IIB's Patterns change every bar (four beats). Some loop in two-bar patterns, some loop every four bars. Some Patterns have more obvious changes than others (for example, listen to P59, V A1), but all have - Yamaha DJX-IIB | Owner's Manual - Page 44
it down, bring in the scratch! One Two Three Four One Two Three Four One Two Three Four One Two Three Four 54 Pattern loop vs. scratch loop Try Tips 52 and 53 with a Drum Loop instead of a scratch! Since the DJX-IIB keeps the Drum Loop in sync with the Pattern, you can switch seamlessly between - Yamaha DJX-IIB | Owner's Manual - Page 45
going at whatever speed you like by simply tapping it out. Select a Pattern, then instead of hitting one of the Pattern Player, tap the BPM/TAP button - four times, in rhythm - and the Pattern starts automatically at the bpm you've tapped. While you're tapping, the display shows each of your four - Yamaha DJX-IIB | Owner's Manual - Page 46
as your favorite vinyl tracks, and mix and switch them with the controls on the DJ mixer. Naturally, you can also hook your DJX-IIB up to an MD recorder or cassette deck and record your DJ performances to disk or tape. DJ mixer LINE IN PHONO IN Turntable LINE OUT Amplifier 58 Mute the - Yamaha DJX-IIB | Owner's Manual - Page 47
Chapter 13 More Pattern Player Power Tips 59 Creative Fill-in 1 Select P35 and start with V A1. Then, hit the V A1 button in the following rhythm. One Two Three Four One Start! Hit it here... ...and here! 60 Creative Fill-in 2 Select P35 and start with V A1. Hit the V A2 button - Yamaha DJX-IIB | Owner's Manual - Page 48
Power Tips 63 Distortion This little trick can kick your tracks into high gear! Use the Distortion effect selectively, applying it only to certain beats in the Pattern new Pattern! This technique works extremely well with some of the other effects, such as Ring Mod, Flanger, and Phaser. One Two - Yamaha DJX-IIB | Owner's Manual - Page 49
we pointed out in Tip 10, this effect is a powerful one, so you'll want to save it for huge, in-yourface intros, transitions and endings. Here's how you can use Ring Modulation to build to an enormous climax: First, set the controls - CONTROL to min and BALANCE to max. Then, hold the effect - Yamaha DJX-IIB | Owner's Manual - Page 50
you hit it right, it can really rock the house! Set both the CONTROL and BALANCE knobs to 12 o'clock. Select P38, and play V A1. Turn on the effect right on the "four" and hit PATTERN STOP on the next "one." Let the delay wind down, then come in with V A3. Experiment with - Yamaha DJX-IIB | Owner's Manual - Page 51
Effector Power Tips 71 Echo Many styles of dance music use echo effects in surprising, unique ways. The DJX-IIB's Echo Part Mixer to bring the mix down to the minimum; see page 32.) Set CONTROL to about 2 o'clock and BALANCE to roughly 12 o'clock (center). Turn on the effect, then stop the Pattern - Yamaha DJX-IIB | Owner's Manual - Page 52
15 Isolator and Filter Power Tips 74 Isolator to the max! Play the Isolator in real time! Get the Pattern running, then tweak Since the effect of the Isolator controls depends in part on the selected Pattern, you'll need to do some playing around. Stick to one Pattern and some of its variations, - Yamaha DJX-IIB | Owner's Manual - Page 53
Dark mixes and deep grooves - cut the Cutoff! Here's a powerful trick to instantly darken up your tracks - if that's what for some stunning fillter sweep effects. It's a great way to fade in the other rhythm parts - plus bring in some killer textures! To bring things back to normal, turn the Cutoff - Yamaha DJX-IIB | Owner's Manual - Page 54
the rhythm is bound to be boring! Try mixing up your scratching - doing sixteenth notes for just one beat or less, and leaving spaces or putting in odd accents. Keep in mind too that not all of the DJX-IIB Patterns lend themselves equally to triplet scratching. Some work well, some are a bit hard to - Yamaha DJX-IIB | Owner's Manual - Page 55
Chapter 16 Scratch Pad Power Tips 77 Scratch on an intro! Improvise on the Scratch Pad for a bar or two, then start the Pattern. To pull this off properly, you'll want to have the bpm firmly in your memory. Also, keep your scratching simple - doing that helps you feel the rhythm and helps you lock - Yamaha DJX-IIB | Owner's Manual - Page 56
dropout Here's a cool outro that's like a fade-out - only much more interesting! While the Pattern is running, select Scratch 73 (Part Mixer). Turn the Scratch Pad counter-clockwise slowly to take instruments out of the mix, one-by-one. After playing a couple of bars of only the last instrument, hit - Yamaha DJX-IIB | Owner's Manual - Page 57
Chapter 16 Scratch Pad Power Tips One Two Three Four One Two Three Four One Two Three Four One Two Three Four Bring back the whole mix - press LOOP. Cymbal and bass only - 1/4 turn counter-clockwise. . One Two Three Four Whole mix - press LOOP. Bass again - 3/4 turn counter-clockwise. - Yamaha DJX-IIB | Owner's Manual - Page 58
the Crossfader back to center on the next "one" beat, to bring the Pattern back in. One Two Three Four One Two Three Four One Two Three Four Play V B5 Turn Delay on here! Flick the fader back on the "one"! Flick the fader right here! 82 Fade the scratch in and out! Now for some mixing - Yamaha DJX-IIB | Owner's Manual - Page 59
key changes as close to the "one" as you can - then get scratching again! 52 84 Down and out! In Tip 29, you learned how to recreate the sound of a turntable grinding to a halt - here's a variation on that trick. This slows down the speed of the Pattern without changing the pitch. While the - Yamaha DJX-IIB | Owner's Manual - Page 60
in rhythm - and still have your right hand free to change Patterns and work the Scratch Pad. Or use your right hand to further mangle the sound with the Isolator or Part Controller knobs! As always, keep the rhythm steady - a master DJ is only as good as his time! However, this effectively starts - Yamaha DJX-IIB | Owner's Manual - Page 61
turn the Scratch Pad clockwise so the the Pattern number in the display advances one step (+1), and then turn it back again (-1) to return to the currently selected Pattern. Finally, release PATTERN to start the Pattern again - preferably on the "one" downbeat. Doing this fools the DJX-IIB into - Yamaha DJX-IIB | Owner's Manual - Page 62
all the way right and play a scratch fill-in. Then - on the next "one" - simultaneously swing the Crossfader to the left and hit a new Variation button. 90 Auto-adjusting the bpm Got a favorite beat on CD or vinyl that you want to sync to the DJX-IIB? This powerful function lets you do just that! The - Yamaha DJX-IIB | Owner's Manual - Page 63
and gives you a clue to where the beat is - even when you can't hear the Pattern! Keep your scratching simple, and the Delay will guide you back to the "one." Once you feel comfortable with this technique, try scratching for two bars instead of one! Also, try the Echo effect for some off-the-wall - Yamaha DJX-IIB | Owner's Manual - Page 64
Part Mixer (Scratch 73) so that the minimum mix will play. (To do this, spin the Scratch Part or Parts. At some point - probably when the Kick comes in - the beat turns around, and you can finally "hear" the rhythm! 96 Taking the pulse The DJX-IIB , start the Pattern Player on the "one" downbeat of - Yamaha DJX-IIB | Owner's Manual - Page 65
Set the external device to "external sync." For specific instructions on changing the sync setting, refer to the owner's manual of the external device. 3 Play the DJX-IIB. When you start and stop the Patterns of the DJX-IIB, the songs or patterns on the external device start and stop at the same time - Yamaha DJX-IIB | Owner's Manual - Page 66
and song data on an external sequencer and have the Patterns of the DJX-IIB lock into the bpm of that device. 1 Set up the DJX-IIB and the external device. Use a standard MIDI cable to connect the two devices as shown. MIDI clock MIDI IN MIDI OUT External sequencer (RM1x, etc.) 2 Set the - Yamaha DJX-IIB | Owner's Manual - Page 67
- with the Pattern Launcher software (on the included CD-ROM; see Tip 31) - load that Pattern data right into your DJX-IIB! Once new Pattern data is loaded, select one of the Patterns U1 - U5 to play the desired Pattern. (U1 - U5 appear only when User Pattern data has been loaded to the DJX-IIB.) Up - Yamaha DJX-IIB | Owner's Manual - Page 68
As mentioned above, you can create your own original Pattern data (on an external MIDI sequencer or a computer with sequencer software) and load it to the DJX-IIB with the Pattern Launcher software. I Connections Connect a MIDI keyboard and the DJX-IIB to the computer or sequencer as shown below - Yamaha DJX-IIB | Owner's Manual - Page 69
le in the software for specific operation instructions.) I About the User Pattern Data As you create your own Patterns and use them with the DJX-IIB, keep in mind that these User Patterns differ from the built-in preset Patterns of the DJX-IIB in the following ways: • The Scratch Pad's Auto kit - Yamaha DJX-IIB | Owner's Manual - Page 70
pressing the BPM/TAP button. When set to "Sync", the external MIDI device can start the Pattern of the DJX-IIB and the DJX-IIB itself cannnot start the Pattern. None of the Scratch Pad sounds or functions work. Make sure that the DJX-IIB is not set to "external sync" (see Tip 98). When "external - Yamaha DJX-IIB | Owner's Manual - Page 71
excessively long MIDI cable. This appears when the received bulk data contains illegal Pattern data. The illegal data is automatically cleared. This appears briefly when initializing the DJX-IIB to the factory preset data, by simultaneously holding down the LOOP button and turning the power on. See - Yamaha DJX-IIB | Owner's Manual - Page 72
Enclosure x 1 G POWER SUPPLY Adaptor PA-5B, PA-5C Batteries 6 x "D" size or SUM-1 or R-20 G POWER CONSUMPTION 20W G DIMENSIONS (W x D x H) 334 x 334 x 126 mm (13-1/8" x 13-1/8" x 4-15/16") G WEIGHT 3.5kg (7 lbs., 11 oz.) G SUPPLIED ACCESSORIES Owner's Manual x 1 CD-ROM x 1..........For - Yamaha DJX-IIB | Owner's Manual - Page 73
- the same effects used by the pros in creating hot tracks. All of the DJX-IIB sounds - the Pattern and Scratch Pad - are processed by these effects. A toggle switch lets you turn the effect on and off in time with the rhythm, and special CONTROL and BALANCE knobs let you tweak the effects as the - Yamaha DJX-IIB | Owner's Manual - Page 74
controlled from a single computer. Naturally, the DJX-IIB is MIDI compatible, and can be used effectively in any of the above scenarios. You can sync two DJX-IIBs together (or the DJX-II), and have the bpm's of both machines lock for synchronized playback. With the special Pattern Launcher software - Yamaha DJX-IIB | Owner's Manual - Page 75
23 24 25 26 27 28 29 30 31 32 33 34 Category Name Pattern Name Berlin Techno Japan Beatz TECHNO Detroit 2000 Parade Beat French Techno Detroit Speed Garage UK Garage Jungle Beatz DRUM'n'BASS Breakbeat Hard Step 8th Jazz D&B Appendix Pattern No. 35 36 37 38 39 40 41 42 43 44 45 46 47 - Yamaha DJX-IIB | Owner's Manual - Page 76
DJX-IIB panel. However, you can select them and play them from a connected MIDI device, such as a MIDI keyboard, sequencer or MIDI-equipped computer. Bank Select MSB LSB MIDI Program Voice Name Change# HYPER MIX 0 123 96 DJX-IIB KEYBOARD Bass 39 Old Mini 39 Power Bass 39 Dub Bass 39 - Yamaha DJX-IIB | Owner's Manual - Page 77
MIDI Program Voice Name Change# 35 Fretless 32 Aco. Bass 35 Fretless SCRATCH 80 Scratch 1F 81 Scratch 1B 82 Scratch 2F 83 Scratch 2B 84 Scratch 3F 85 Scratch 3B 86 Scratch 4F 87 Scratch B900 Kit 2 DJX Kit 3 BD Kit 4 SD Kit 5 HH Kit 6 Human Kit 7 Scratch Kit BASIC - Yamaha DJX-IIB | Owner's Manual - Page 78
#190 (Electronic Kit2), #191 (B900 Kit), and #192 (DJX Kit), play notes on the keyboard one octave lower than indicated. • In order to properly hear Voices #196 (Human Kit) and #197 (Scratch Kit), play notes on the keyboard one octave higher than indicated. • Key Off & Alternate Assign : These - Yamaha DJX-IIB | Owner's Manual - Page 79
Appendix Drum Kit List Voice # Bank MSB# Bank LSB# Program # Keyboard MIDI Key Note# Note Note# Note off 25 C# 0 13 C# -1 26 D 0 14 D -1 Open Hi-Q Whip 4 Scratch H 4 Scratch L Finger Snap Click RhBox HH Closed 1 RhBox HH Closed 2 Rh Box HH Open Rh Box Cymbal SD Ana Dist 2 Hard Tom 1 - Yamaha DJX-IIB | Owner's Manual - Page 80
Appendix Drum Kit List Voice # Bank MSB# Bank LSB# Program # Keyboard MIDI Key Note# Note Note# Note off 25 C# 0 13 C# -1 26 D 0 14 D -1 27 D# 0 Analog Cymbal 192 126 0 2 DJX Kit BD00 T9 Distortion BD04 Scratch Kit Ain'tGoingOut(1) Ain'tGoingOut(2) Beat ClapYourHands Club ComOn DJ - Yamaha DJX-IIB | Owner's Manual - Page 81
Format Appendix Many MIDI messages listed in the MIDI Data Format are expressed 20 21 22 23 24 25 26 27 28 29 2A 2B 2C 2D 2E 2F 30 31 32 33 34 35 36 each channel (1-16). 176-191/BnH/1011 0000-1011 1111 denotes the Control Change Message for each channel (1-16). 192-207/CnH/1100 0000-1100 - Yamaha DJX-IIB | Owner's Manual - Page 82
(HEX) Parameter Data 2nd Data byte (HEX) Parameter MIDI Transmitted Recognized Key Off 8nH (n:channel no.) kk Key no. (0 - 127) vv Velocity (0 - 127) x o Key On 9nH kk Key no. (0 - 127) vv Key On :vv=1 - 127 Key Off :vv=0 x o Control Change BnH 0 (00H) Bank Select MSB 0 (00H - Yamaha DJX-IIB | Owner's Manual - Page 83
l l dd ... dd cc F7H 0n aa bb hh mm ll dd Device Number (0 - f (receive)) Byte Count (aa - Yamaha DJX-IIB | Owner's Manual - Page 84
Effect Map." 00 : basic type x o* Refer to "MIDI Effect Map." 00 : basic type * Between MIDI messages and panel operation(Live Effector), the last message will take priority. Default 01 (=HALL1) 00 41 (=CHORUS1) 00 00 (=DJ DISTORTION) 00 I Effect Map REVER BLOCK Type MSB DEC 001 002 003 - Yamaha DJX-IIB | Owner's Manual - Page 85
Pattern Snare Pattern Hi-Hat Pattern Percussion Pattern Bass Pattern Phrase 1 Pattern Phrase 2 Pattern Phrase 3 Data received over channel 4 (Remote) is used to control the various panel controls of the DJX-IIB. About MIDI remote control Remote Control Data Functions Panel Operation Scratch - Yamaha DJX-IIB | Owner's Manual - Page 86
PAN RING MOD FLANGER PHASER SLICER DELAY ECHO LO-FI WAH CONTROL knob BALANCE knob KEY SHIFTER setting 0 1 2 3 4 5 6 -5 -4 -3 -2 -1 Scratch Pad rocking Other buttons PATTERN button BPM/TAP button KEY SHIFTER button PATTERN STOP button MIDI Data Format Soft Pedal (B3H, 43H, 7FH) Soft Pedal (B3H - Yamaha DJX-IIB | Owner's Manual - Page 87
Chart Appendix YAMAHA [ DJ-GEAR ] Model DJX-IIB MIDI Implementation Chart Function... Transmitted Recognized Basic Default x Channel x 3 x x 0 - 127 0 - 127 o 9nH,v=1-127 o 9nH,v=0 or 8nH x x Pitch Bend x o Control Change 0,32 x 1x 6,38 x 7,10 x 11 x 64 x 71-74 x 84 x 91,93 x 96,97 - Yamaha DJX-IIB | Owner's Manual - Page 88
bpm, tapping 45 C Control (Live Effector 20 Crossfader kits (Scratch Pad 26 knob 9, 20 MIDI 65, 66, 67, 68, 69 MIDI Data Format 81 MIDI Implementation Chart 87 P Part 32, 74 Part Mixer 32, 56 Pattern 14, 74 Pattern Launcher 68 Pattern List 75 Pattern Player 14 Pattern Stop 9, 14 Patterns - Yamaha DJX-IIB | Owner's Manual - Page 89
Sense 62 sequencer 65, 66, 67 Slice 22, 49 Snare 32, 68 Specifications 72 Sync 8, 37, 40, 65, 66 T transpose 36 V Variation 74 Voice List 76 Volume 9, 13, 38 W Wah 23, 51 Appendix Index 89 - Yamaha DJX-IIB | Owner's Manual - Page 90
according to the instructions found in the users manual, may cause problem by using one of the following measures: Relocate either this product or the device that is being affected by the interference. Utilize power , please contact Yamaha Corporation of America, Electronic Service Division, 6600 - Yamaha DJX-IIB | Owner's Manual - Page 91
to: the retailer selling the product, an authorized service center, or to Yamaha with an explanation of the problem. Please be prepared to provide proof purchase date (sales receipt, credit card copy, etc.) when requesting service and/or parts under warranty. 3. Shipping and/or insurance costs are - Yamaha DJX-IIB | Owner's Manual - Page 92
19 ITALY Yamaha Musica Italia S.P.A., Home Keyboard Division Viale Italia 88, 20020 Lainate (Milano), Italy Tel: 02-935-771 SPAIN/PORTUGAL Yamaha-Hazen Electronica Athens, Greece Tel: 01-364-7111 SWEDEN Yamaha Scandinavia AB J. A. Wettergrens Gata 1 Box 30053 S-400 43 Göteborg, Sweden Tel: 031 - Yamaha DJX-IIB | Owner's Manual - Page 93
M.D.G., Pro Audio & Digital Musical Instrument Division, Yamaha Corporation © 2000 Yamaha Corporation V563330 00?PO???.?-01A0 Printed in Malaysia
-
 1
1 -
 2
2 -
 3
3 -
 4
4 -
 5
5 -
 6
6 -
 7
7 -
8
-
9
-
10
-
11
-
12
-
13
-
14
-
15
-
16
-
17
-
18
-
19
-
20
-
21
-
22
-
23
-
24
-
25
-
26
-
27
-
28
-
29
-
30
-
31
-
32
-
33
-
34
-
35
-
36
-
37
-
38
-
39
-
40
-
41
-
42
-
43
-
44
-
45
-
46
-
47
-
48
-
49
-
50
-
51
-
52
-
53
-
54
-
55
-
56
-
57
-
58
-
59
-
60
-
61
-
62
-
63
-
64
-
65
-
66
-
67
-
68
-
69
-
70
-
71
-
72
-
73
-
74
-
75
-
76
-
77
-
78
-
79
-
80
-
81
-
82
-
83
-
84
-
85
-
86
-
87
-
88
-
89
-
90
-
91
-
92
-
93
 |
 |

Owner's Manual
Owner's Manual