Yamaha MCP1 MCP1 Installation Manual
Yamaha MCP1 Manual
 |
View all Yamaha MCP1 manuals
Add to My Manuals
Save this manual to your list of manuals |
Yamaha MCP1 manual content summary:
- Yamaha MCP1 | MCP1 Installation Manual - Page 1
English Deutsch WALL-MOUNT CONTROLLER MCP1 Français Español Português Italiano EN DE Installation Manual FR Installationshandbuch ES Manuel d'installation Manual de instalación PT Manual de instalação IT Manuale all'installazione RU JA - Yamaha MCP1 | MCP1 Installation Manual - Page 2
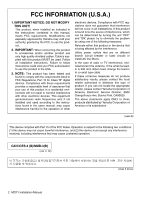
instructions contained in this manual, meets FCC requirements. Modifications not expressly approved by Yamaha and "ON", please try to eliminate the problem by using one of the following measures: Relocate contact Yamaha Corporation of America, Electronic Service Division, MCP1 Installation Manual - Yamaha MCP1 | MCP1 Installation Manual - Page 3
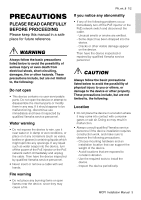
immediately and have it inspected by qualified Yamaha service personnel. Water warning • Do not support the weight of the device. - Avoid locations that are exposed to constant vibration. - Use the required tools to install the device. - Inspect the device periodically. MCP1 Installation Manual - Yamaha MCP1 | MCP1 Installation Manual - Page 4
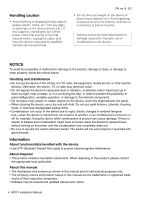
by qualified Yamaha service personnel. manual are for instructional purposes only. • The company names and product names in this manual are the trademarks or registered trade- marks of their respective companies. • Software may be revised and updated without prior notice. 4 MCP1 Installation Manual - Yamaha MCP1 | MCP1 Installation Manual - Page 5
is used to update the firmware of the MCP1 and to check the version. For details on how to perform these operations, refer to "MTX-MRX Editor User Guide." The latest firmware can be downloaded from the download page of the following website. http://www.yamahaproaudio.com/ MCP1 Installation Manual 5 - Yamaha MCP1 | MCP1 Installation Manual - Page 6
Yamaha MCP1 wall-mount controller. This product is a wall-mount controller for controlling the MTX/MRX system. This installation manual explains PoE network switch that supports IEEE802.3af This is used between the MTX/MRX system and the MCP1 in order to supply power to the MCP1. PoE injector units - Yamaha MCP1 | MCP1 Installation Manual - Page 7
that will be shown. r Return switch After setting a parameter, touch this switch to confirm and return to the page or to move to a confirmation screen. MCP1 Installation Manual 7 - Yamaha MCP1 | MCP1 Installation Manual - Page 8
via the PSE. The maximum cable length that can be used is 100 meters. NOTE Use STP (Shielded Twisted Pair) cable to prevent electromagnetic interference. 8 MCP1 Installation Manual - Yamaha MCP1 | MCP1 Installation Manual - Page 9
network switch to the MCP1. If the network switch does not support PoE, connect a PoE injector between the network switch and the MCP1. In some cases, Guide." Connections for a small system Maximum 100 meters MTX3 SWR2100P-5G Computer MCP1 Connections for a large system MCP1 MCP1 MCP1 MCP1 - Yamaha MCP1 | MCP1 Installation Manual - Page 10
PC or UNIT ID as the method of specifying the MCP1's IP address. In the case of PC, use MTX confirmation screen and automatically restart. • Unit ID Specifies the MCP1's UNIT ID. The range of this setting is 01 Initializes the MCP1. • Version Display the firmware version of MCP1. • Alert Display - Yamaha MCP1 | MCP1 Installation Manual - Page 11
of the wall in an exposed position. CAUTION Install the MCP1 no more than 2 meters above the floor. When MCP1 falls, it becomes a cause by which MCP1 is damaged or you or others are injured. If screws without washers (M3.0 × 12). Mounting plate Surface mount box Cable MCP1 Installation Manual 11 - Yamaha MCP1 | MCP1 Installation Manual - Page 12
the tabs of the mounting plate into the square holes of the MCP1. MCP1 4. While pressing the unit, use the included screws with washers a problem with connections, removing the side panel might damage the side panel or the wall. 6. Verify that the MCP1 starts. If it starts, the PSE and the MCP1 are - Yamaha MCP1 | MCP1 Installation Manual - Page 13
select Yes. The setting is confirmed as the UNIT ID, and the MCP1 automatically restarts. 6. Touch the [Unit ID] switch (L2). Set the MCP1's UNIT ID. Set the ID so that it does not conflict with ; select Yes. The UNIT ID is confirmed, and the MCP1 automatically restarts. MCP1 Installation Manual 13 - Yamaha MCP1 | MCP1 Installation Manual - Page 14
adjust parts of the screw holes as necessary and re-install the unit. Initializing the MCP1 With the unit powered on, perform the following procedure. 1. In the home page or screen appears; select Yes. Initialization begins, and the MCP1 automatically restarts. 14 MCP1 Installation Manual - Yamaha MCP1 | MCP1 Installation Manual - Page 15
is shown when the situation occurs and when it ends. If the problem cannot be solved, contact your Yamaha dealer. Number Content Action Device abnormality 001 The unit did not start Continuing Continuing Continuing Single Continuing Continuing Continuing MCP1 Installation Manual 15 - Yamaha MCP1 | MCP1 Installation Manual - Page 16
Editor. If this 070 chronization was halted before does not solve the problem, ini- completion. tialize the MCP1. Do not change any UNIT ID's The UNIT ID settings when " in the "MTX-MRX Editor User Guide." Type Error Error Single / Continuing Continuing Continuing 16 MCP1 Installation Manual - Yamaha MCP1 | MCP1 Installation Manual - Page 17
20°C - 60°C Maximum number of units usable simultaneously Up to 16 MCP1 units can be installed per system (There are limits on the total of this manual apply to the latest specifications as of the publishing date. To obtain the latest manual, access the Yamaha website then download the manual file. - Yamaha MCP1 | MCP1 Installation Manual - Page 18
Dimensions Without surface mount box 149 38 (18) (20) 125 18 MCP1 Installation Manual Unit: mm - Yamaha MCP1 | MCP1 Installation Manual - Page 19
With surface mount box 152 Dimensions 46 (18) (28) 128 Surface mount box 152 80 4×Ø4.6 128 80 Unit: mm MCP1 Installation Manual 19 - Yamaha MCP1 | MCP1 Installation Manual - Page 20
about collection and recycling of old products, please contact your local municipality, your waste disposal service or the point of sale where you purchased the items. For business users in the European or dealer and ask for the correct method of disposal. (weee_eu_en_02) 20 MCP1 Installation Manual - Yamaha MCP1 | MCP1 Installation Manual - Page 21
MCP1 Installation Manual 149 - Yamaha MCP1 | MCP1 Installation Manual - Page 22
rkiye İstanbul Şubesi Mor Sumbul Sokak Varyap Meridian Business 1.Blok No:1 113-114-115 Bati Atasehir Istanbul, Turkey Tel: +90-216-275-7960 OTHER COUNTRIES Yamaha Music Gulf FZE JAFZA-16, Office 512, P.O.Box 17328, Jebel Ali FZE, Dubai, UAE Tel: +971-4-801-1500 ASIA THE PEOPLE'S REPUBLIC OF CHINA - Yamaha MCP1 | MCP1 Installation Manual - Page 23
- Yamaha MCP1 | MCP1 Installation Manual - Page 24
Yamaha Pro Audio global website https://www.yamaha.com/proaudio/ Yamaha Downloads https://download.yamaha.com/ Manual Development Group © 2017 Yamaha Corporation Published 05/2018 POES-C0 VAM5060
-
 1
1 -
 2
2 -
 3
3 -
 4
4 -
 5
5 -
 6
6 -
 7
7 -
8
-
9
-
10
-
11
-
12
-
13
-
14
-
15
-
16
-
17
-
18
-
19
-
20
-
21
-
22
-
23
-
24
 |
 |
English
Deutsch
Français
Español
Português
Italiano
Русский
日本語
JA
RU
IT
PT
ES
FR
DE
EN
WALL-MOUNT CONTROLLER
MCP1
施工説明書
Installation Manual
Installationshandbuch
Manuel d’installation
Manual de instalación
Manual de instalação
Manuale all’installazione
Руководство по установке