Yamaha NS-P236 Owner's Manual - Page 17
Frequency characteristics
 |
View all Yamaha NS-P236 manuals
Add to My Manuals
Save this manual to your list of manuals |
Page 17 highlights
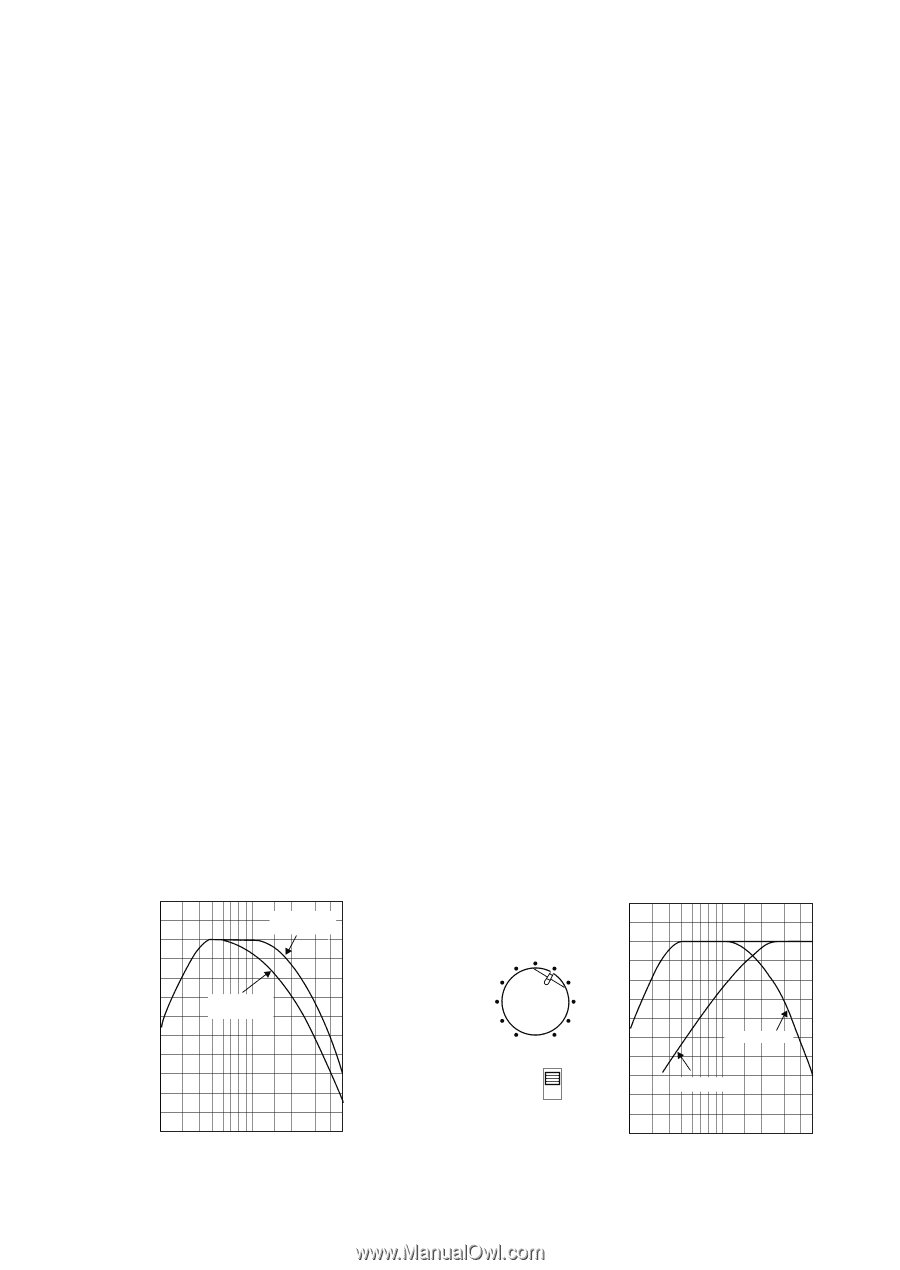
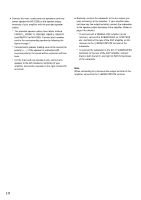
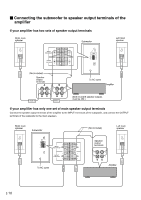
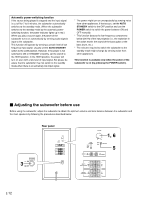
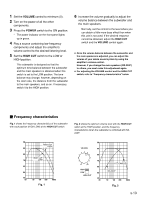
English 1 Set the VOLUME control to minimum (0). 2 Turn on the power of all the other components. 3 Press the POWER switch to the ON position. * The power indicator on the front panel lights up in green. 4 Play a source containing low-frequency components and adjust the amplifier's volume control to the desired listening level. 5 Set the HIGH CUT switch to the LOW or HIGH position. This subwoofer is designed so that the optimum tone balance between the subwoofer and the main speakers is obtained when this switch is set to the LOW position. The tone balance may change, however, depending on the room size, the distance from the subwoofer to the main speakers, and so on. If necessary, switch it to the HIGH position. 6 Increase the volume gradually to adjust the volume balance between the subwoofer and the main speakers. Normally, set the control to the level where you can obtain a little more bass effect than when this unit is not used. If the desired response cannot be obtained, adjust the HIGH CUT switch and the VOLUME control again. ● Once the volume balance between the subwoofer and the main speakers is adjusted, you can adjust the volume of your whole sound system by using the amplifier's volume control. However, if you change the main speakers (NX-230P) to others, you must make this adjustment again. ● For adjusting the VOLUME control and the HIGH CUT switch, refer to "Frequency characteristics" below. Ⅵ Frequency characteristics Fig. 1 shows the frequency characteristics of the subwoofer with each position (HIGH/LOW) of the HIGH CUT switch. Fig. 2 shows the optimum volume level with the HIGH CUT switch at the HIGH position, and the frequency characteristics when the subwoofer is combined with NX230P. 100 HIGH CUT HIGH 90 80 HIGH CUT 70 LOW 60 50 40 20 50 100 200 500Hz Fig. 1 VOLUME 0 I0 HIGH LOW HIGH CUT 100 90 80 70 60 50 40 20 YST-SW005 NX-230P 50 100 200 Fig. 2 500Hz E-13
-
 1
1 -
2
-
3
-
4
-
5
-
6
-
7
-
8
-
9
-
10
-
11
-
 12
12 -
 13
13 -
 14
14 -
 15
15 -
 16
16 -
 17
17 -
 18
18 -
 19
19 -
 20
20
 |
 |