Yamaha NS-SW310BL Owner's Manual - Page 5
Contents, Special Instructions For U.k. Model
 |
View all Yamaha NS-SW310BL manuals
Add to My Manuals
Save this manual to your list of manuals |
Page 5 highlights
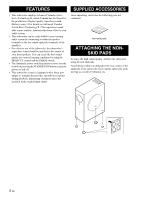
• VOLTAGE SELECTOR (Asia and General models only) The voltage selector switch on the rear panel of this unit must be set to your local main voltage BEFORE plugging this unit into the AC main supply. Voltages are 110-120/220-240 V AC, 50/60 Hz. CONTENTS FEATURES 2 SUPPLIED ACCESSORIES 2 This unit is not disconnected from the AC power source as long as it is connected to the wall outlet, even if this unit itself is turned off. In this state, this unit is designed to consume a very small quantity of power. ATTACHING THE NON-SKID PADS 2 PLACEMENT 3 CONTROLS AND THEIR FUNCTIONS 4 This unit features a magnetically shielded design, however, there is still a chance that placing it too close to a TV set might impair picture color. Should this happen, move this unit away from the TV set. For U.K. customers If the socket outlets in the home are not suitable for the plug supplied with this appliance, it should be cut off and an appropriate 3 pin plug fitted. For details, refer to the instructions described below. Note: The plug severed from the mains lead must be destroyed, as a plug with bared flexible cord is hazardous if engaged in a live socket outlet. SPECIAL INSTRUCTIONS FOR U.K. MODEL CONNECTIONS 6 1 Connecting to line output (pin jack) terminals of the amplifier 6 2 Connecting to speaker output terminals of the amplifier 8 Connecting to the INPUT1/OUTPUT terminals of the subwoofer 10 Plug in the subwoofer to the AC outlet 10 AUTOMATIC POWER-SWITCHING FUNCTION ...11 Changing the AUTO STANDBY setting 11 ADJUSTING THE SUBWOOFER BEFORE USE ......12 Frequency characteristics 13 ADVANCED YAMAHA ACTIVE SERVO TECHNOLOGY II 14 IMPORTANT: THE WIRES IN MAINS LEAD ARE COLOURED IN ACCORDANCE WITH THE FOLLOWING CODE: Blue: NEUTRAL Brown: LIVE As the colours of the wires in the mains lead of this apparatus may not correspond with the coloured markings identifying the terminals in your plug, proceed as follows: The wire which is coloured BLUE must be connected to the terminal which is marked with the letter N or coloured BLACK. The wire which is coloured BROWN must be connected to the terminal which is marked with the letter L or coloured RED. Make sure that neither wire is connected to the earth terminal of a three pin plug. TROUBLESHOOTING 15 SPECIFICATIONS 16 For Canadian Customers To prevent electric shock, match wide blade of plug to wide slot and fully insert. This Class B digital apparatus complies with Canadian ICES-003. English 1 En
-
 1
1 -
 2
2 -
 3
3 -
 4
4 -
 5
5 -
 6
6 -
 7
7 -
 8
8 -
 9
9 -
 10
10 -
 11
11 -
12
-
13
-
14
-
15
-
16
-
17
-
18
-
19
-
20
-
21
-
22
 |
 |