Yamaha PF-500 Owner's Manual
Yamaha PF-500 Manual
 |
View all Yamaha PF-500 manuals
Add to My Manuals
Save this manual to your list of manuals |
Yamaha PF-500 manual content summary:
- Yamaha PF-500 | Owner's Manual - Page 1
PF-500 Owner's Manual Before using the PF-500, be sure to read "Precautions„ on pages 3-4. IMPORTANT Check your power supply Make sure that your local AC mains voltage matches the voltage specified on the name plate on the bottom panel. In some areas a voltage selector - Yamaha PF-500 | Owner's Manual - Page 2
indicated in the safety instruction section. CAUTION RISK OF ELECTRIC SHOCK DO NOT OPEN CAUTION: TO REDUCE THE RISK OF ELECTRIC SHOCK. DO NOT REMOVE COVER (OR BACK). NO USER-SERVICEABLE PARTS INSIDE. REFER SERVICING TO QUALIFIED SERVICE PERSONNEL. See bottom of Keyboard enclosure for graphic symbol - Yamaha PF-500 | Owner's Manual - Page 3
to disassemble the internal parts or modify them in any way. The instrument contains no user-serviceable parts. If it should appear to be malfunctioning, discontinue use immediately and have it inspected by qualified Yamaha service personnel. Water warning • Do not expose the instrument to rain - Yamaha PF-500 | Owner's Manual - Page 4
power to the instrument. Save the data to the storage memory (see page 43). Yamaha cannot be held responsible for damage caused by improper use or modifications to the instrument, or data that is lost or destroyed. Always turn the power off when the instrument is not in use. 4 PF-500 (1)B-7 2/2 - Yamaha PF-500 | Owner's Manual - Page 5
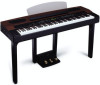
for choosing the Yamaha PF-500 electronic piano. In order to make the most of your PF-500's performance potential and features, please read this Owner's Manual thoroughly, and keep it in a safe place for later reference. About this Owner's Manual and Reference Booklet This manual consists of four - Yamaha PF-500 | Owner's Manual - Page 6
About this Owner's Manual and Reference Booklet...5 Table of contents ...6 Application Index ...9 Included Accessories ...11 Features ...12 Before Using the PF-500 ...14 About the pedal unit ...14 About the music stand ...14 Turning the power on...15 Adjusting the display contrast ...16 Setting the - Yamaha PF-500 | Owner's Manual - Page 7
VibeRotorSpeed 72 Turning the vibraphone vibrato effect on/off [VibeRotorOnOff (RotorOnOff 73 Setting the rotation speed of the rotary speaker [RotarySpeed (Rot.Speed 73 Adjusting the depth of the DSP effect [DSPDepth high-range gain (amount of boost/cut) of the equalizer [EQ HighGain 74 PF-500 7 - Yamaha PF-500 | Owner's Manual - Page 8
method for restoring the normal settings ...85 Message List ...86 Questions about Operations and Functions 90 Appendix 93 Troubleshooting...94 Data Compatibility ...95 Preset Voice List ...97 Voice Combination Examples (Dual and Split 99 Assembling the Keyboard Stand ...100 Index...102 8 PF-500 - Yamaha PF-500 | Owner's Manual - Page 9
for the Piano Playing the 50 piano preset songs" on page 22 Listening to my recorded performance Recording to [TRACK 1]" on page 35 "Playing back a song" on page 48 Playing Using three pedals Using the pedals" on page 27 Playing an accompaniment that matches pitch Changing the key [Transpose - Yamaha PF-500 | Owner's Manual - Page 10
Assembling the keyboard stand Using the stand Assembling the Keyboard Stand" on page 100 Quick solution What the PF-500 offers Application Index" on page 9 "Features" on page 12 Returning to the main screen EXIT button" on page 18 Resetting the PF-500 to the default setting Restoring the normal - Yamaha PF-500 | Owner's Manual - Page 11
Included Accessories Pedal Unit Keyboard Stand Music Stand Bench (included or optional depending on locale) Dust Cover (included or optional depending on locale) Owner's Manual Reference Booklet PF-500 11 - Yamaha PF-500 | Owner's Manual - Page 12
pedal is pressed, and "Key-off Samples" that add the subtle sound produced when the keys are released. The PF-500 comes much closer to the sound of a true acoustic piano. MIN MAX MASTER VOLUME SONG KEYBOARD SONG BALANCE DEMO TRACK 1 TRACK 2 EXTRA TRACKS FILE METRONOME START/STOP SETTING - Yamaha PF-500 | Owner's Manual - Page 13
detailed settings for tone and effects. (page 69) BRILLIANCE [MELLOW] [BRIGHT] Adjust the brightness of the tone using these buttons. (page 28) [OTHER SETTING] This lets you make detailed settings, such as adjusting the keyboard touch or making fine adjustments to the pitch. (page 81) PF-500 13 - Yamaha PF-500 | Owner's Manual - Page 14
plug facing upward. L/L+RAUX IN R AC INLET L/L+R AUX R OUT PEDAL AUX PEDAL L LEVEL FIXED R MIDI IN OUT PHONES THRU POONWER OFF MIHDIOPSCT-2SMEaLcECUSTB TO HOST USB About the music stand The PF-500 is supplied with a music stand that can be attached to the instrument by inserting it - Yamaha PF-500 | Owner's Manual - Page 15
sure that the voltage selector is set for the voltage in your area. Connecting the unit to the wrong AC supply can cause serious damage to the internal circuitry and may even pose a shock hazard! Use only the AC power cord supplied with the PF-500. If the supplied cord is lost or damaged and needs - Yamaha PF-500 | Owner's Manual - Page 16
jacks.) CAUTION Do not use headphones at a high volume for an extended period of time. Doing so may cause hearing loss. L/L+RAUX IN R AC INLET L/L+R AUX R OUT PEDAL AUX PEDAL L LEVEL FIXED R MIDI IN OUT PHONES THRU POONWER OFF MIHDIOPSCT-2SMEaLcECUSTB TO HOST USB PHONES 16 PF-500 - Yamaha PF-500 | Owner's Manual - Page 17
Basic Operation PF-500 17 - Yamaha PF-500 | Owner's Manual - Page 18
] knob P16 E [EXIT P19 F Voice group buttons P26 G [VOICE SETTING P69 H [SPLIT P32 I [REVERB P29 J [CHORUS P29 K VARIATION [M] [L P26 L BRILLIANCE [MELLOW] [BRIGHT] ......P28 M [MIDI SETTING P77 N [OTHER SETTING P81 O Soft pedal P27 P Sostenuto pedal P27 Q Damper pedal P27 18 PF-500 - Yamaha PF-500 | Owner's Manual - Page 19
T [PHONES P16 U [POWER ON/OFF P15 V [AC INLET P15 W [PEDAL P14, 101 X [AUX PEDAL P52 Y MIDI [IN] U POWER ON OFF AC INLET V PEDAL AUX PEDAL IN WX MIDI HOST SELECT TO HOST MIDI PC-2 Mac USB Yamaha C LCD A B Use the LCD button A, screen when you turn on the power to the unit. E [EXIT] - Yamaha PF-500 | Owner's Manual - Page 20
SONG C TEMPO 3 B NO YES D CONTRAST EXIT GRAND PIANO 1 GRAND PIANO 2 E.PIANO E.PIANO 1 2 HARPSI- E.CLAVICHORD CHORD VIBRAPHONE VOICE GUITAR SETTING SPLIT CHURCH JAZZ SYNTH. WOOD ORGAN ORGAN STRINGS CHOIR PAD BASS E.BASS XG VARIATION REVERB CHORUS BRILLIANCE MELLOW BRIGHT - Yamaha PF-500 | Owner's Manual - Page 21
with Sustain (with sustain sampling) VIBRAPHONE no Sustain (without sustain sampling) GUITAR with KeyOff (with key-off sampling) CHURCH ORGAN no KeyOff (without key-off sampling) JAZZ ORGAN with StringRes (with string reso- nance) STRINGS no StringRes (without string reso- nance) PF-500 21 - Yamaha PF-500 | Owner's Manual - Page 22
. (See page 35.) • Use the SongRepeat parameter in the "SONG SETTING" menu to select repeat playback of all songs or repeat playback of a single song. (See page 67.) TIP You can play the keyboard along with the preset song playback. You can change the voice playing on the keyboard. 22 PF-500 - Yamaha PF-500 | Owner's Manual - Page 23
original tempo) is set when you press the [DOWN] and [UP] buttons simultaneously. Press either of the SONG SELECT [ ]/[ ] buttons to return to the song select screen. A B NO YES C D 3. Stop the song playback. When playback is complete, it automatically stops and the PF-500 locates the top of - Yamaha PF-500 | Owner's Manual - Page 24
PIANO 1 GRAND PIANO 2 E.PIANO E.PIANO 1 2 HARPSI- E.CLAVICHORD CHORD VIBRAPHONE VOICE GUITAR SETTING SPLIT CHURCH JAZZ SYNTH. WOOD ORGAN ORGAN STRINGS CHOIR PAD BASS E.BASS will blink, and the PF-500 will wait for Syncro Start. Now when you play the keyboard, playback will begin at - Yamaha PF-500 | Owner's Manual - Page 25
Listening to 50 Piano Preset Songs 3. Stop playback. When playback is complete, it automatically stops and the PF-500 locates the top of the song. If you wish to stop playback in to repeatedly practice that part. Refer to the [FromToRepeat] option in the "SONG SETTING" menu on page 66. PF-500 25 - Yamaha PF-500 | Owner's Manual - Page 26
START SONG C TEMPO B NO YES D CONTRAST EXIT GRAND PIANO 1 GRAND PIANO 2 E.PIANO E.PIANO 1 2 HARPSI- E.CLAVICHORD CHORD VIBRAPHONE VOICE GUITAR SETTING SPLIT CHURCH JAZZ SYNTH. WOOD ORGAN ORGAN STRINGS CHOIR PAD BASS E.BASS XG VARIATION REVERB CHORUS BRILLIANCE MELLOW BRIGHT - Yamaha PF-500 | Owner's Manual - Page 27
Selecting and Playing Voices Using the pedals The PF-500 has three foot pedals: damper pedal (right), sostenuto pedal (center), and soft pedal (left) that produce a range of expressive effects similar to those produced by the pedals on an acoustic piano. Damper (right) pedal When you press the - Yamaha PF-500 | Owner's Manual - Page 28
press BRILLIANCE [MELLOW] [BRIGHT], and then use D [-][+] to select the desired tonality. TIP Normal setting = Normal TERMINOLOGY Normal setting: The "Normal setting" refers to the default setting (factory setting) obtained when you first turn on the power to the PF-500. NOTE If you select [Bright1 - Yamaha PF-500 | Owner's Manual - Page 29
Type parameter in the "VOICE SETTING" menu, and adjust the chorus depth for the selected voice via the Reverb Send parameter.You can also turn chorus on or off via the Chorus On Off parameter. (See page 71.) TIP Normal Setting The normal chorus on/off setting is different for each voice. PF-500 29 - Yamaha PF-500 | Owner's Manual - Page 30
in Dual mode using voices from the same group. B NO YES D CONTRAST EXIT GRAND PIANO 1 GRAND E.PIANO E.PIANO HARPSI- E.CLAVI- PIANO 2 1 2 CHORD CHORD VIBRAPHONE VOICE GUITAR SETTING SPLIT CHURCH JAZZ SYNTH. WOOD ORGAN ORGAN STRINGS CHOIR PAD BASS E.BASS XG VARIATION REVERB - Yamaha PF-500 | Owner's Manual - Page 31
buttons to select another voice in the same voice group. To use the identical voices, press the B [-]/[+] buttons once. To use different voices within the same voice group, press the B [-]/[+] area when the entire keyboard is devided into left and right areas (page 32), press D [-] [+]. PF-500 31 - Yamaha PF-500 | Owner's Manual - Page 32
TEMPO 3 Procedure B NO YES D CONTRAST EXIT GRAND PIANO 1 GRAND PIANO 2 E.PIANO E.PIANO 1 2 HARPSI- E.CLAVICHORD CHORD VIBRAPHONE VOICE GUITAR SETTING SPLIT CHURCH JAZZ SYNTH. WOOD ORGAN ORGAN STRINGS CHOIR PAD BASS E.BASS XG VARIATION REVERB CHORUS BRILLIANCE MELLOW BRIGHT - Yamaha PF-500 | Owner's Manual - Page 33
. Press [SPLIT]. TIP A specified "split point" key is included in the left-hand range. TIP The split point can also be set by the [OTHER SETTING] parameter [SplitPoint]. (page 69) You can use Dual (see page 30) in each area (right-hand and left-hand) of Split mode. A B NO YES C D PF-500 33 - Yamaha PF-500 | Owner's Manual - Page 34
Playing Voices Using the metronome The PF-500 is built-in metronome (a device that keeps an accurate tempo) is a convenient feature for practice. 1 2 MIN MAX MASTER VOLUME SONG KEYBOARD SONG BALANCE DEMO TRACK TRACK EXTRA METRONOME 1 2 TRACKS FILE START/STOP SETTING A SONG SELECT - Yamaha PF-500 | Owner's Manual - Page 35
using the PF-500 recording function. You can, for example, play back what you have played on the PF-500 keyboard PIANO 1 GRAND PIANO 2 E.PIANO E.PIANO 1 2 HARPSI- E.CLAVICHORD CHORD VIBRAPHONE VOICE GUITAR SETTING SPLIT CHURCH JAZZ SYNTH. WOOD ORGAN ORGAN STRINGS CHOIR PAD BASS E.BASS - Yamaha PF-500 | Owner's Manual - Page 36
screen A B NO YES NOTE Set the tempo in Step 3. NOTE See page 42 for more information on recording in Dual/ Split mode. C D Set the tempo, if necessary. button again or play a note on the keyboard. To stop recording, press the [TOP] button. The PF-500 locates the top of the song. The [TRACK - Yamaha PF-500 | Owner's Manual - Page 37
turn off the power to the PF-500, the recorded performance data will be lost. If you wish to keep the recording, save the data using the SaveToMemory parameter (page 45) in the File menu. NOTE To erase recorded data from a track, use the Channel Clear parameter in the "SONG SETTING" menu. (See page - Yamaha PF-500 | Owner's Manual - Page 38
of the part you wish to re-record. Use the B [-]/[+] buttons while the playback screen is existing data will be erased after re-recording starts. Key On - Data that exists prior to the point set to "KeyOn," you cannot change a voice or tempo (page 41) after the recording is complete. 38 PF-500 - Yamaha PF-500 | Owner's Manual - Page 39
cancel recording by pressing the [TOP] button, the PF500 locates the top of the song. Recording to [ PIANO 1 GRAND PIANO 2 E.PIANO E.PIANO 1 2 HARPSI- E.CLAVICHORD CHORD VIBRAPHONE VOICE GUITAR SETTING SPLIT CHURCH JAZZ SYNTH. WOOD ORGAN ORGAN STRINGS CHOIR PAD BASS E.BASS PF-500 39 - Yamaha PF-500 | Owner's Manual - Page 40
use the B [-]/[+] buttons to select a recording track (3-16). select a recording track (3-16) A B NO YES C D 2. While holding down the [REC] key your performance to or overwrite existing songs (such as 50 preset piano songs [P-001-P-050], or your old recorded performances [see page 43 PF-500 - Yamaha PF-500 | Owner's Manual - Page 41
and Functions" on page 90 for information on the settings that can be changed here. TIP Change the tempo in Step 4. CAUTION The edited settings (except for the tempo setting) will be saved in memory and you will not be able to restore the previous settings. Proceed with caution. PF-500 41 - Yamaha PF-500 | Owner's Manual - Page 42
adjustments. SONG KEYBOARD TIP The song balance setting is also used during playback. (See page 48.) The song playback vol- SONG BALANCE ume will be lower. Your playing volume will be lower. Recording in Dual or Split mode When you record in Dual or Split mode, the PF-500 records each voice - Yamaha PF-500 | Owner's Manual - Page 43
PIANO 2 E.PIANO 1 E.PIANO 2 HARPSICHORD E.CLAVICHORD VIBRAPHONE GUITAR VOICE SETTING SPLIT REVERB CHORUS MIDI SETTING CHURCH JAZZ SYNTH. WOOD ORGAN ORGAN STRINGS CHOIR PAD BASS E.BASS XG VARIATION BRILLIANCE MELLOW BRIGHT OTHER SETTING EXIT D VOICE EFFECT PF-500 PF-500 - Yamaha PF-500 | Owner's Manual - Page 44
"DeleteSong", "RenameSong", "CharacterCode". 4. Set the parameter or execute the command. Use the B [- (NO)]/[+ (YES)], C [-]/[+], D [-]/[+] buttons. For more information regarding this procedure, refer to the corresponding section below. 5. Close the File menu. Press the [EXIT] button. 44 PF-500 - Yamaha PF-500 | Owner's Manual - Page 45
PF-500 Storage memory...[SaveToMemory] If you record a song, then turn off the power to the PF-500, the song will be erased. To save the recorded song, you must save it into the PF-500 , use the D [-]/[+] buttons. To delete a character, press the D [-]/[+] buttons simultaneously. You can use up - Yamaha PF-500 | Owner's Manual - Page 46
parameter in the "SONG SETTING" menu (page 66). instructions on screen. TIP Deleting a Memory song does not erase song data from Current memory. However, if you return to the song select screen, song information other than the song name is replaced by TIP After you delete a song, the PF-500 - Yamaha PF-500 | Owner's Manual - Page 47
off the power while the screen displays "Executing." TIP After you rename a song, the PF-500 sorts songs alphabetically and renumbers them. Changing the type of characters on screen...[CharacterCode] You can change the type of characters that appear on screen. The default setting is "International - Yamaha PF-500 | Owner's Manual - Page 48
back a song TIP Change the PF-500's character type ([CharacterCord]) as appropriate for the selected song. 1 2-2 TEMPO [DOWN] [UP] 2-1 MIN MAX MASTER VOLUME SONG KEYBOARD SONG BALANCE DEMO TRACK 1 TRACK 2 EXTRA TRACKS FILE METRONOME START/STOP SETTING A SONG SELECT TOP START/STOP - Yamaha PF-500 | Owner's Manual - Page 49
the Synchro Start function, press the [TOP] button while the PF500 is in Synchro Start standby mode. You can move back and forth (rewind and fast forward) through the bars by using the B [-]/[+] buttons in the song select screen while the PF-500 is playing or stopped. The bar number in playback - Yamaha PF-500 | Owner's Manual - Page 50
that is turned off. TIP You can practice a part or phrase using the FromToRepeat (page 66) and PhraseMark parameters (page 67) in the "SONG SETTING" menu. Supported song data type Data formats that can be played on the PF-500 The PF-500 plays song data in the following formats: Sequence format SMF - Yamaha PF-500 | Owner's Manual - Page 51
via the PF500's speakers. Refer to the diagram below and use audio cables for connection. CAUTION When the PF-500's AUX IN jacks are connected to an external device, first turn on the power to the external divice, then to the PF-500. Reverse this order when you turn the power off. PF-500 AUX IN - Yamaha PF-500 | Owner's Manual - Page 52
do not connect the audio device to the PF500's AUX IN jacks. If you make this Use audio cables and adaptor plugs with no resistance. TIP The PF-500's [MASTER VOLUME] setting will not affect the sound that is output from AUX OUT (LEVEL FIXED). TIP Connect or disconnect the pedal when the power - Yamaha PF-500 | Owner's Manual - Page 53
HOST], MIDI [IN][OUT][THRU], or [USB] connector of the PF-500 to your personal computer and enjoy using the PF-500 in conjunction with musical software on your computer. There are the three methods by which to connect the PF-500 to a personal computer: 1. Connecting the serial port on the computer - Yamaha PF-500 | Owner's Manual - Page 54
Mac USB TO HOST RS-232C (D-sub 9-pin) RS-232C (D-sub 25-pin) modem port Windows Windows Macintosh Note for Windows users (regarding the MIDI driver) To transfer data via the computer's serial port and the PF-500's TO HOST jack, you need to install a specific MIDI driver (the Yamaha CBX driver - Yamaha PF-500 | Owner's Manual - Page 55
) • Windows: "PC-2" (data transfer rate: 38,400bps) TIP If your system does not work properly with the connections and settings listed above, your software may require different settings. Check your software operation manual and set the HOST SELECT switch to the proper data transfer rate. PF-500 55 - Yamaha PF-500 | Owner's Manual - Page 56
to connect a computer to the PF-500 using special MIDI cables. PF-500 MIDI HOST SELECT MIDI PC-2 Mac USB IN MIDI IN OUT THRU MIDI OUT MIDI OUT MIDI IN MIDI interface MIDI OUT MIDI IN MIDI interface Windows Macintosh PF-500 HOST SELECT switch setting Set the PF-500 HOST SELECT switch to - Yamaha PF-500 | Owner's Manual - Page 57
transfer data between the computer and the PF-500. The YAMAHA USB MIDI Driver can be installed from the Accessory CD-ROM included with the PF-500. The YAMAHA USB MIDI Driver supports the following OS versions. Windows 98, Windows 98SE, Windows Me, Windows 2000, Windows XP Mac OS 8.6-9.2.1 PF-500 57 - Yamaha PF-500 | Owner's Manual - Page 58
PF-500 on or off while application software that uses USB MIDI is running. • The PF-500 will begin transmission a short time after the USB connection is made. • If you are using Windows 2000, problems may occur on your computer when your computer starts up. In this case, turn on the power of the PF - Yamaha PF-500 | Owner's Manual - Page 59
Detailed Settings PF-500 59 - Yamaha PF-500 | Owner's Manual - Page 60
various parameters to make the best use of PF-500 functions, such as fine tuning the pitch, selecting a voice for the metronome, repeating playback, etc. For the basic procedure to make these settings, refer to page 85. Parameter List The following parameters are available. Recording and playback - Yamaha PF-500 | Owner's Manual - Page 61
the DSP type* Set the speed of the vibraphone vibrato effect* Turn the vibraphone vibrato effect on/off* Adjust the speed of the rotary speaker* Adjust the * Touch sensitivity* Right pedal function Center pedal function Left pedal function Auxiliary pedal function Parameter name Octave PF-500 61 - Yamaha PF-500 | Owner's Manual - Page 62
the damper pedal Specify the volume of the key-off sound Selecting a pedal function for vibraphone Assign the SONG [START/STOP] function to the pedal Selecting a type of auxiliary pedal Setting the point at which the damper pedal starts to affect the sound Pitch bend range Switch the speaker on/off - Yamaha PF-500 | Owner's Manual - Page 63
buttons repeatedly as required. 3. Set the parameter or part. Some parameters or parts lead you to more options. Use the B [- (NO)]/[+ (YES)], C [-]/[+], and D [-]/[+] buttons to select or set the option. To restore the normal parameter value, press the [-] and [+] buttons simultaneously. PF-500 63 - Yamaha PF-500 | Owner's Manual - Page 64
Detailed Settings 4. Write, execute, or save the data. There are two ways to respond to the messages. If "Execute?→" or "Start?→" appears: Press the B [+(YES)] button to display confirmation ([Sure?→]). To proceed, press the B [+(YES)] button again. The PF-500 displays "Executing" and writes the - Yamaha PF-500 | Owner's Manual - Page 65
SETTING] button to access the "Song Setting" menu. MIN MAX MASTER VOLUME SONG KEYBOARD SONG PIANO 1 GRAND E.PIANO E.PIANO HARPSI- E.CLAVI- PIANO 2 1 2 CHORD CHORD VIBRAPHONE VOICE GUITAR SETTING SPLIT CHURCH JAZZ SYNTH. WOOD ORGAN ORGAN STRINGS CHOIR PAD BASS E.BASS PF-500 65 - Yamaha PF-500 | Owner's Manual - Page 66
procedure on page 63. A B NO YES C D Setting range: [On] Playing from the first note [Off] Use these buttons to select "Repeat On." A B NO YES C Use these buttons to specify the start point of the repeated range. D Use these buttons to specify the end point of the repeated range. 66 PF-500 - Yamaha PF-500 | Owner's Manual - Page 67
songs until you press the [TOP] button. See the procedure on page 63. Use these buttons to select "On." A B NO YES C D Use these buttons to specify the repeated songs. Setting range: [MemorySongs] All songs in the PF-500's mem- ory [PresetSongs] All 50 preset songs [ALL] All songs from - Yamaha PF-500 | Owner's Manual - Page 68
the time signature, volume level, and voice of the PF-500 metronome. Procedure Press the [METRONOME SETTING] button to access the Metronome Setting menu. [METRONOME SETTING] MIN MAX MASTER VOLUME SONG KEYBOARD SONG BALANCE DEMO TRACK TRACK EXTRA METRONOME 1 2 TRACKS FILE START/STOP - Yamaha PF-500 | Owner's Manual - Page 69
GRAND PIANO 1 GRAND PIANO 2 E.PIANO E.PIANO 1 2 HARPSI- E.CLAVICHORD CHORD VIBRAPHONE VOICE GUITAR SETTING SPLIT CHURCH JAZZ SYNTH. WOOD ORGAN ORGAN STRINGS CHOIR PAD BASS E.BASS XG Layer] LEFT Voice 1 and Voice 2 (displayed when the LEFT side is in Dual mode) PF-500 69 - Yamaha PF-500 | Owner's Manual - Page 70
in Dual mode can be "skewed" slightly away from each other. See the procedure on page 63. A B NO YES C D Setting range: -20-+20 (Positive (+) settings will raise the pitch of the first sound and lower the pitch of the second sound. Negative (-) settings will do the opposite.) 70 PF-500 - Yamaha PF-500 | Owner's Manual - Page 71
Adds swell and a spacious sound. Flanger Adds swell effects of an ascending or descending jet plane. Setting the chorus depth [ChorusSend]* See the procedure on page 63. A B NO YES C In Dual mode: A D B NO YES C D Voice for editing (Voice 1 or Voice 2) Setting range: 0 - 127 PF-500 71 - Yamaha PF-500 | Owner's Manual - Page 72
The rotating portion of an electrical device etc. This will be displayed only if VibeRotor is selected for the DSP Type parameter explained above. This sets the speed of the vibrato effect that is applied when you have selected Vibraphone and are using the VibeRotor pedal. See the procedure on page - Yamaha PF-500 | Owner's Manual - Page 73
above. It turns on/off the vibrato effect that is applied when you use the VibeRotor pedal. See the procedure on page 63. A B NO YES C D Setting range: On/Off Setting the rotation speed of the rotary speaker* [RotarySpeed (Rot.Speed)] This will be displayed only if RotarySpeaker is selected - Yamaha PF-500 | Owner's Manual - Page 74
SETTING] Adjusting the low-range frequency of the equalizer* [EQ LowFreq. (EQ L.Freq)] TERMINOLOGY Equalizer: An audio equalizer divides the frequency spectrum into multiple regions and enables the user A B NO YES C D Setting range: -12-+12 dB Setting range: 500 Hz-16.0 kHz Adjusting the high - Yamaha PF-500 | Owner's Manual - Page 75
on/off each time you press the pedal) Off No function Normal setting: SustainCont Setting the center pedal function [MPedal] See the procedure on page 63. A B NO YES C D Setting range: Same as "Specifying the function of the right pedal," above. Normal Setting: Sostenuto PF-500 75 - Yamaha PF-500 | Owner's Manual - Page 76
[AuxPedal] You can assign a function to the pedal connected to the PF-500's AUX PEDAL jack. See the procedure on page 63. A B NO YES C D Setting range: Same as "Right pedal function assignment" (page 75). Normal setting: Expression TIP YAMAHA FC7 foot controller This foot controller is - Yamaha PF-500 | Owner's Manual - Page 77
. [USB] connector Use this connector to connect the PF-500 and computer. HOST SELECT TO HOST MIDI PC-2 Mac USB USB TIP MIDI receive. The PF500's MIDI Implementation Chart is listed on page 32 in the "Reference Booklet" for the PF-500. When you are using the MIDI connectors, set the [HOST - Yamaha PF-500 | Owner's Manual - Page 78
Ch18 - Main Ch19 - Left Ch20 - Layer Ch21 - LeftLayer Others - Off MIDI data 78 PF-500 MIDI IN TO HOST USB (When the channel setting is other than Song or Off) Port A Port B Sound source A Channels 1-16 Used for song playback Sound source B Channels 17-32 Only for song playback Played from - Yamaha PF-500 | Owner's Manual - Page 79
when you wish to play an external sound source while playing the keys on the PF-500. See the procedure on page 63. A B NO YES C D Setting range: On/Off Normal setting: On Selecting performance from the keyboard or song data for MIDI transmission [MidiOutSelect] You can select whether your - Yamaha PF-500 | Owner's Manual - Page 80
C D Executing voice data bulk dump [VoiceBulkDump] You can transmit the voice data specified in the "Voice Setting" menu (page 69) as MIDI bulk data. You can interrupt voice data bulk dump transmission by pressing the B [- (NO)] button. See the procedure on page 63. A B NO YES C D 80 PF-500 - Yamaha PF-500 | Owner's Manual - Page 81
of the entire instrument. This function is useful when you play the PF-500 along with other instruments or CD music. See the procedure on page 63. A B NO YES C D Setting range: A3=427.0Hz - 453.0Hz (0.1Hz steps) Selecting a tuning curve for a piano voice [PianoTuningCurve] You can select - Yamaha PF-500 | Owner's Manual - Page 82
C produces pitch F. In this way, you can play the song as if it were in C major, and the PF-500 will transpose it to the key of F. Setting for: Master The sound of the entire instrument (the manually-played sound and the song playback) Keyboard The manually-played sound Song The song playback - Yamaha PF-500 | Owner's Manual - Page 83
while you press the keys on the keyboard ("PianoLike") or the sound is sustained only while you press and hold down the sustain pedal, like playing a real vibraphone ("Normal"). See the procedure on page 63. A B NO YES C D Setting range: PianoLike, Normal Normal setting: PianoLike PF-500 83 - Yamaha PF-500 | Owner's Manual - Page 84
in semitone steps. • You can set the pedal function (page 75) to spec- ify whether the pitch will be raised or lowered. See the procedure on page 63. A B NO YES C D Setting range: 0-+12 (Pressing the pedal will raise/lower the pitch by 12 semitones [1 octave]) Normal setting: -2 84 PF-500 - Yamaha PF-500 | Owner's Manual - Page 85
are kept. MemorySongIncluded Memory songs are erased. Other method for restoring the normal settings Press and hold down the white key on the right end (C7) and press the [POWER] switch to turn on the power to the PF-500. In this case, the Memory songs saved in the storage memory are not erased. If - Yamaha PF-500 | Owner's Manual - Page 86
if you press and hold down the C7 and B 6 keys and turn on the power to the PF-500 (page 85). The PF-500's flash memory (storage memory) has expired. Consult your Yamaha dealer. If this message appears, the PF-500 will not back up the songs and settings in memory. Press the [EXIT] button to return to - Yamaha PF-500 | Owner's Manual - Page 87
case, turn off the power of the PF-500 and your computer, and check the cable connections and HOST SELECT switch setting. Then turn on the power in the order of your computer → PF-500, and check that the driver and MIDI application on your computer are functioning correctly. When using the PF-500 - Yamaha PF-500 | Owner's Manual - Page 88
song such as commercially available music data into the PF-500's Current memory or storage memory press the B [+ (YES)] button. The PF500 displays the "SaveToMemory" (page 45) parameter screen. problem is found with the song data when you select a song or while the song is playing. In this case - Yamaha PF-500 | Owner's Manual - Page 89
set correctly, and that the driver on your computer is functioning correctly. Then try transmitting the data once again. You used a period or space at the beginning of a song name or you tried to change a song name that includes a character (or characters) not supported by the PF-500, and the PF-500 - Yamaha PF-500 | Owner's Manual - Page 90
pedal. I Higher or lower notes does not sound correctly when the transpose or octave setting is made. The setting range for the transposition and octave setting is C-2 - G8. (With the normal setting, the PF-500's 88 keys covers case, using the B [-]/[+] buttons while the song is stopped. 90 PF-500 - Yamaha PF-500 | Owner's Manual - Page 91
change the key signature, then change it. I How much data can I record? • Current memory (page 45): About 800KB • Storage memory (page 45): About 750KB I The on/off setting of the pedal connected to the AUX PEDAL jack is reversed. Some types of pedals may turn on and off in opposite fashion. Use the - Yamaha PF-500 | Owner's Manual - Page 92
MEMO 92 PF-500 - Yamaha PF-500 | Owner's Manual - Page 93
Appendix PF-500 93 - Yamaha PF-500 | Owner's Manual - Page 94
function, or notes are sustained even though the damper pedal is not pressed. Speaker setting is On. The plug of the pedal unit is not inserted into the [PEDAL] jack. Solution Insert the power cable plug firmly into the PF-500 and into the electrical outlet of the correct voltage. (page 15) This is - Yamaha PF-500 | Owner's Manual - Page 95
into problems playing PF-500 is saved in the SMF format 0 in a floppy disk. I ESEQ This sequence format is compatible with many of Yamaha's MIDI devices, including the PF-500 series instruments. This is a common format used with various Yamaha software. • The PF-500 is compatible with ESEQ. PF-500 - Yamaha PF-500 | Owner's Manual - Page 96
) This voice allocation format is compatible with many of Yamaha's MIDI devices, including the PF500 series instruments. This is also common format used with various Yamaha software. The PF-500 is compatible with DOC. • Even if the devices and data used satisfy all the conditions above, the data may - Yamaha PF-500 | Owner's Manual - Page 97
of an acoustic piano. Even the tonal changes produced by the damper pedal and the subtle sounds of releasing a key are reproduced. of electric piano sound. Widely used in rock and popular music. The sound of the instrument frequently used in × × baroque music. Variations Suite." PF-500 97 - Yamaha PF-500 | Owner's Manual - Page 98
for use in Dual mode with GRAND PIANO or E.PIANO. You bass. Effective when used for jazz walk- ing-bass lines. × × × The sound of an electric bass. Frequently used in jazz, rock, and popular music. × × × The sound of a fretless bass. Suitable for styles such as jazz and fusion. 98 PF-500 - Yamaha PF-500 | Owner's Manual - Page 99
combination creates the thick sound of a layered piano and strings. This sound is suitable for fusion. Deeper reverb and chorus (page 71) will improve the groove. The damper pedal is effective on the voice assigned to the right-hand range. This combination makes a very brilliant sound. PF-500 99 - Yamaha PF-500 | Owner's Manual - Page 100
Assembling the Keyboard Stand You can use the PF-500 without installing the stand. However, if you wish to attach the stand to the PF-500, follow the steps below. CAUTION • Be careful not to confuse parts. Make sure that you install all parts in the correct orientation. Assemble the stand in - Yamaha PF-500 | Owner's Manual - Page 101
other movable fixtures? • Move the PF-500 to an appropriate location. • Does the PF-500 make a rattling noise when you shake it? • Tighten all screws. • Are the pedal and power cords inserted securely into the sockets? • Check the connections. • If the keyboard stand creaks or is otherwise unsteady - Yamaha PF-500 | Owner's Manual - Page 102
Components 51 Serial 54 Speaker 51 USB 57 Connectors MIDI IN/OUT/THRU 52, 56 CONTRAST* 16 D Damper (right) pedal 27 Data Compatibility 95 Data type 50 102 PF-500 Default (Normal) setting* 28 Demonstration tunes 20 Detailed Settings 60 Metronome 68 MIDI 77 Other settings 81 recording and playback - Yamaha PF-500 | Owner's Manual - Page 103
23 metronome 34 USB jack 52 V Voice group buttons 26, 32 VOICE SETTING 69 Voices* 26 Detailed settings 69 Volume Balance (SONG BLANCE) 42 Setting 16 X XG 96 T TEMPO 50 Piano Preset Songs 23 metronome 34 Recorded Songs 49 the third or more tracks ➔ EXTRA TRACKS 40 TO HOST jack 52, 54 PF-500 103 - Yamaha PF-500 | Owner's Manual - Page 104
MEMO 104 PF-500 - Yamaha PF-500 | Owner's Manual - Page 105
to have the obsolete outlet replaced. Do NOT defeat the safety purpose of the plug. 4. Some electronic products utilize external power supplies or adapters. Do NOT connect this type of product to any power supply or adapter other than one described in the owners manual, on the name plate, or - Yamaha PF-500 | Owner's Manual - Page 106
electronic devices. This equipment generates/ uses radio frequencies and, if not installed and used according to the instructions found in the users manual to products distributed by Yamaha Canada Music Ltd. • Ceci ne s'applique qu'aux produits distribués par Yamaha Canada Musique Ltée. 106 PF-500 - Yamaha PF-500 | Owner's Manual - Page 107
IN PACIFIC OCEAN Yamaha Corporation, Asia-Pacific Music Marketing Group Nakazawa-cho 10-1, Hamamatsu, Japan 430-8650 Tel: 053-460-2312 SY23 HEAD OFFICE Yamaha Corporation, Pro Audio & Digital Musical Instrument Division Nakazawa-cho 10-1, Hamamatsu, Japan 430-8650 Tel: 053-460-2445 PF-500 107 - Yamaha PF-500 | Owner's Manual - Page 108
only) www.yamahasynth.com Yamaha Manual Library http://www2.yamaha.co.jp/manual/english/ This document is printed on recycled chlorine free (ECF) paper with soy ink. M.D.G., Pro Audio & Digital Musical Instrument Division, Yamaha Corporation C 2002 Yamaha Corporation V941880 205APAP1.3-01A0 Printed
-
 1
1 -
 2
2 -
 3
3 -
 4
4 -
 5
5 -
 6
6 -
 7
7 -
8
-
9
-
10
-
11
-
12
-
13
-
14
-
15
-
16
-
17
-
18
-
19
-
20
-
21
-
22
-
23
-
24
-
25
-
26
-
27
-
28
-
29
-
30
-
31
-
32
-
33
-
34
-
35
-
36
-
37
-
38
-
39
-
40
-
41
-
42
-
43
-
44
-
45
-
46
-
47
-
48
-
49
-
50
-
51
-
52
-
53
-
54
-
55
-
56
-
57
-
58
-
59
-
60
-
61
-
62
-
63
-
64
-
65
-
66
-
67
-
68
-
69
-
70
-
71
-
72
-
73
-
74
-
75
-
76
-
77
-
78
-
79
-
80
-
81
-
82
-
83
-
84
-
85
-
86
-
87
-
88
-
89
-
90
-
91
-
92
-
93
-
94
-
95
-
96
-
97
-
98
-
99
-
100
-
101
-
102
-
103
-
104
-
105
-
106
-
107
-
108
 |
 |
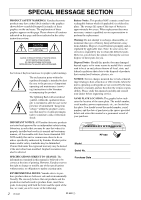
IMPORTANT
Check your power supply
Make sure that your local AC mains voltage matches the voltage specified on the name plate
on the bottom panel. In some areas a voltage selector may be provided on the bottom panel of
the main keyboard unit. Make sure that the voltage selector is set for the voltage in your area. The
voltage selector is set at 240V when the unit is initially shipped. To change the setting use a
"minus" screwdriver to rotate the selector dial so that the correct voltage appears next to the
pointer on the panel.
Before using the PF-500, be sure to read
“
Precautions
„
on pages 3-4.
PF-500
PF-500
Owner's Manual