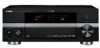
Yamaha RX-V3800 Owner's Manual
Yamaha RX-V3800 - AV Receiver Manual
 |
UPC - 027108928524
View all Yamaha RX-V3800 manuals
Add to My Manuals
Save this manual to your list of manuals |
Yamaha RX-V3800 manual content summary:
- Yamaha RX-V3800 | Owner's Manual - Page 1
U RX-V3800 AV Receiver OWNER'S MANUAL - Yamaha RX-V3800 | Owner's Manual - Page 2
INSTRUCTIONS Important safety instructions CAUTION RISK OF ELECTRIC SHOCK DO NOT OPEN CAUTION: TO REDUCE THE RISK OF ELECTRIC SHOCK, DO NOT REMOVE COVER (OR BACK). NO USER-SERVICEABLE PARTS INSIDE. REFER SERVICING TO QUALIFIED SERVICE and to protect it from overheating, and these openings must not - Yamaha RX-V3800 | Owner's Manual - Page 3
SERVICE GROUNDING ELECTRODE SYSTEM (NEC ART 250. PART H) FCC INFORMATION (for US customers) 1 IMPORTANT NOTICE: DO NOT MODIFY THIS UNIT! This product, when installed as indicated in the instructions contained in this manual, meets FCC requirements. Modifications not expressly approved by Yamaha - Yamaha RX-V3800 | Owner's Manual - Page 4
shock to the user and/or damage Yamaha service personnel when any service du Canada. IMPORTANT received including Fax: 714-670-0108 interference that may cause undesired operation. Type of Equipment: AV Receiver See the "Troubleshooting" section at the end of this manual if Model Name: RX-V3800 - Yamaha RX-V3800 | Owner's Manual - Page 5
setup menu 122 ADDITIONAL INFORMATION Troubleshooting 127 Resetting the system 137 Glossary 138 Sound field program information 142 Parametric equalizer information 143 Specifications 144 Index 146 z APPENDIX (at the end of this manual) Front Panel i Remote Control ii Sound output in each - Yamaha RX-V3800 | Owner's Manual - Page 6
licensed from Fraunhofer IIS and Thomson. This receiver supports network connections. "HDMI", the "HDMI" logo, and "High-Definition Multimedia Interface" are trademarks or registered trademarks of HDMI Licensing LLC. "SILENT CINEMA" is a trademark of YAMAHA CORPORATION. The XM name and related logos - Yamaha RX-V3800 | Owner's Manual - Page 7
video → HDMI digital video) capability for monitor out ◆ Analog video up-scaling from 480i (NTSC)/576i (PAL) or 480p/576p to 720p, 1080i or 1080p iPod controlling capability ◆ DOCK terminal to connect a Yamaha iPod universal dock (such as the YDS-10, sold separately), which supports iPod (Click - Yamaha RX-V3800 | Owner's Manual - Page 8
accessories Check that you received all of the following parts. Remote control POWER TV POWER AV STANDBY POWER XM NET/USB AUDIO SEL SLEEP TUNER CD CD-R MULTI CH IN MD/TAPE DVD BD/HD DVD PHONO DTV/CBL DVR VCR V-AUX/DOCK SELECT ++ TV VOL CH -- + VOLUME - AMP SOURCE TV TV MUTE - Yamaha RX-V3800 | Owner's Manual - Page 9
INTRODUCTION Getting started Getting started ■ Installing batteries in the remote control 2 1 3 1 Press the part and slide the battery compartment cover off. 2 Insert the four supplied batteries (AAA, LR03) according to the polarity markings (+ and -) on the inside of the - Yamaha RX-V3800 | Owner's Manual - Page 10
Quick start guide Quick start guide The following steps describe the easiest way to enjoy DVD movie playback in your home theater. Front right Video monitor speaker Front left speaker Subwoofer Surround right speaker Preparation: Check the items In these steps, you need the following supplied - Yamaha RX-V3800 | Owner's Manual - Page 11
metal part of this unit. To the surround back left speaker To the surround right speaker To the surround back right speaker To the surround left speaker 4 Connect the subwoofer cable to the SUBWOOFER PRE OUT jack of this unit and the input jack of the subwoofer. Subwoofer AV receiver English - Yamaha RX-V3800 | Owner's Manual - Page 12
HDMI COMPONENT VIDEO MONITOR OUT A BD/HD DVD B DVD C DTV/CBL Y Y IN4 PB PB BD/HD DVD DVD VIDEO DTV/CBL IN DVR 1 OUT IN VCR OUT MONITOR OUT FM 75Ω UNBAL. S VIDEO ANTENNA GND AM DVR PR PR IN3 DTV/ CBL REMOTE unit. DVD player AV receiver Video monitor AV receiver Video input jack - Yamaha RX-V3800 | Owner's Manual - Page 13
start guide 4 amplifier ☞ P. 28 • Connecting a DVD player via multi-channel analog audio connection ☞ P. 29 • Connecting a Yamaha iPod universal dock ☞ P. 30 • Using the REMOTE IN plugs ☞ P. 20 • General information on HDMI ☞ P. 21 • Speaker impedance settings ☞ P. 33 English 9 En - Yamaha RX-V3800 | Owner's Manual - Page 14
Quick start guide Step 3: Turn on the power and start playback Check the type of the unit is set to the standby mode and consumes a small amount of power in order to receive infrared signals from the remote control. To turn on this unit from the standby mode, press BMAIN ZONE ON/OFF on the - Yamaha RX-V3800 | Owner's Manual - Page 15
to do with this unit? Quick start guide Using various input sources • Basic operations Setup) ☞ P. 37 • Setting the remote control ☞ P. 105 Additional features • Displaying the video signals ☞ P. 89 • Setting the basic speaker configuration ☞ P. 91 • Setting the network parameters ☞ P. - Yamaha RX-V3800 | Owner's Manual - Page 16
R + SURROUND FRONT L SP2 + ZONE 2/ZONE 3 R L + L + AC IN AC OUTLETS SWITCHED 89 0 A Name Page 1 HDMI connectors 21 2 COMPONENT VIDEO jacks 23 - 26 3 Audio component jacks 27 REMOTE IN/OUT jacks 30 4 Video component jacks 23 - 26 5 ANTENNA terminals 32 6 VOLTAGE SELECTOR 32 - Yamaha RX-V3800 | Owner's Manual - Page 17
add the presence speakers for the effect sounds of the CINEMA DSP sound field program. See page 17 for details. speaker, you can do without it. Best results, however, are obtained with the Subwoofer The use of a subwoofer with a built-in amplifier, such as the Yamaha Active Servo Processing Subwoofer - Yamaha RX-V3800 | Owner's Manual - Page 18
you also add the presence speakers for the effect sounds of the CINEMA DSP sound field program. See page 17 for details. FR FL 92). Front left and right speakers Center speaker Subwoofer The functions and settings of each speaker are parameters in "Manual Setup" (see page 91) to output - Yamaha RX-V3800 | Owner's Manual - Page 19
each other or do not let them touch any metal part of this unit. This could damage this unit and/or setting Subwoofer Surround back speakers Left Right Center speaker SUB WOOFER SPEAKERS SURROUND BACK/ CENTER R BI-AMP L + SINGLE + + R SURROUND L SP2 + - Yamaha RX-V3800 | Owner's Manual - Page 20
Connections ■ For the 6.1-channel speaker setting Surround back speakers Left Subwoofer SUB WOOFER SPEAKERS SURROUND BACK/ CENTER BI-AMP L SINGLE + + R SURROUND L SP2 + + ZONE 2/ZONE 3 R L + R FRONT L + + Center speaker Zone 2 or Zone 3 speakers (see page 117) Right Left - Yamaha RX-V3800 | Owner's Manual - Page 21
speakers with extra ambient effects produced by the sound field programs (see page 45). Presence left and right speakers function more effectively when the CINEMA DSP 3D mode is active (see page 50). You can adjust the vertical position of dialogues with using the presence speakers (see page 75). To - Yamaha RX-V3800 | Owner's Manual - Page 22
Connections ■ Connecting the speaker cable 1 Remove approximately 10 mm (0.4 in) of insulation from the end of each speaker cable and then twist the exposed wires of the cable together to prevent short circuits. 5 Hook the speaker terminal wrench onto the WRENCH HOLDER on the rear panel of this - Yamaha RX-V3800 | Owner's Manual - Page 23
speaker system. Check if your speakers support biamplification. To make the bi-amplification connections, use the FRONT and SURROUND BACK/BI-AMP terminals as shown below. To activate of the speakers appropriately. Refer to the instruction manuals of the speakers for details. English 19 En - Yamaha RX-V3800 | Owner's Manual - Page 24
Connections Information on jacks and cable plugs Audio jacks and cable plugs AUDIO L R DIGITAL COAXIAL DIGITAL OPTICAL Video jacks and cable plugs VIDEO S VIDEO COMPONENT VIDEO Y PB PR (White) (Red) (Orange) (Yellow) (Green) (Blue) (Red) L R Left and right analog audio cable - Yamaha RX-V3800 | Owner's Manual - Page 25
the HDMI IN jacks of the selected input source are output at the HDMI OUT jack of this unit. y • You can check the potential problem about the HDMI connection or cause noise. • The HDMI OUT jack outputs the audio signals input at the HDMI input jacks only even if "Support Audio" is set to "Other - Yamaha RX-V3800 | Owner's Manual - Page 26
Dolby Digital and DTS signals input at the HDMI input jacks can be output at the HDMI OUT jack only when "Support Audio" is set to "Other" (see page or S VIDEO MONITOR OUT jacks. • The analog component video signals with 1080p of resolution are only output at the COMPONENT VIDEO MONITOR OUT jacks. • - Yamaha RX-V3800 | Owner's Manual - Page 27
and other components are unplugged from the AC wall outlets. y You can select to play back HDMI audio signals on this unit or on another HDMI component connected to the HDMI OUT jack on the rear panel of this unit. Use the "Support Audio" parameter in "Option" to select the component to play back - Yamaha RX-V3800 | Owner's Manual - Page 28
out Component out Blu-ray Disc or HD DVD player Optical out Audio out S-video out Video out Y PB PR S V LR O HDMI COMPONENT VIDEO A BD/HD DVD Y PB PR BD/HD DVD VIDEO L R S VIDEO VIDEO IN1 BD/ HD DVD DIGITAL INPUT 5 BD/ HD DVD OPTICAL indicates recommended - Yamaha RX-V3800 | Owner's Manual - Page 29
player Optical out Coaxial out Component out Audio out S-video out Video out C Y PB PR S V LR O HDMI IN2 DVD COMPONENT VIDEO B DVD Y PB PR VIDEO DVD L R 2 DVD DIGITAL INPUT COAXIAL 6 DVD S VIDEO VIDEO OPTICAL indicates recommended connections indicates alternative connections - Yamaha RX-V3800 | Owner's Manual - Page 30
Connections ■ Connecting a set-top box HDMI out Component out Satellite receiver, cable TV receiver or HDTV decoder Optical out Audio out Video out S-video out Y PB PR HDMI COMPONENT VIDEO Y C DTV/CBL PB PR L IN3 R DTV/ CBL S V LR O VIDEO DTV/CBL S VIDEO VIDEO DIGITAL INPUT 7 DTV/ - Yamaha RX-V3800 | Owner's Manual - Page 31
-output MC cartridge. To connect a turntable with a lowoutput MC cartridge to the PHONO jacks, use an in-line boosting transformer or an MC-head amplifier. • When you connect both the DIGITAL INPUT (OPTICAL) jack and the DIGITAL INPUT (COAXIAL) jack to an audio component, the priority is given to - Yamaha RX-V3800 | Owner's Manual - Page 32
control on the subwoofer (see page 52). • Some signals may not be output at the SUBWOOFER PRE OUT jack depending on the settings for "Speaker Set" (see page 91) and "Bass Out" (see page 92). • You can use the automatic setup feature even if you use an external amplifier "BI-AMP" is set to "ON - Yamaha RX-V3800 | Owner's Manual - Page 33
is equipped with 6 additional input jacks (left and right FRONT, CENTER, left and right SURROUND and SUBWOOFER) for discrete multi-channel input from a multi-format player, external decoder, sound processor or pre-amplifier. If you set "Input Channels" to "8ch" in "MULTI CH" (see page 83), you can - Yamaha RX-V3800 | Owner's Manual - Page 34
MAN'L/AUTO FM MODE ZONE ON/OFF DISPLAY ZONE CONTROLS ZONE 2 ZONE 3 SILENT CINEMA S VIDEO VIDEO L AUDIO R OPTICAL SLEEP PROGRAM Video output S-Video output REMOTE IN OUT 1 IN OUT 2 * Remote control out Infrared signal receiver or Yamaha component Yamaha component (CD or DVD - Yamaha RX-V3800 | Owner's Manual - Page 35
ports on your router that supports the DHCP (Dynamic Host Configuration Protocol) server function. The configure the network settings manually (see page 94). • Yamaha MCX-2000, MCX-A10 and MCX-C15 may not be for sale in same locations. Internet Yamaha MCX-2000 Yamaha MCX-C15 WAN LAN Modem Yamaha - Yamaha RX-V3800 | Owner's Manual - Page 36
, install an outdoor antenna. Consult the nearest authorized Yamaha dealer or service center about outdoor antennas. AC IN AC OUTLETS To unit into the AC wall outlet. ■ AC OUTLET(S) (SWITCHED) U.K. and Australia models 1 outlet Korea model None Other models 2 outlets Use these outlet(s) to - Yamaha RX-V3800 | Owner's Manual - Page 37
and messages, that appears in the GUI (graphical user interface) screen of this unit. 1 Make sure amount of power in order to receive infrared signals from the remote control. ■ Set the main zone to are some problems... • First, turn off and then turn on this unit again. • If problems persist, - Yamaha RX-V3800 | Owner's Manual - Page 38
lower part of the panel. Keep the door closed when not using these controls. 2 LIGHT Lights up the remote control buttons remote control is sending infrared signals. Operation mode selector (D) The function of some buttons depends on the operation mode selector position. AMP Operates the amplifier - Yamaha RX-V3800 | Owner's Manual - Page 39
PCM WMA MATRIX DISCRETE HD 96 24 CINEMA q DIGITAL PLUS qPL x qEX MP3 HDMI input jacks (see page 21). 3 DOCK indicator Lights up when you station your iPod in a Yamaha to the U.S.A. and Canada models. 6 MUTE indicator " (see page 37) or manually by adjusting settings for "Presence" (see page - Yamaha RX-V3800 | Owner's Manual - Page 40
indicator Lights up when this unit is receiving a strong signal for an FM stereo CINEMA MATRIX DISCRETE HD 96 qDIGITAL PLUS 24 qPL x qEX F G H I J K MP3 MASTER AUDIO qTRUE HD C neural indicator (U.S.A. and Canada CINEMA DSP is active (see page 50). 3D indicator Lights up when the CINEMA DSP 3D - Yamaha RX-V3800 | Owner's Manual - Page 41
"Auto Setup" section in "Troubleshooting" on pages 135 and 136 for a complete list of error and warning messages and proper remedies. • The initial setting for each parameter is indicated in bold. • Before performing operations, set the operation mode selector on the remote control to DAMP. ■ Basic - Yamaha RX-V3800 | Owner's Manual - Page 42
procedure immediately. Loud test tones are output from see the "Auto Setup" section in "Troubleshooting" on page 135. • Press 4l and not satisfied with the results or want to manually adjust each parameter, set the parameters in characteristics of your subwoofer or external amplifiers if you connect - Yamaha RX-V3800 | Owner's Manual - Page 43
W1:Out of Phase W3:Level Error Warning messages When this unit detects potential problems during the automatic setup procedure, warning messages appears in the result display. See the "Auto Setup" section in "Troubleshooting" on page 135 for a complete list of warning messages and proper remedies - Yamaha RX-V3800 | Owner's Manual - Page 44
automatic setup Use this feature to review the result of the automatic setup. 1 Set the operation mode selector to DAMP and then press GSET MENU to turn on the GUI screen. 2 Press 4k / n repeatedly and then 4h to select "Auto Setup". Input Select Manual Setup Auto Setup System Memory Signal Info - Yamaha RX-V3800 | Owner's Manual - Page 45
some unwanted noise that may damage your speakers. Check whether your CD player supports CDs encoded in DTS. Also, check the sound output level of your remote control to DAMP. Basic procedure 1 Turn on the video monitor connected to this unit. y • You can control this unit by using the graphical user - Yamaha RX-V3800 | Owner's Manual - Page 46
This feature is not available when no digital input jack (OPTICAL, COAXIAL and HDMI) are assigned. Use "I/O Assignment" in "Input Select" to reassign the MAN'L/AUTO FM MODE ZONE ON/OFF DISPLAY ZONE CONTROLS ZONE 2 ZONE 3 SILENT CINEMA S VIDEO VIDEO L AUDIO R OPTICAL SLEEP PROGRAM - Yamaha RX-V3800 | Owner's Manual - Page 47
You can also rotate RVOLUME on the front panel or press CVOLUME +/- on the remote control to resume the audio output. • You can adjust the muting level by using the . Refer to the operating instructions for the source component. See page 53 for details about tuning instructions. 3 Press MSLEEP (or - Yamaha RX-V3800 | Owner's Manual - Page 48
using the graphical user interface (GUI) screen This unit features a sophisticated graphical user interface (GUI) screen that helps you to control the amplifier function of DVD qPLIIx Movie Sci-Fi Stereo/Surround Input Select Manual Setup Auto Setup System Memory Sound Video Basic NET/USB Option - Yamaha RX-V3800 | Owner's Manual - Page 49
which you can use to enhance your playback experience. y • The Yamaha CINEMA DSP sound field program are compatible with all Dolby Digital, DTS, Dolby name of the program, etc. Remote control button Category of the program Name of the program Created sound fields CINEMA DSP or HiFi DSP MOVIE - Yamaha RX-V3800 | Owner's Manual - Page 50
Sound field programs ■ For audio music sources y For audio music sources, we also recommend using the Pure Direct mode (see page 51), the "STRAIGHT" mode (see page 50) or surround decode mode (see page 71). CELNATSESRITCAAINL 57 CLASSICAL Hall in Munich HiFi DSP This sound field simulates a - Yamaha RX-V3800 | Owner's Manual - Page 51
and adventure games. It combines the sound field effects for movies and the sound field design used with "Action Game" to represent the depth and 3D feeling of the field during play, while offering movie-like surround effects in the movie scenes in the game. DSP Level Init. Delay Room Size - Yamaha RX-V3800 | Owner's Manual - Page 52
Room Size Sur. Init. Delay Sur. Room Size SB. Init. Delay SB. Room Size Dialogue Lift ENTERTAIN 7 ENTERTAINMENT Recital/Opera This program controls the amount of reverberations at an optimum level and emphasizes the depth and clarity of human voices. "Opera" offers the reverberations of an - Yamaha RX-V3800 | Owner's Manual - Page 53
that match a wide range of movie genres from serious dramas to musicals and comedies. The reverberations are modest but offer an optimum 3D feeling, reproducing effects tones and background music softly but cubically around clear words and center positioning in a way that does not fatigue - Yamaha RX-V3800 | Owner's Manual - Page 54
unit is in the "STRAIGHT" mode. Before performing the following operation, set the operation mode selector on the remote control to DAMP. Using CINEMA DSP 3D mode CINEMA DSP 3D mode creates the intensive and accurate stereoscopic sound field in the listening room. You can activate and deactivate the - Yamaha RX-V3800 | Owner's Manual - Page 55
the operation mode selector on the remote control to DAMP. Enjoying pure hi- MONITOR OUT jacks and the HDMI OUT jack. • When you set Audio input jack selects to "AUTO", "HDMI", or "COAX/OPT" and center speaker channels and the subwoofer channel. 1 Press ETONE CONTROL on the front panel repeatedly to - Yamaha RX-V3800 | Owner's Manual - Page 56
stereo You can mix down multi-channel sources to 2 channels and enjoy playback in 2-channel stereo. Press OSTEREO on the remote control repeatedly to select "2ch Stereo". y • You can use a subwoofer with this program when "Bass Out" is set to "SWFR" or "Both" (see page 92). • You can also select the - Yamaha RX-V3800 | Owner's Manual - Page 57
with each other. Note Orient the connected FM and AM antennas for the best reception. Automatic tuning Manual tuning Automatic tuning is effective when station signals are strong and there is no interference. If the signal received from the station you want to select is weak, tune into it - Yamaha RX-V3800 | Owner's Manual - Page 58
of the 5 preset station groups) manually. 1 Tune into a station automatically or manually. See page 53 for tuning instructions. 2 Press KMEMORY. The MEMORY under the same preset station number. • If the number of received stations does not reach 40 (E8), automatic preset tuning automatically stops - Yamaha RX-V3800 | Owner's Manual - Page 59
BASIC OPERATION FM/AM tuning 5 Press KMEMORY while the MEMORY indicator is flashing. The station band and frequency appear in the front panel display with the preset station group and number you have selected. The MEMORY indicator disappears from the front panel display. A1:FM 88.9 MHz The - Yamaha RX-V3800 | Owner's Manual - Page 60
for XM radio receivers by calling 1- and advertising-supported channels, Service only available in the 48 contiguous United States and Canada Home Dock, see the operating instructions provided with XM MiniTuner Dock. on the video monitor. For the best reception, adjust the orientation of the antenna - Yamaha RX-V3800 | Owner's Manual - Page 61
and installed the antenna, you are ready to subscribe and begin receiving XM programming. There are three places to find your eight character Before performing the following operations, set the operation mode selector on the remote control to DSOURCE. 1 Rotate the CINPUT selector (or press 1XM) to - Yamaha RX-V3800 | Owner's Manual - Page 62
y You can also select the preset channel number directly by pressing the numeric buttons (1 to 8) on the remote control. ■ Direct Number Access mode 1 Press GSRCH MODE on the remote control repeatedly to select "ALL CH SEARCH" or "CAT SEARCH". 2 Press GCATEGORY (or 4A-E/CAT. l / h) repeatedly to - Yamaha RX-V3800 | Owner's Manual - Page 63
12 [043] XMU Currently selected channel number 123 y • To enter a one-digit or two-digit channel number, press the numeric buttons (6) on the remote control and then press KENT to confirm the input number. • If no button is pressed within a few seconds after you enter a one-digit or two-digit - Yamaha RX-V3800 | Owner's Manual - Page 64
following operations, set the operation mode selector on the remote control to DSOURCE and then press 1XM. Displaying the XM™ or on the video monitor, see the "XM Satellite Radio (U.S.A. and Canada models only)" section in "Troubleshooting" on page 127 for appropriate remedies. p Rl - Yamaha RX-V3800 | Owner's Manual - Page 65
it is being displayed on the video monitor. • The XM Satellite Radio information screen on hold is released if you press 4ENTER on the remote control again or if you change the XM Satellite Radio channel. • This unit can save up to two XM Satellite Radio information screens for future reference - Yamaha RX-V3800 | Owner's Manual - Page 66
Using iPod™ Once you have stationed your iPod in a Yamaha iPod universal dock (such as the YDS-10, sold separately) connected to the DOCK terminal of this unit (see page 30), you can enjoy playback of your iPod using the supplied remote control. You can also use the Compressed Music Enhancer mode - Yamaha RX-V3800 | Owner's Manual - Page 67
BASIC OPERATION Before performing the following operations, set the operation mode selector on the remote control to DSOURCE and then press 1V-AUX/DOCK. 1 Press JDISPLAY on the remote control. The following display appears in the video monitor. Top Playlists Artists Albums Songs Genres Composers - Yamaha RX-V3800 | Owner's Manual - Page 68
the network and USB features, refer to the "Remote control operation" on page 65. • For a complete list of status messages that appear in the front panel display and on the video monitor, see the "Network and USB" section in "Troubleshooting" on page 132. Navigating the network and USB menus - Yamaha RX-V3800 | Owner's Manual - Page 69
top NET/ USB menu. The following display appears on the video monitor. If any other screen appears on the video monitor, press GMENU on the remote control repeatedly until the top NET/USB menu appears. Top PC/MusicCAST Internet Radio USB 3 Press 4k / n to select the desired sub input source and then - Yamaha RX-V3800 | Owner's Manual - Page 70
or MusicCAST to begin playback. Notes • Yamaha MCX-2000 may not be for sale in some locations. • You can "Receive PCM Stream" setting of this unit to "ON" on MCX-2000. For details, refer to the instruction manual of Player 11 on your PC. You can download the installer of Windows Media Player 11 from - Yamaha RX-V3800 | Owner's Manual - Page 71
Config" mode of your Yamaha MCX-2000 (refer to the instruction manual of MCX-2000) and then set "INITIALIZE" in the advanced setup menu of this unit to "NETWORK" (see page 122). • The client control functions of MusicCAST over this unit other than "View Play Info", "Receive PCM Stream" and "Edit - Yamaha RX-V3800 | Owner's Manual - Page 72
USB port on the front panel of this unit. Notes • This unit supports USB mass storage class devices (except USB Hard Disc Drivers) using FAT (1-8) Before performing the following operations, set the operation mode selector on the remote control to DSOURCE. 1 Press 1NET/USB to select "NET/USB" as the - Yamaha RX-V3800 | Owner's Manual - Page 73
to confirm the preset. ■ Select an item by using numeric buttons (1-8) (6) Before performing the following operations, set the operation mode selector on the remote control to DSOURCE. 1 Press 1NET/USB to select "NET/USB" as the input source. 2 Select the desired sub input source. 3 Press one of - Yamaha RX-V3800 | Owner's Manual - Page 74
DTS-compatible player, follow its operating instructions to make a setting so that the components connected to this unit. • TONE CONTROL (see page 51) and the volume The XM Satellite Radio signals (U.S.A. and Canada models only) cannot be output at laws. y Do a test recording before you start an - Yamaha RX-V3800 | Owner's Manual - Page 75
ADVANCED SOUND CONFIGURATIONS Advanced sound configurations Selecting decoders ■ Selecting decoders for 2-channel sources operation mode selector to DAMP and then press LSUR. DECODE repeatedly on the remote control to select the surround decode mode. You can select desired surround decoder modes - Yamaha RX-V3800 | Owner's Manual - Page 76
for movie sources. EXTD Surround Neo:6 Cinema SUR.DECODE +10 SUR. DECODE Surround Decoder DTS processing for music sources. Center Image EXTD Surround Neo:6 Music SUR.DECODE +10 SUR. DECODE Surround Decoder Neural THX (U.S.A. and Canada models only) Neural-THX Surround processing for - Yamaha RX-V3800 | Owner's Manual - Page 77
unit features a sophisticated graphical user interface (GUI) screen that helps you to control the amplifier function of this unit. With the GUI screen, you can view the information of the signals being input and the status of this unit. Stereo/Surround Input Select Manual Setup Auto Setup System - Yamaha RX-V3800 | Owner's Manual - Page 78
Graphical user interface selector to DAMP and then press GSET MENU. ■ Basic configuration of sound field programs Each sound field program has some 4k / n repeatedly to select the desired programs. 5 Press 4h on the remote control and then 4k / n to select the desired parameter. y You can select - Yamaha RX-V3800 | Owner's Manual - Page 79
" is available only when "Presence" is set to "Yes" (see page 92). • You cannot move the dialogue position down from the initial dialogue position. Graphical user interface (GUI) screen ADVANCED OPERATION English 75 En - Yamaha RX-V3800 | Owner's Manual - Page 80
Graphical user interface (GUI) screen ■ Sound field parameter descriptions You can adjust that you adjust the corresponding room size parameters likewise. This adjustment is especially effective for the CINEMA DSP programs. Control range: 1 to 99 ms (Init. Delay) 1 to 49 ms (Sur. Init. Delay - Yamaha RX-V3800 | Owner's Manual - Page 81
field parameter Liveness Sur. Liveness SB. Liveness Graphical user interface (GUI) screen Features Liveness. Surround and lets you adjust the early reflection decay rate and thus the "liveness" of the room. Control range: 0 to 10 Source sound Live Dead Level Level Level Time Time Time Rev. - Yamaha RX-V3800 | Owner's Manual - Page 82
Graphical user interface (GUI) screen Sound field parameter Rev. Delay Features Reverberation sound begins. A later reverberation sound makes you feel as if you are in a larger acoustic environment. Control range: 0 to 250 ms Rev. Level Level Source sound (dB) Reverberation Rev. Delay Rev. - Yamaha RX-V3800 | Owner's Manual - Page 83
Graphical user interface Select "Off" not to bypass the decoders, DSP processors and the tone control circuitry when "BASS" and "TREBLE" are set to 0 dB. -frequency signals of the front left and right channels are redirected to the subwoofer in the following cases: - "Bass Out" is set to "Both - Yamaha RX-V3800 | Owner's Manual - Page 84
user interface moves the center channel output towards the front left and right speakers. Control range: 0 (center channel sound is output only from the center center speaker) Initial setting: 0.3 EXTD Surround (U.S.A. and Canada models only) Extended surround mode. Selects the extended surround - Yamaha RX-V3800 | Owner's Manual - Page 85
user interface (GUI) screen Input Select Use this feature to reassign digital input/outputs, select the input signal, rename the inputs, or adjust the level of the signal input at each input source. Input source XM (U.S.A. and Canada a Yamaha iPod best reception using the remote control. Instead - Yamaha RX-V3800 | Owner's Manual - Page 86
user I/O Assignment Audio Select Decoder Mode Optical Output Component Video HDMI Example 1: Assigning the CD DIGITAL INPUT COAXIAL jack to jack by pressing DAUDIO SELECT on the front panel (or 0AUDIO SEL on the remote control). See page 42 for details. • You can set the default audio input jack - Yamaha RX-V3800 | Owner's Manual - Page 87
in the display window (B) on the remote control. Refer to "Changing source names in sources) using this setting. Graphical user interface (GUI) screen ■ Multi input into the center, subwoofer and surround channels when a component are input. Note If "Zone2 Amplifier" (page 97) is set to " - Yamaha RX-V3800 | Owner's Manual - Page 88
Graphical user interface (GUI) screen Manual Setup (Volume) Use this menu to manually adjust the various volume settings. 1 Set the operation mode selector to DAMP and then press GSET MENU on the remote control. 2 Press 4k / n on the remote control to select "Manual Setup" and then press 4h. 3 - Yamaha RX-V3800 | Owner's Manual - Page 89
the remote control to select "Sound" and then press 4h. 4 Select the desired parameters and then press 4h to access and adjust. ■ LFE Level (Low-frequency effect level) Use this feature to adjust the output level of the LFE (lowfrequency effect) channel according to the capacity of your subwoofer or - Yamaha RX-V3800 | Owner's Manual - Page 90
user interface (GUI) screen Test Tone Use this feature to select whether to turn on or off the test tone output while you are adjusting the tonal quality of each speaker. Choice Functions On Outputs the test tone. Off Does not output the test and Subwoofer channel. Bass (Bass control) Use - Yamaha RX-V3800 | Owner's Manual - Page 91
"Manual" to adjustment the audio and video synchronization. Graphical user interface Manual (Manual audio delay adjustment) Use this feature to adjust the delay of the sound output manually to synchronize audio with video images when you set "HDMI Auto" to "Off". Control range: 0 to 240 ms Control - Yamaha RX-V3800 | Owner's Manual - Page 92
user this feature to activate the desired decoder manually when this unit cannot detect the signal AMP" is set to "On" (see page 126). • When this unit is turned off, this setting will be reset to "Auto". • (U.S.A. and Canada Presence R Presence right Subwoofer Subwoofer Choice Mute On Mute Off - Yamaha RX-V3800 | Owner's Manual - Page 93
user interface (GUI) screen Manual Setup (Video) Use this menu to adjust the video parameters. 1 Set the operation mode selector to DAMP and then press GSET MENU on the remote control. 2 Press 4k / n / l / h on the remote control to select "Manual HDMI monitor does not support analog video signals - Yamaha RX-V3800 | Owner's Manual - Page 94
when the component video signals with 720p, 1080i or 1080p resolutions are input - when HDMI video signals are input ■ On Screen (On-screen display this feature to adjust the vertical and horizontal position of the GUI screen. Control range: -5 (downward/left) to +5 (upward/right) Short Message On - Yamaha RX-V3800 | Owner's Manual - Page 95
user interface (GUI) screen Manual Setup (Basic) Use this menu to manually adjust any speaker setting. 1 Set the operation mode selector to DAMP and then press GSET MENU on the remote control. 2 Press 4k / n to select "Manual • If your subwoofer can adjust the Test Tone (Test tone) Turns the test - Yamaha RX-V3800 | Owner's Manual - Page 96
Graphical user interface . Notes • If you set "Presence" to "No", you cannot activate the CINEMA DSP 3D mode (see page 50). • "Dialogue Lift" is available only when "Presence" signals. LFE signals output Choice Subwoofer and speakers Subwoofer Front speakers Other speakers Both Output - Yamaha RX-V3800 | Owner's Manual - Page 97
. Uses the surround back speakers. Note When the CINEMA DSP 3D mode is active (see page 50), this unit always prioritize the presence speakers. Graphical user interface (GUI) screen ■ Speaker Distance (Speaker distance) Use this feature to manually adjust the distance of each speaker and the delay - Yamaha RX-V3800 | Owner's Manual - Page 98
) Use this feature to manually balance the speaker levels between the front left or surround left speakers and each speaker selected in "Speaker Set" (see page 91). Control range: -10.0 dB to +10.0 dB Initial setting: Front L/Front R/Presence L/Presence R/Subwoofer: 0.0 dB CENTER/Surround L/Surround - Yamaha RX-V3800 | Owner's Manual - Page 99
ADVANCED OPERATION Procedure of the network configuration 1 From the top GUI screen, press 4k / n on the remote control repeatedly and then 4h to select change and then press 4k / n repeatedly to change the number. Graphical user interface (GUI) screen Repeat (Repeat) Use this feature to set this - Yamaha RX-V3800 | Owner's Manual - Page 100
Graphical user interface (GUI) screen Manual Setup (Option) This menu adjusts the optional system settings. 1 Set the operation mode selector to DAMP and then press GSET MENU on the remote control. 2 Press 4k / n to select "Manual Setup" and then press 4h. 3 Press 4k / n / l / h to select "Option" - Yamaha RX-V3800 | Owner's Manual - Page 101
user interface (GUI) screen Zone2 Volume/Zone3 Volume (Zone 2/Zone 3 volume) Use this feature to select whether this unit controls the volume level of the audio signals output at the ZONE OUT (ZONE2 or ZONE3) jacks when you set "Zone2 Amplifier" or "Zone3 Amplifier on the remote control. Zone2 Max - Yamaha RX-V3800 | Owner's Manual - Page 102
HDMI support audio. Support Audio (Support audio) Use this feature to select whether to play back HDMI audio signals on this unit or on another HDMI component connected to the HDMI OUT jack on the rear panel of this unit. Choice Functions RX-V3800 Other Plays back HDMI on the remote control. 2 - Yamaha RX-V3800 | Owner's Manual - Page 103
this unit. Error message for HDMI sources or connected HDMI devices. See page 131 for details. Graphical user interface (GUI) screen Language the operation mode selector to DAMP and then press GSET MENU on the remote control. The top display appears. 2 Press 4n repeatedly to select "Language" - Yamaha RX-V3800 | Owner's Manual - Page 104
"Front Panel Disp." parameters "Support Audio" Currently selected sound field program (or the Pure Direct mode) Tonal quality control settings* Page 74 84 85 buttons. Press and hold one of the NSYSTEM MEMORY buttons on the remote control for 4 seconds. "MEMORY 1 SAVE Done" (example) appears in - Yamaha RX-V3800 | Owner's Manual - Page 105
NSYSTEM MEMORY buttons (see page 101). Loading the stored system settings • Before performing the following operations, set the operation mode selector on the remote control to DAMP. • This unit overwrites the stored settings to the current settings of this unit. If you do not want to erase the - Yamaha RX-V3800 | Owner's Manual - Page 106
System Memory) ■ Loading by the SET MENU operation 1 Press GSET MENU on the remote control. The top menu appears in the GUI. 2 Press 4k / n repeatedly to 85). To compare the results of the automatic setup or your manual configuration, use the NSYSTEM MEMORY buttons. SYSTEM MEMORY 1 The current - Yamaha RX-V3800 | Owner's Manual - Page 107
ENTERTAIN 5 6 7 MOVIE 8 SYSTEM MEMORY 2 The settings when the curtains of the listening room are open SYSTEM MEMORY 2 The "Village Vanguard" program configured for the vinyl record sources Saving each setting 1 Close the curtains of the listening room and then perform the automatic setup. See - Yamaha RX-V3800 | Owner's Manual - Page 108
for the LCD video monitor to "Memory1". 3 Change the input source to the component connected to one of the HDMI IN jacks and then start playback. 4 Adjust "Manual" in "Lipsync" appropriately. 5 Press and hold NSYSTEM MEMORY 2 for 4 seconds. This unit stores the audio and video synchronization - Yamaha RX-V3800 | Owner's Manual - Page 109
remote control codes for both DTV and PHONO, priority is given to the one set for DTV. POWER TV POWER AV STANDBY POWER XM NET/USB AUDIO SEL SLEEP TUNER CD CD-R MULTI CH IN MD/TAPE DVD BD/HD DVD PHONO DTV/CBL DVR VCR V-AUX/DOCK SELECT ++ TV VOL CH -- + VOLUME - AMP - Yamaha RX-V3800 | Owner's Manual - Page 110
remote control can operate up to 14 different components. [1] [2] POWER TV POWER AV STANDBY POWER XM NET/USB AUDIO SEL SLEEP TUNER CD CD-R MULTI CH IN MD/TAPE DVD BD/HD DVD PHONO DTV/CBL DVR VCR V-AUX/DOCK SELECT [3] [4] [5] [6] ++ TV VOL CH -- + VOLUME - AMP . DECODE 3D DSP 9 - Yamaha RX-V3800 | Owner's Manual - Page 111
TV TV DVR VCR TUNER Manufacturer Yamaha Yamaha Yamaha Yamaha Yamaha Yamaha Yamaha Yamaha Yamaha - - Yamaha - Yamaha Default code 2604 2607 2602 2300 2400 2100 2500 2100 2100 - - 2807 - 2606 Note You may not be able to operate your Yamaha component even if a Yamaha remote control code is preset as - Yamaha RX-V3800 | Owner's Manual - Page 112
video components (including Yamaha components). If operation is not possible with any of the remote control codes, program the new remote control function using the learn feature (see "Programming codes from other remote controls" on page 109) or use the remote control supplied with the component - Yamaha RX-V3800 | Owner's Manual - Page 113
AV STANDBY POWER XM NET/USB AUDIO SEL SLEEP TUNER CD CD-R MULTI CH IN MD/TAPE DVD BD/HD DVD PHONO DTV/CBL DVR VCR V-AUX/DOCK SELECT ++ TV VOL CH -- + VOLUME - AMP long transmissions. Refer to the operating instructions for the other remote control. 1 Set the operation mode selector - Yamaha RX-V3800 | Owner's Manual - Page 114
/USB AUDIO SEL SLEEP XM POWER AV POWER TV POWER STANDBY 5 Press and hold the button you want to program on the other remote control until "OK" appears in the display window (B) on the remote control. "NG" appears in the display window (B) on the remote control if learning was unsuccessful. In - Yamaha RX-V3800 | Owner's Manual - Page 115
macros (see page 113). ■ MACRO operations Macro buttons POWER TV POWER AV STANDBY POWER XM NET/USB AUDIO SEL SLEEP TUNER CD CD-R MULTI CH mode. RENAME Note "ERROR" appears in the display window (B) on the remote control if you press a button not indicated in the respective step, or when - Yamaha RX-V3800 | Owner's Manual - Page 116
one for PHONO. *3 When TUNER is selected as the input source, this unit plays the last station received before the unit was set in the standby mode. *4 Playback can be started for any Yamaha remote control-compatible MD recorder, CD player, CD recorder, DVD player, Blu-ray Disc player, HD DVD player - Yamaha RX-V3800 | Owner's Manual - Page 117
?" appears in the display window (B) on the remote control. POWER TV POWER AV STANDBY POWER XM 2 NET/USB AUDIO SEL SLEEP TUNER CD CD-R 3 MULTI CH IN MD/TAPE DVD BD/HD DVD PHONO DTV/CBL 1 DVR VCR V-AUX/DOCK AMP SOURCE TV or AMP - Yamaha RX-V3800 | Owner's Manual - Page 118
Remote control features Clearing configurations You can clear all changes made in each function set, such as learned functions, macros, renamed input area names and setup remote control select the input area. L;AMP Clears all learned functions for controlling the amplifier functions of this unit. - Yamaha RX-V3800 | Owner's Manual - Page 119
if clearing was successful. Once "C;OK" appears in the display window (B) on the remote control, release the ballpoint pen or similar object used to press MCLEAR to exit the clearing mode. The remote control returns to the learning mode. AMP SOURCE TV XM NET/USB TUNER CD CD-R MULTI CH IN or - Yamaha RX-V3800 | Owner's Manual - Page 120
to DAMP or DSOURCE and then press MMACRO using a ballpoint pen or similar object. "MCR ?" appears in the display window (B) on the remote control. AMP SOURCE TV or AMP SOURCE TV MACRO 3 Press MMACRO again to exit the macro programming mode. Notes • "C;NG" appears in the display window (B) on the - Yamaha RX-V3800 | Owner's Manual - Page 121
with your nearest authorized Yamaha dealer or service center for the Zone 2 and Zone 3 connections that best meet your requirements. REMOTE IN REMOTE OUT IN REMOTE OUT IN REMOTE OUT Infrared signal receiver This unit Yamaha component Yamaha component ■ Using external amplifiers To use an - Yamaha RX-V3800 | Owner's Manual - Page 122
/ZONE 2/ZONE 3 L + -- + SURROUND BACK/ R BI-AMP L + -- SINGLE + R SP2 L + - Third zone (Zone 3) Controlling Zone 2 or Zone 3 You can select the zone you want to control by using the control buttons on the front panel or on the remote control. ■ Selecting Zone 2 or Zone 3 Front panel - Yamaha RX-V3800 | Owner's Manual - Page 123
selector to DAMP and then press BSELECT k repeatedly to select the zone you want to control. "ZONE 2" or "ZONE 3" is displayed in the display window (B) on the remote control. AMP SOURCE TV SELECT or Control mode Display window (B) POWER and STANDBY Main zone mode Name of the selected input - Yamaha RX-V3800 | Owner's Manual - Page 124
y Press EMUTE on the remote control to mute the sound output to the selected zone. Note When you use the external amplifiers in Zone 2 or Zone on the remote control to adjust the high-frequency response (TREBLE) or TV VOL +/- to adjust the low-frequency response (BASS) respectively. AMP SOURCE TV - Yamaha RX-V3800 | Owner's Manual - Page 125
Zone 2 and that of Zone 3. Controlling the tuner function (see page 53) Select "TUNER" as the input source of the controlling zone to use the following functions 3 mode) Changes the preset channel group (A to E). Using multi-zone configuration 6 PRESET/CH k / n (All Channel Search mode) Searches for - Yamaha RX-V3800 | Owner's Manual - Page 126
unit. Choices: ON, OFF • Select "ON" if you want to activate the signal- receiving capability of the remote control sensor. • Select "OFF" if you want to deactivate the signal- receiving capability of the remote control sensor. Note We recommend setting the parameter to "ON" in most cases. 122 En - Yamaha RX-V3800 | Owner's Manual - Page 127
. Choices: YES, NO Initial setting: [U.S.A. and Canada models]: YES [Other models]: NO • Select "YES" to set this unit to transmit data via the RS-232C interface. • Select "NO" to set this unit not to transmit data via the RS-232C interface. ■ Remote control AMP ID RC AMP ID Use this feature to set - Yamaha RX-V3800 | Owner's Manual - Page 128
TUNER ID code*1 Function 2602 Operates this unit using the (initial setting) default code. 2603 Operates this unit using an alternative code. *1 The remote control setting. *2 The setting of this unit. RC TUNER ID*2 ID1 (initial setting) ID2 5 Press 4ENTER to set the number. "OK" appears in - Yamaha RX-V3800 | Owner's Manual - Page 129
XM ID RC XM ID (U.S.A. and Canada models only) Use this feature to set the XM ID of this unit for remote control recognition. Choices: ID1, ID2 • Select "ID1" when the remote control XM ID library code is set to "2604". • Select "ID2" when the remote control XM ID library code is set to "2605 - Yamaha RX-V3800 | Owner's Manual - Page 130
amplifier setting BI-AMP Use this feature to activate or deactivate the bi-amplifier your Yamaha MCX-2000 Canada receives the information of the available video signal resolutions from the video monitor connected via HDMI and you can only select the resolutions supported by the video monitor in "HDMI - Yamaha RX-V3800 | Owner's Manual - Page 131
Troubleshooting Refer to the table below when this unit does not function properly. If the problem you are experiencing is not listed below or if the instruction below does not help, turn off this unit, disconnect the power cable, and contact the nearest authorized Yamaha dealer or service - Yamaha RX-V3800 | Owner's Manual - Page 132
from the subwoofer. No remote control to resume audio output. Incorrect cable connections. Connect the cables properly. If the problem persists, the cables may be defective. Incorrect settings in "Speaker Level". Adjust the "Speaker Level" settings. When playing a monaural source with a CINEMA - Yamaha RX-V3800 | Owner's Manual - Page 133
Troubleshooting Problem Cause Remedy The audio input sources cannot be played in the desired signals. Audio input jack select is set to "ANALOG". Make an appropriate setting following the operating instructions for your component. Set the audio input jack select to "AUTO". A humming sound is - Yamaha RX-V3800 | Owner's Manual - Page 134
Troubleshooting ■ Tuner Problem 32 - - ■ XM Satellite Radio (U.S.A. and Canada models only) If an operation takes longer than best reception level. The XM user encryption code is being updated. Wait until the encryption code is updated remote control) repeatedly. See page 56 - 56 - - 58 130 En - Yamaha RX-V3800 | Owner's Manual - Page 135
■ Remote control Troubleshooting Problem The remote control does not work or function properly. The remote control does not work or function properly. The remote control does not learn new functions. Cause Remedy Wrong distance or angle. The remote control will function within a maximum range - Yamaha RX-V3800 | Owner's Manual - Page 136
source component appropriately. See page - Problem Cause Remedy The PC server/MCX-2000/ Internet Radio does not function properly. The IP address is not set properly. Set the DHCP server function of the router to ON. Alternately, perform manual configuration according to the current operating - Yamaha RX-V3800 | Owner's Manual - Page 137
Troubleshooting Problem Cause Remedy The USB device cannot be recognized. The connected USB Radio station is Try again when the selected Internet Radio is temporary unavailable or out of service. providing the service. Preset other Internet Radio stations. See page 68 68 68 68 68 66 67 68 - Yamaha RX-V3800 | Owner's Manual - Page 138
Troubleshooting Status message Access error Unable to play List updated Bookmark ON Bookmark OFF Empty Memory! Not found! Cause Remedy This unit cannot access your USB memory device or USB portable audio player. Try another USB memory device or USB portable audio player. There is a problem with - Yamaha RX-V3800 | Owner's Manual - Page 139
Troubleshooting There is a problem with the signal path from your iPod to this unit. Turn off this unit and reconnect the Yamaha iPod universal dock not supported by this unit. Only iPod (Click and Wheel), iPod nano, and iPod mini are supported. Your iPod is properly stationed in a Yamaha iPod - Yamaha RX-V3800 | Owner's Manual - Page 140
of the subwoofer. Use "Speaker Set" in "Manual Setup" to adjust the speaker settings manually. Notes • If the "ERROR" or "WARNING" screens appears, check the cause of the problem, then "E10" occurs repeatedly, please contact a qualified Yamaha service center. See page 15 - - 15 - 37 91 136 En - Yamaha RX-V3800 | Owner's Manual - Page 141
RESETTING THE SYSTEM Resetting the system Use this feature to reset all the parameters of this unit to the initial factory settings. Notes • This procedure completely resets all the parameters of this unit including the "SET MENU" parameters. However, the advanced setup menu parameters will not - Yamaha RX-V3800 | Owner's Manual - Page 142
, HDMI version 1.3 incorporates an automatic audio and video syncing capability that allows devices to perform this synchronization automatically and accurately without user interaction. ■ Bi-amplification connection A bi-amplification connection uses two amplifiers for a speaker. One amplifier is - Yamaha RX-V3800 | Owner's Manual - Page 143
Mbps, Dolby TrueHD can carry up to 8 discrete channels of 24-bit/96 kHz audio simultaneously. Supported by HDMI version 1.3 and designed for the optical disc players and AV receivers/amplifiers of the future, Dolby TrueHD also remains fully compatible with the existing multichannel audio systems and - Yamaha RX-V3800 | Owner's Manual - Page 144
users via the Internet, etc. DTS Express signals are mixed down with the main audio stream on the player component, and the component sends the mixed audio stream to the AV receivers/amplifiers Supported by HDMI version 1.3 and designed for the optical disc players and AV receivers/amplifiers part - Yamaha RX-V3800 | Owner's Manual - Page 145
deliver true, multi-channel surround presentations, and enables 7.1-channel support for gaming and movies. By unmasking the audio details, typically which achieves a high compression rate by thinning out the data of hardly audible part to the human ears. It is said to be capable of compressing the - Yamaha RX-V3800 | Owner's Manual - Page 146
CINEMA DSP Since the Dolby Surround and DTS systems were originally designed for use in movie theaters, their effect is best Yamaha original sound field technology combined with various digital audio systems. ■ CINEMA DSP 3D in "APPENDIX" at the end of this manual. Note Be advised that there may be - Yamaha RX-V3800 | Owner's Manual - Page 147
PARAMETRIC EQUALIZER INFORMATION Parametric equalizer information This unit employs Yamaha Parametric Room Acoustic Optimizer (YPAO) technology, together with the Parametric EQ settings (see page 85), to optimize the frequency characteristics of its parametric equalizer to - Yamaha RX-V3800 | Owner's Manual - Page 148
) to Front L/R ... 60 dB/45 dB or more • Tone Control (Front L/R, Center, Subwoofer) BASS Boost/Cut 6 dB/50 Hz BASS Turnover Frequency 350 Hz Subwoofer 24 dB/oct. VIDEO SECTION • Video Format [MONITOR OUT] (Wall Paper) [U.S.A., Canada, General and Korea models NTSC/PAL [U.K., Europe, Australia - Yamaha RX-V3800 | Owner's Manual - Page 149
directly (does not decode the bitstream signals on the component). Refer to the supplied instruction manuals for details. • This unit is not compatible with the audio commentary features (for example, the special audio contents downloaded via Internet) of Blu-ray Disc or HD DVD. This unit does not - Yamaha RX-V3800 | Owner's Manual - Page 150
Manual setup 91 Bass control, Tone control 86 Bass Cross Over, Speaker settings .......93 Bass cross over, Speaker settings .........93 Bass Out, Speaker settings 92 Bass out, Speaker settings 92 Bass, Tone control 86 Battery charge indicator 35 BGV, Input select 83 BI-AMP CINEMA SUBWOOFER PRE - Yamaha RX-V3800 | Owner's Manual - Page 151
surround, Sound 88 External amplifier connection 28 External decoder connection remote control ...... 111 Manual audio delay adjustment 87 Manual preset tuning, FM/AM tuning .... 54 Manual tuning, FM/AM tuning 53 Manual information display 35 MULTI-ZONE configuration, Zone2, Zone3 117 MUSIC - Yamaha RX-V3800 | Owner's Manual - Page 152
Remote control AMP ID, Advanced setup 123 Remote control code default settings ....107 Remote control codes settings 107 Remote control TUNER ID, Advanced setup 124 Remote control XM ID, Advanced setup 125 REMOTE IN jack 30 REMOTE OUT jack 30 REMOTE SILENT CINEMA 50 SILENT CINEMA indicator - Yamaha RX-V3800 | Owner's Manual - Page 153
Zone3 Amplifier, Zone 3 setting ......... 97 Zone3 Initial Vol., Zone 3 setting ....... 97 Zone3 Max Vol., Zone 3 setting .......... 97 Zone3 Set, Option 97 Zone3 Volume, Zone 3 setting 97 "AMASTER ON/OFF" or "1DVD" (example) indicates the name of the parts on the front panel or the remote control - Yamaha RX-V3800 | Owner's Manual - Page 154
PRESET/ TUNING EDIT SEARCH MODE MULTI ZONE MEMORY TUNING FM/AM MAN'L/AUTO FM MODE ZONE ON/OFF DISPLAY ZONE CONTROLS ZONE 2 ZONE 3 SILENT CINEMA S VIDEO VIDEO L AUDIO R OPTICAL SLEEP PROGRAM OPTIMIZER MIC PHONES VIDEO AUX USB PURE DIRECT VOLUME R D E FG H IJKL M AUDIO SELECT - Yamaha RX-V3800 | Owner's Manual - Page 155
■ Remote control PQ 1 2 3 4 5 6 7 POWER TV POWER AV STANDBY POWER XM NET/USB AUDIO SEL SLEEP TUNER CD CD-R MULTI CH IN MD/TAPE DVD BD/HD DVD PHONO DTV/CBL DVR VCR V-AUX/DOCK SELECT ++ TV VOL CH -- + VOLUME - AMP SOURCE TV TV MUTE LEVEL TITLE BAND TV INPUT MUTE PRESET/CH - Yamaha RX-V3800 | Owner's Manual - Page 156
Sound output in each sound field program L Front left speaker C Center speaker R Front right speaker SL Surround left speaker SR Surround right speaker SBL Surround back left speaker SBR Surround back right speaker PL Presence left speaker PR Presence right speaker Speaker from which sound is - Yamaha RX-V3800 | Owner's Manual - Page 157
/ neural : ON or discrete 6.1/7.1-channel audio signals are input. Program 3D PR/SB Priority CLASSICAL Hall in Munich Hall in Vienna Hall in Amsterdam Music) SUR.DECODE Surround Decoder (PLIIx Movie) (PLIIx Game) (Neo:6 Cinema) (Neural THX) SUR.DECODE Surround Decoder (PLIIx Music) (Neo:6 Music - Yamaha RX-V3800 | Owner's Manual - Page 158
for all its users. This General price. Our General Public Licenses are designed to make sure that you have the freedom to distribute copies of free software (and charge for this service if you wish), that you receive so that any problems introduced by others the same sections as part of a whole which - Yamaha RX-V3800 | Owner's Manual - Page 159
to address new problems or concerns. Each incorporate parts of be guided by the public, the best way to achieve users price. Our General Public Licenses are designed to make sure that you have the freedom to distribute copies of free software (and charge for this service if you wish); that you receive - Yamaha RX-V3800 | Owner's Manual - Page 160
complete source code as you receive it, in any medium, is to exercise the right to control the distribution of derivative or collective option is useful when you wish to copy part of the code of the Library into a the library already present on the user's computer system, rather than copying library - Yamaha RX-V3800 | Owner's Manual - Page 161
user has already received a copy of these materials or that you have already sent this user library of the fact that part of it is a work in detail to address new problems or concerns. Each version is decision will be guided by the two THE COST OF ALL NECESSARY SERVICING, REPAIR OR CORRECTION. 16 - Yamaha RX-V3800 | Owner's Manual - Page 162
List of remote control codes CABLE ABC 0030, 0035 AMERICAST 0926 BELL SOUTH 0926 BIRMINGHAM PIONEER 0086 SALORA 0091 SONY 0228 TELEFUNKEN 0086 Yamaha 2200 MD RECORDER KENWOOD ONKYO SHARP SONY Yamaha 0708 0895 0888 0517 2500, 2501, 2502 RECEIVER (TUNER) ADC 0558 AIWA 0185, 1116, - Yamaha RX-V3800 | Owner's Manual - Page 163
SAGEM 0847, 1141, 1280 SAMSUNG 1044, 1136, 1303, 1319 SAT CONTROL 1327 SATSTATION 1110 SCHWAIGER 1138 SEEMANN 0423 SIEMENS 0200 SONY 0666, 0874 0056 RCA 0054 REVOX 0056 SANSUI 0056 SONY 0270 THORENS 0056 WARDS 0054 Yamaha 2700,2701 TV AGB 0543 AOC 0036, 0057, 0087, 0119, - Yamaha RX-V3800 | Owner's Manual - Page 164
OSAKI 0291, 0439 OTTO VERSAND 0064, 0347, 0539, 0583 PALLADIUM 0397, 0445 PANAMA 0291 PANASONIC 0064, 0078, 0081, 0190, 0277, 0677, 1437 PATHE CINEMA 0265, 0347 PAUSA 0036 PENNEY 0057, 0074, 0078, 0087, 0183, 0205, 1374 PERDIO 0347 PHILCO 0057, 0064, 0081, 0172, 0205, 0207, 0274 - Yamaha RX-V3800 | Owner's Manual - Page 165
0347 VOXSON 0190 WALTHAM 0383 WARDS 0057, 0081, 0205, 0893 WATSON 0064, 0347 WAYCON 0183 WHITE WESTINGHOUSE 0064, 0347, 0490, 0650 Yamaha 0057, 0172, 0677, 0796, 0860, 2900 (projector), 2901 (projector), 2903, 2904 (projector) YAPSHE 0277 YOKO 0064, 0291 ZENITH 0044, 0119 - Yamaha RX-V3800 | Owner's Manual - Page 166
0072 VIDEOMAGIC 0064 VIDEOSONIC 0267 VILLAIN 0027 WARDS 0027, 0062, 0069, 0074, 0075, 0087, 0099, 0108, 0267 WHITE WESTINGHOUSE 0099 XR-1000 0027, 0062, 0099 Yamaha 0068 YAMISHI 0099 YOKAN 0099 YOKO 0267 ZENITH 0027, 0060, 0066, 1506 xiii - Yamaha RX-V3800 | Owner's Manual - Page 167
-BEAUBOURG 77312 MARNE-LA-VALLEE CEDEX02, FRANCE YAMAHA ELECTRONICS (UK) LTD. YAMAHA HOUSE, 200 RICKMANSWORTH ROAD WATFORD, HERTS WD18 7GQ, ENGLAND YAMAHA SCANDINAVIA A.B. J A WETTERGRENS GATA 1, BOX 30053, 400 43 VÄSTRA FRÖLUNDA, SWEDEN YAMAHA MUSIC AUSTRALIA PTY, LTD. 17-33 MARKET ST., SOUTH - Yamaha RX-V3800 | Owner's Manual - Page 168
Manual. Les nombres et lettres dans un cercle correspondent à ceux du mode d'emploi. ■ Front panel/Face avant A B C DE FG H I J K L M UC RX-V3800 N MAIN ZONE ON/OFF ON OFF MASTER INPUT AUDIO SELECT TONE REC OUT/ CONTROL DISPLAY ZONE CONTROLS ZONE 2 ZONE 3 SILENT CINEMA S VIDEO VIDEO - Yamaha RX-V3800 | Owner's Manual - Page 169
■ Remote control/Boîtier de télécommande PQ 1 2 3 4 5 6 7 POWER TV POWER AV STANDBY POWER XM NET/USB AUDIO SEL SLEEP TUNER CD CD-R MULTI CH IN MD/TAPE DVD BD/HD DVD PHONO DTV/CBL DVR VCR V-AUX/DOCK SELECT ++ TV VOL CH -- + VOLUME - AMP SOURCE TV TV MUTE LEVEL TITLE BAND TV
-
 1
1 -
 2
2 -
 3
3 -
 4
4 -
 5
5 -
 6
6 -
 7
7 -
8
-
9
-
10
-
11
-
12
-
13
-
14
-
15
-
16
-
17
-
18
-
19
-
20
-
21
-
22
-
23
-
24
-
25
-
26
-
27
-
28
-
29
-
30
-
31
-
32
-
33
-
34
-
35
-
36
-
37
-
38
-
39
-
40
-
41
-
42
-
43
-
44
-
45
-
46
-
47
-
48
-
49
-
50
-
51
-
52
-
53
-
54
-
55
-
56
-
57
-
58
-
59
-
60
-
61
-
62
-
63
-
64
-
65
-
66
-
67
-
68
-
69
-
70
-
71
-
72
-
73
-
74
-
75
-
76
-
77
-
78
-
79
-
80
-
81
-
82
-
83
-
84
-
85
-
86
-
87
-
88
-
89
-
90
-
91
-
92
-
93
-
94
-
95
-
96
-
97
-
98
-
99
-
100
-
101
-
102
-
103
-
104
-
105
-
106
-
107
-
108
-
109
-
110
-
111
-
112
-
113
-
114
-
115
-
116
-
117
-
118
-
119
-
120
-
121
-
122
-
123
-
124
-
125
-
126
-
127
-
128
-
129
-
130
-
131
-
132
-
133
-
134
-
135
-
136
-
137
-
138
-
139
-
140
-
141
-
142
-
143
-
144
-
145
-
146
-
147
-
148
-
149
-
150
-
151
-
152
-
153
-
154
-
155
-
156
-
157
-
158
-
159
-
160
-
161
-
162
-
163
-
164
-
165
-
166
-
167
-
168
-
169
 |
 |

RX-V3800
AV Receiver
OWNER’S MANUAL
U