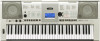
Yamaha YPT-420 Owner's Manual
Yamaha YPT-420 Manual
 |
UPC - 086792317045
View all Yamaha YPT-420 manuals
Add to My Manuals
Save this manual to your list of manuals |
Yamaha YPT-420 manual content summary:
- Yamaha YPT-420 | Owner's Manual - Page 1
DIGITAL KEYBOARD Owner's Manual EN - Yamaha YPT-420 | Owner's Manual - Page 2
components supplied or; a cart, rack, or stand that is recommended by Yamaha. If a cart, etc., is used, please observe all safety markings and instructions that accompany the accessory product. SPECIFICATIONS SUBJECT TO CHANGE: The information contained in this manual is believed to be correct at - Yamaha YPT-420 | Owner's Manual - Page 3
"OFF" and "ON", please try to eliminate the problem by using one of the following measures: Relocate either this manual instructions if interference to radio reception is suspected. * This applies only to products distributed by YAMAHA CORPORATION OF AMERICA. (FCC DoC) 1 YPT-420 Owner's Manual - Yamaha YPT-420 | Owner's Manual - Page 4
and have it inspected by qualified Yamaha service personnel. Water warning • Do not expose • When one of the following problems occur, immediately turn off the power are using is easily accessible. If some trouble or malfunction occurs, immediately turn off the YPT-420 Owner's Manual (7)-1 1/2 2 - Yamaha YPT-420 | Owner's Manual - Page 5
objects into the gaps on the panel or keyboard. • Do not rest your weight on, ears, consult a physician. Yamaha cannot be held responsible for manual • The illustrations and LCD screens as shown in this manual are for instructional your waste disposal service or the point YPT-420 Owner's Manual 5 3 - Yamaha YPT-420 | Owner's Manual - Page 6
according to your playing strength-just a like a real musical instrument! STYLE FILE The Style File Format is Yamaha's original style file format which uses a unique conversion system to provide high-quality automatic accompaniment based on a wide range of chord types. 6 YPT-420 Owner's Manual 4 - Yamaha YPT-420 | Owner's Manual - Page 7
The following instructional materials are available for downloading from the Yamaha Manual Library. Access the Yamaha Manual Library, then enter your model name (YPT-420, for example) in the Model Name area to search the manuals. Yamaha Manual Library http://www.yamaha.co.jp/manual/ • MIDI Reference - Yamaha YPT-420 | Owner's Manual - Page 8
you play the keyboard can be full backing band covering a wide variety of styles from waltzes to 8-beat to euro-trance ... and much more. Select a style that matches the music you want to play, or experiment with new styles to expand your musical horizons. PopBossa 092 6 8 YPT-420 Owner's Manual - Yamaha YPT-420 | Owner's Manual - Page 9
Transferring Data between the Computer and Instrument... 89 Accessory CD-ROM Installation Guide 92 Important Notices about the CD-ROM 92 CD-ROM Contents 93 System Requirements 94 Software Installation 94 Appendix Troubleshooting 99 Index 100 Specifications 102 7 YPT-420 Owner's Manual 9 - Yamaha YPT-420 | Owner's Manual - Page 10
run either from an optional AC adaptor or batteries, Yamaha recommends use of an AC adaptor whenever possible. An installed. For battery operation the instrument requires six 1.5V "D" size, R20P (LR20) or equivalent batteries. (Alkaline batteries are recommended lost. 8 10 YPT-420 Owner's Manual - Yamaha YPT-420 | Owner's Manual - Page 11
can connect the PHONES/OUTPUT jack to a keyboard amplifier, stereo system, mixer, tape USB MIDI driver on your computer. Installation of the USB MIDI driver is described on as you play by pressing a footswitch. Plug the Yamaha FC4 or FC5 footswitch into this jack and use YPT-420 Owner's Manual 11 9 - Yamaha YPT-420 | Owner's Manual - Page 12
Standby/On) switch page 11 w [MASTER VOLUME] control.... pages 11, 24 e [TOUCH ON/OFF] button page 65 r [HARMONY ON/OFF] button .......... page 60 t r !4 [METRONOME ON/OFF] button ..... page 63 !5 [PORTABLE GRAND] button .......... page 31 !6 Dial pages 58, 82 !7 34 12 YPT-420 Owner's Manual 10 - Yamaha YPT-420 | Owner's Manual - Page 13
four buttons light up when selected. (Other buttons do not light up even if selected.) !8 [SONG] button !9 [EASY SONG ARRANGER] button @0 [STYLE] button @1 [VOICE] button YPT-420 Owner's Manual 13 11 - Yamaha YPT-420 | Owner's Manual - Page 14
Q 12 e uick Guid Creating Arpeggios Quick Guide The arpeggio function lets you create arpeggios (broken chords) by simply playing the required notes on the keyboard. For example, you could play the notes of Chord Guitar Arpeggio Acid Synth Arabic Loop Massive Percussion 14 YPT-420 Owner's Manual - Yamaha YPT-420 | Owner's Manual - Page 15
the same time as the harmony function. NOTE • Make sure that you are not pressing any of the keyboard's keys while turning the arpeggio function on or off. 4 When you have finished playing with the arpeggio function, press the [ARPEGGIO ON/OFF] button to turn it off. 13 YPT-420 Owner's Manual 15 - Yamaha YPT-420 | Owner's Manual - Page 16
sonic textures and backgrounds. 1 Select the keyboard voice (page 28). For this example we'll use a grand piano voice, so press the [PORTABLE GRAND] button. This convenient voice selection method style. 8BtModrn 001 NOTE • Refer to "Playing Styles" on page 33. 16 YPT-420 Owner's Manual 14 - Yamaha YPT-420 | Owner's Manual - Page 17
key will always produce musically appropriate notes! Split point Whenever you're playing a style as well as a right-hand part, be sure that your left hand plays only to the left of the split point and your right hand plays only to the right of the split point. (page 30) YPT-420 Owner's Manual - Yamaha YPT-420 | Owner's Manual - Page 18
Q 16 e uick Guid Create Original Sounds The two knobs located in the lower left area of the panel can be used to add variations to the the main and dual voices only. Split voices will not be affected. Styles and songs will also not be affected. v-b affect styles only. 18 YPT-420 Owner's Manual - Yamaha YPT-420 | Owner's Manual - Page 19
-instrument" effect. Reverb Send Level Chorus Send Level Knob A adjusts the depth of the reverb effect, and Knob B adjusts the depth of the chorus effect. YPT-420 Owner's Manual 19 17 - Yamaha YPT-420 | Owner's Manual - Page 20
it takes for the sound to decay to silence after a key is released). Level Sustain Level ATTACK DECAY RELEASE Time Key Played Key Released v Style Filter Filter Cutoff Filter Resonance In this case the knob's center position produces the initial default tempo. 20 YPT-420 Owner's Manual 18 - Yamaha YPT-420 | Owner's Manual - Page 21
Using the Knobs 1 Select the voice you want to play on the keyboard. SquareLd 097 Create Original Sounds The name of the currently selected voice will appear in the display when is set to a high level can result in distortion. If this occurs, reduce the volume level. 19 YPT-420 Owner's Manual 21 - Yamaha YPT-420 | Owner's Manual - Page 22
left hand. Filter Cutoff Filter Resonance If you select a different keyboard voice the knobs will be reset and the ideal settings for majestic, organ-like sound. The attack time is quite long so play the keys and hold them to let the sound come in fully. Ideal for slow YPT-420 Owner's Manual - Yamaha YPT-420 | Owner's Manual - Page 23
21 Q e uick Guid The Easy Way to Play Piano This instrument includes a performance assistant technology feature that lets you play along with a song and sound like a great pianist ( AveMaria". Song name AveMaria 010 Song number The song displayed here will be played. YPT-420 Owner's Manual 23 - Yamaha YPT-420 | Owner's Manual - Page 24
play the part from the fifth measure. 4 Play on the keyboard. Adjusts volume. Before After Play the score on the left along with the accompaniment using both hands. You can even play the same keys over and over: C, E, G, C, E, G, C, E. Performance assistant 24 YPT-420 Owner's Manual - Yamaha YPT-420 | Owner's Manual - Page 25
illustration, simply play the keyboard alternately with your left feature it is necessary to play a song that includes chord data, or a style with auto accompaniment on. If a song includes the required data, the chords are shown on the right side of the display (page 59). 23 YPT-420 Owner's Manual - Yamaha YPT-420 | Owner's Manual - Page 26
011 2 Listen to eight measures, then begin playing from the ninth measure. Play the keys shown in the illustration. Keep playing F, A and C with your left hand and assistant technology feature off. The complete score for Nocturne is provided in the separate Data List. 26 YPT-420 Owner's Manual 24 - Yamaha YPT-420 | Owner's Manual - Page 27
the beat display flash in time with the rhythm of the song or style. First beat of measure Third beat Second beat Fourth beat 25 YPT-420 Owner's Manual 27 - Yamaha YPT-420 | Owner's Manual - Page 28
Q r f 26 e uick Guid Try Playing a Variety of Instrument Voices In addition to piano, organ, and other "standard" keyboard instruments, this instrument has a large page 58) Flute 092 Select 092 Flute 3 Play the keyboard. Try selecting and playing a variety of voices. 28 YPT-420 Owner's Manual - Yamaha YPT-420 | Owner's Manual - Page 29
-DUAL You can select a second voice which will play in addition to the main voice when you play the keyboard. The second voice is known as the "dual" voice. 1 Press the [DUAL ON/OFF] button. The this example try selecting the "109 Vibraphone" voice. Vibes 109 27 r f YPT-420 Owner's Manual 29 - Yamaha YPT-420 | Owner's Manual - Page 30
In the split mode you can play different voices to the left and right of the keyboard "split point". The main and dual voices can be played to the right of the to select the "S.Voice" item. Hold for longer than a second 30 YPT-420 Owner's Manual FngrBass 042 The currently selected SPLIT voice 28 - Yamaha YPT-420 | Owner's Manual - Page 31
"001 Grand Piano" voice will be selected. NOTE • When you press the [PORTABLE GRAND] button all settings other than touch sensitivity are turned off. The dual and split voices will also be turned off, so only the Grand Piano voice will play over the entire keyboard. 29 YPT-420 Owner's Manual 31 - Yamaha YPT-420 | Owner's Manual - Page 32
Q 30 e Drum Kits uick Guid This instrument includes a range of drum kits and unique sound is selected, the icons printed above the keyboard indicates the instruments assigned to each key. 3 Try out each key. You'll hear bongo drums, congas 127 SFX Kit 1 128 SFX Kit 2 32 YPT-420 Owner's Manual - Yamaha YPT-420 | Owner's Manual - Page 33
31 Q e uick Guid Playing Styles This instrument has an auto accompaniment feature that produces accompaniment (rhythm + bass + chords) in the style you the accompaniment bass and chord parts will begin playing when you play a key to the left of the keyboard split point. YPT-420 Owner's Manual 33 - Yamaha YPT-420 | Owner's Manual - Page 34
how to add bass and chord accompaniment to the basic rhythm to produce a full, rich accompaniment that you can play along with. 1 Press the [STYLE] keyboard split point. Press the button a second time to turn the sync start function off. Flashes when sync start is on. 32 34 YPT-420 Owner's Manual - Yamaha YPT-420 | Owner's Manual - Page 35
you're done. Playing Styles You can switch style "sections" to add variety to the accompaniment. Refer to "Pattern Variation (Sections)" on page 70. 33 YPT-420 Owner's Manual 35 - Yamaha YPT-420 | Owner's Manual - Page 36
beginning. When you're ready to stop playing press the [INTRO/ENDING/rit.] button and the auto accompaniment function will create a perfect ending. 34 36 YPT-420 Owner's Manual - Yamaha YPT-420 | Owner's Manual - Page 37
jazzy "two-five" (II-V) changes. Try playing it through several times. When you're ready to stop playing press the [INTRO/ENDING/rit.] button. 35 YPT-420 Owner's Manual 37 - Yamaha YPT-420 | Owner's Manual - Page 38
notes and the corresponding keys ■ Easy Chords This method lets you easily play chords in the accompaniment range of the keyboard using only one, C(7#9) C(7b5) () () () () C7aug C7sus4 Csus2 () 38 YPT-420 Owner's Manual * Notes enclosed in parentheses ( ) are optional; the chords will - Yamaha YPT-420 | Owner's Manual - Page 39
Guid Using Songs With this instrument the term "song" refers the data that makes up a piece of music. You can simply enjoy listening to the 30 internal songs, or use them with just about any of the many functions provided-the performance assistant technology feature songs. YPT-420 Owner's Manual 39 - Yamaha YPT-420 | Owner's Manual - Page 40
in the song. NOTE • When an A-B repeat range is specified the fast reverse and forward function will only work within that range. 38 40 YPT-420 Owner's Manual - Yamaha YPT-420 | Owner's Manual - Page 41
this instrument. They're great for listening, or for use with the performance assistant technology feature. These songs features some of the instrument's many useful voices. They make maximum use of the characteristics of and may not be exactly the same as the original. 39 YPT-420 Owner's Manual 41 - Yamaha YPT-420 | Owner's Manual - Page 42
Song numbers 036-. * The Accessory CD-ROM includes a selection of 70 MIDI songs. See page 90 for instructions on how to transfer the songs to the instrument. The chart below shows the basic processes flow for using song file flash memory area, and vice versa. Play 40 42 YPT-420 Owner's Manual - Yamaha YPT-420 | Owner's Manual - Page 43
41 Q e uick Guid Select a Song For a Lesson Yamaha Education Suite You can select song you like and use it for a left-hand, right-hand, or both-hands lesson on page 42 there are a variety of song types. For this example try selecting the "012 ForElise". ForElise 012 YPT-420 Owner's Manual 43 - Yamaha YPT-420 | Owner's Manual - Page 44
1) YourTemp (Lesson 2) r2 MinusOne (Lesson 3) r3 ForElise (Song Lesson off) 012 Song playback will begin automatically when you select Lesson 1. Start the lesson! 42 44 YPT-420 Owner's Manual - Yamaha YPT-420 | Owner's Manual - Page 45
Good, or Excellent. "Excellent!" is the highest evaluation. After the evaluation display has appeared, the lesson will start again from the beginning. NOTE • The evaluation feature can be turned off via the FUNCTION Grade item (page 84). 43 YPT-420 Owner's Manual 45 - Yamaha YPT-420 | Owner's Manual - Page 46
can stop the Lesson mode at any time by pressing the [START/ STOP] button. Once you've mastered Lesson 2, move on to Lesson 3. 44 46 YPT-420 Owner's Manual - Yamaha YPT-420 | Owner's Manual - Page 47
case of a right-hand lesson) 3 Stop the Lesson mode. You can stop the Lesson mode at any time by pressing the [START/ STOP] button. 45 YPT-420 Owner's Manual 47 - Yamaha YPT-420 | Owner's Manual - Page 48
Select a Song For a Lesson Practice Makes Perfect-Repeat and Learn Use this feature when you want to start again just ahead of a section on which you made a e Jump back 4 measures and repeat playback Song playback direction q Oops! A mistake! w Press immediately 46 48 YPT-420 Owner's Manual - Yamaha YPT-420 | Owner's Manual - Page 49
47 Q e uick Guid Play Using the Music Database You want to play music in your favorite style, but you're not sure how to select the split point (page 30). Refer to page 38 for information about playing chords. Split Point Press the [START/STOP] button to stop playback. YPT-420 Owner's Manual 49 - Yamaha YPT-420 | Owner's Manual - Page 50
009 The currently selected song number and name are displayed here. 2 Select a Song. Use the dial to select the song you want to arrange. 50 YPT-420 Owner's Manual - Yamaha YPT-420 | Owner's Manual - Page 51
Because the Easy Song Arranger uses song data you can't specify chords by playing in the accompaniment range of the keyboard. The [ACMP ON/ OFF] button will not function. • If the time signature of the song and melody voice. SONG MEL 49 Hold for longer than a second YPT-420 Owner's Manual 51 - Yamaha YPT-420 | Owner's Manual - Page 52
Q 50 e uick Guid Record Your Own Performance You can record up to 5 of your own performances and save them as user songs 031 through 035. The user song number (031-035) you want to record to. User 1 031 Rotate the dial to select a song number between 031 and 035. 52 YPT-420 Owner's Manual - Yamaha YPT-420 | Owner's Manual - Page 53
in progress. 3 Recording will start when you play on the keyboard. You can also start recording by pressing the [START/STOP] button starts User 1 rEC 003 NOTE • If the memory becomes full during recording a warning message will appear and recording will stop 51 YPT-420 Owner's Manual 53 - Yamaha YPT-420 | Owner's Manual - Page 54
beginning of the track. Changes made during the song will not be recorded. reverb type, chorus type, time signature, style number, style volume, tempo 54 YPT-420 Owner's Manual 52 - Yamaha YPT-420 | Owner's Manual - Page 55
the display while the track is being cleared. NOTE • To execute the Track Clear function press the [+] button. Press [-] to cancel the Track Clear operation. YPT-420 Owner's Manual 55 53 - Yamaha YPT-420 | Owner's Manual - Page 56
) switch while simultaneously holding the highest white key on the keyboard and the three highest black keys. CAUTION • When you execute the Flash Clear operation, song data you have purchased will also be cleared. Be sure to save data you want to keep to a computer. 54 56 YPT-420 Owner's Manual - Yamaha YPT-420 | Owner's Manual - Page 57
want to listen to or a song you want to use for a lesson. Select an auto-accompaniment style. Select a voice you want to play on the keyboard. YPT-420 Owner's Manual 57 55 - Yamaha YPT-420 | Owner's Manual - Page 58
have to select from a large number of voices. In most procedures described throughout this owner's manual the dial is recommended for selection simply because it is the easiest and most intuitive selection to start playback of the selected song or style (rhythm). 56 58 YPT-420 Owner's Manual - Yamaha YPT-420 | Owner's Manual - Page 59
name of the chord being played on the keyboard. Song Track Display Information related to the song tracks is shown here. (see page 52, 79) TOUCH Indicates that Touch response is turned on. (see page 65) visually confirm parameters assigned to the knobs. (see page 18) YPT-420 Owner's Manual 59 57 - Yamaha YPT-420 | Owner's Manual - Page 60
Type • Harmony type 01 to 05 Press the right-hand keys while playing chords in the auto accompaniment range of the keyboard when the Auto Accompaniment is on (page 34). • Harmony type 06 to 12 (Trill) Hold down two keys. 60 YPT-420 Owner's Manual • Harmony type 13 to 19 (Tremolo) Keep holding down - Yamaha YPT-420 | Owner's Manual - Page 61
Use the dial to select a reverb type. You can check how the selected reverb type sounds by playing on the keyboard. StyleVol 100 2 Use the CATEGORY [ ] and [ ] buttons to select the Reverb Type item. "Reverb" appears page 83.) Hall2 02 The currently selected reverb type YPT-420 Owner's Manual 61 - Yamaha YPT-420 | Owner's Manual - Page 62
Use the dial to select a chorus type. You can check how the selected chorus type sounds by playing on the keyboard. 2 Use the CATEGORY [ ] and [ ] buttons to select the Chorus Type item. "Chorus" appears in the page 83.) Chorus1 1 The currently selected chorus type 60 62 YPT-420 Owner's Manual - Yamaha YPT-420 | Owner's Manual - Page 63
61 R e eferenc Handy Performance Features The Metronome The instrument includes a metronome with adjustable tempo and time signature. Use it to set the tempo that beat number in the measure Tempo 090 Current Tempo setting 2 Use the dial to select a tempo from 11 to 280. YPT-420 Owner's Manual 63 - Yamaha YPT-420 | Owner's Manual - Page 64
f r f r Handy Performance Features Setting the Number of Beats per Measure, and the Length of Each Beat In this example we'll set up a 5/8 volume as required. 2 Use the CATEGORY [ ] and [ ] buttons to select the Metronome Volume item. MtrVol 100 Metronome volume 64 YPT-420 Owner's Manual 62 - Yamaha YPT-420 | Owner's Manual - Page 65
[TOUCH ON/OFF] button for longer than a second so that the Touch Sensitivity item appears. "TouchSns" appears in the display for a few seconds, and the currently selected touch sensitivity will be displayed. TouchSns Hold for longer than a second. Medium 2 Touch Sensitivity YPT-420 Owner's Manual - Yamaha YPT-420 | Owner's Manual - Page 66
smooth pitch variations to notes you play on the keyboard. Roll the wheel upward to raise the pitch, or downward to lower the pitch. If you use this feature with a voice such as the "040 Overdriven" required. NOTE • The pitch of Drum Kits voices cannot be changed. 66 YPT-420 Owner's Manual 64 - Yamaha YPT-420 | Owner's Manual - Page 67
Features Controlling Arpeggio Volume with Keyboard Dynamics 1 Press the [FUNCTION] button. 3 Use the dial to select "2 Thru". When "1 Original" is selected the arpeggio volume is the same regardless of changes in keyboard 1 The currently selected arpeggio velocity. YPT-420 Owner's Manual 67 - Yamaha YPT-420 | Owner's Manual - Page 68
hear a different keyboard voice than you played in step 3. Press the [VOICE] button after changing songs to see the name of the voice being used. If you have stopped playback at some point during this procedure press the [START/STOP] button to start playback again. 66 68 YPT-420 Owner's Manual - Yamaha YPT-420 | Owner's Manual - Page 69
Adjusting the Harmony Volume 1 Press the [FUNCTION] button. Handy Performance Features 3 Use the dial to set the harmony volume between 000 and 127. 2 Use the CATEGORY [ , setting 3 is for headphones, and settings 4 and 5 are ideal for listening via external speakers. YPT-420 Owner's Manual 69 - Yamaha YPT-420 | Owner's Manual - Page 70
) Functions Basic operation of the Style (auto-accompaniment) feature is described on page 33 of the Quick Guide. Here are some other ways you can play the styles of the keyboard. You can disengage the synchro-start standby mode by pressing the [SYNC START] button again. 70 YPT-420 Owner's Manual - Yamaha YPT-420 | Owner's Manual - Page 71
you are playing chords in the accompaniment range of the keyboard. Style playback will stop when you release the keys. To turn the function on, press the [SYNC STOP The style will play while you are playing the keys Style playback will stop when you release the keys YPT-420 Owner's Manual 71 69 - Yamaha YPT-420 | Owner's Manual - Page 72
than a second so that the Split point item appears. 3 Use the dial to set the split point to any key from 000 through 127. Split point (54 : F#2) Hold for longer than a second SplitPnt 054 Split point Split CATEGORY [ ] and [ ] buttons to locate the item (page 82). 70 72 YPT-420 Owner's Manual - Yamaha YPT-420 | Owner's Manual - Page 73
and Synchro Start is off, you can play chords in the left-hand accompaniment range of the keyboard while the style is stopped and still hear the accompaniment chords. This is "Stop Accompaniment", and 092 Appears when auto accompaniment is on Accompaniment range YPT-420 Owner's Manual 73 71 - Yamaha YPT-420 | Owner's Manual - Page 74
Style (Auto-accompaniment) Functions Loading Style Files This instrument features 155 internal styles, but other styles, such as those provided on the CD-ROM and others that can , you can use the dial or the [+] and [-] buttons to select the other files in sequence. 72 74 YPT-420 Owner's Manual - Yamaha YPT-420 | Owner's Manual - Page 75
lowest note results in "inversions"). The root is the central sound of the chord, which supports and anchors the other chord notes. The distance (interval) between adjacent notes of a triad th chord Flatted 5 th Minor 7 th chord Flatted 7 th Suspended 4 th chord YPT-420 Owner's Manual 75 73 - Yamaha YPT-420 | Owner's Manual - Page 76
shown in the Dictionary function. NOTE • Notes in parentheses can be omitted. • Playing two same root keys in the adjacent octaves produces accompaniment based only on the root. • A perfect fifth (1+5) produces will produce a chord based on the previously played chord. 74 76 YPT-420 Owner's Manual - Yamaha YPT-420 | Owner's Manual - Page 77
3 Press the "M7" (major seventh) key in the section of the keyboard labeled "CHORD TYPE". (The note doesn't keyboard, checking the indications in the display. When you've played the chord properly, a bell sound signals your success and the chord name in the display flash. 75 YPT-420 Owner's Manual - Yamaha YPT-420 | Owner's Manual - Page 78
you want to set the start point "A" at the very beginning of the song press the [A-B REPEAT] button before starting playback of the song. 78 YPT-420 Owner's Manual - Yamaha YPT-420 | Owner's Manual - Page 79
the song-melody, percussion, accompaniment, etc. You can mute individual tracks and play the muted part on the keyboard yourself, or simply mute tracks other than the ones you want to listen to. Use the SONG MEMORY Strings 050 Hold for longer than a second SONG MEL 77 YPT-420 Owner's Manual 79 - Yamaha YPT-420 | Owner's Manual - Page 80
R 78 e eferenc Memorize Your Favorite Panel Settings This instrument has a Registration Memory feature that lets you save your favorite settings for easy recall whenever they're needed. lost. NOTE • Data cannot be saved to the registration memory during song play- back. 80 YPT-420 Owner's Manual - Yamaha YPT-420 | Owner's Manual - Page 81
/OFF, Harmony Type, Harmony Volume • Other settings Transpose, Pitch Bend Range, Knob Assign * Style settings are not available for Registration Memory when using the Song features. REGIST 1 1 79 YPT-420 Owner's Manual 81 - Yamaha YPT-420 | Owner's Manual - Page 82
necessary until the function's display name appears in the display. Direct numeric entry. Transpos 00 The selected function. 82 YPT-420 Owner's Manual • Decrement value by 1. • OFF • Cancel • Increment value by 1. • ON • Execute Press simultaneously to recall the default setting. Some function - Yamaha YPT-420 | Owner's Manual - Page 83
"0" results in the sound being panned full left; the value "127" results in the sound being panned full right. Determines how much of the Split voice's signal is sent to the Reverb effect. Determines how much of the Split voice's signal is sent to the Chorus effect. 81 YPT-420 Owner's Manual 83 - Yamaha YPT-420 | Owner's Manual - Page 84
an external clock (ON). (page 87) ON/OFF Determines whether keyboard performance data of the instrument is transmitted (ON) or not (OFF songs in SMF format 0 transferred from a computer. Determines the guide track number for your left hand lesson. The setting is only 82 84 YPT-420 Owner's Manual - Yamaha YPT-420 | Owner's Manual - Page 85
from the keyboard such as "with what voice", "with which key", " keyboard performance and all panel operations of this instrument are processed as MIDI data. The songs, auto accompaniment (styles), and User songs are also made up of MIDI data. MIDI is an acronym that stands YPT-420 Owner's Manual 85 - Yamaha YPT-420 | Owner's Manual - Page 86
driver on your computer. The USB-MIDI driver is included on the CD-ROM. Installation of the USB MIDI driver instrument's flash memory. For instructions about how to install Musicsoft Downloader is transmitted whenever you play notes on the keyboard or play back a song, etc.) • YPT-420 Owner's Manual - Yamaha YPT-420 | Owner's Manual - Page 87
(OFF), or to a clock signal from an external device (ON). Keyboard Out ON/OFF These settings determine whether keyboard performance data of the instrument is transmitted (ON) or not (OFF). . 1 Press the [FUNCTION] button. 3 Use the dial to select ON or OFF. 85 f r YPT-420 Owner's Manual 87 - Yamaha YPT-420 | Owner's Manual - Page 88
features keyboard (C1 and C#1) and press the appropriate key (shown below). C#1 C1 C6: Fast forward B5: Start A5: Stop G5: Rewind F5: Top (move to the beginning of the song) E5: Metronome ON/OFF NOTE • Remote control of MIDI devices will function independently of the PC2 mode. 86 88 YPT-420 - Yamaha YPT-420 | Owner's Manual - Page 89
to install the Musicsoft Downloader application and the USBMIDI Driver included on the Accessory CD-ROM on your computer. Refer to the Accessory CDROM Installation Guide on page 92 for installation details. ● Data from your computer to the instrument is given as an example. YPT-420 Owner's Manual 89 - Yamaha YPT-420 | Owner's Manual - Page 90
song or style is being played, stop playback before proceeding. 1 Install the Musicsoft Downloader and USB MIDI driver to your computer, then connect the computer and the instrument (page 94). 2 Insert the included CD files stored temporarily" to the instrument's memory. 88 90 YPT-420 Owner's Manual - Yamaha YPT-420 | Owner's Manual - Page 91
1 Press the [SONG] button and select the song (036-) residing in flash memory for which you want to set the guide track. 2 Press the [FUNCTION] button. 3 Use the CATEGORY [ ] and [ ] buttons to select the R-Part or -hand part and channel 2 for the left-hand part. 89 f r YPT-420 Owner's Manual 91 - Yamaha YPT-420 | Owner's Manual - Page 92
equipment other than a computer. • The screen displays as illustrated in this manual are for instructional purposes, and may appear somewhat different from the screens which appear on your computer. • Software such as the USB-MIDI driver may be revised and updated without prior notice. Make sure to - Yamaha YPT-420 | Owner's Manual - Page 93
to the instrument and played or used with the instrument's functions. * This instrument does not support Music Database data. In order to view PDF scores, you will need to install Adobe Reader in your computer. Adobe Reader can be downloaded free at the Adobe website. 91 YPT-420 Owner's Manual 93 - Yamaha YPT-420 | Owner's Manual - Page 94
Guide System Requirements Data OS Computer Musicsoft Downloader Windows 2000/XP Home Edition/XP Professional/ Vista * Only 32-bit is supported problems with the installation, refer to the troubleshooting section on page 96. ■ Installing / Updating the USB-MIDI Driver YPT-420 Owner's Manual - Yamaha YPT-420 | Owner's Manual - Page 95
the driver Open the "Control Panel" and double-click the "Yamaha USB-MIDI Driver" icon. A window appears and the driver version is indicated in the lower left of the window. NOTE • When using Windows XP x64/Vista/7, double-click the "Yamaha USB-MIDI Driver (WDM)" icon. 93 YPT-420 Owner's Manual 95 - Yamaha YPT-420 | Owner's Manual - Page 96
yamaha.com/download/ IMPORTANT • Only Musicsoft Downloader can be used to transfer files between this instrument and a computer. No other file transfer application can be used. ■ Troubleshooting The driver the connection again. 5 Install the driver again. (pages 94-95) 94 96 YPT-420 Owner's Manual - Yamaha YPT-420 | Owner's Manual - Page 97
a program" window. 4 Select "Yamaha USB-MIDI Driver" or "Yamaha Musicsoft Downloader" from the list. 5 Click [Uninstall]. If the "User Account Control" window appears, click [Allow] or [Continue]. A dialog box appears. Follow the instructions to remove the software. 95 YPT-420 Owner's Manual 97 - Yamaha YPT-420 | Owner's Manual - Page 98
Guide not initiate services based on the use of the SOFTWARE without permission by Yamaha Corporation. YPT-420 Owner's Manual and without warranty of any kind. NOTWITHSTANDING ANY OTHER PROVISION OF THIS AGREEMENT, YAMAHA of this Agreement shall continue in full force and effect. 9. COMPLETE - Yamaha YPT-420 | Owner's Manual - Page 99
Appendix Troubleshooting Problem Possible Cause and Solution When the instrument is keyboard, and a melody is played in the right-hand range. Types 06-26 will function whether style playback is on or off. For types 06-12 you need to play two notes at the same time. 97 YPT-420 Owner's Manual - Yamaha YPT-420 | Owner's Manual - Page 100
, 13 PITCH BEND wheel 13, 66 PORTABLE GRAND 12, 31 REC, 1-5, A 84, 89 Initialization 56 K Keyboard Out 87 L Lesson 43 Load Touch Setting 68 P PC Mode 88 Performance assistant technology ........ 23 Pitch Bend Range 83 Power Adaptor 10 Preset Song 39, 41-42 98 100 YPT-420 Owner's Manual - Yamaha YPT-420 | Owner's Manual - Page 101
control 88 Repeat 48 Resonance 19 Reverb 19, 61 R-Part 91 S Save (Backup File 91 Touch Response 65 Touch Sensitivity 65 Track 52-55 Track Clear 55 Transfer 89-91 Transpose 66 Troubleshooting (Installation 96 Troubleshooting (Instrument 99 Tuning 66 Index 99 YPT-420 Owner's Manual - Yamaha YPT-420 | Owner's Manual - Page 102
Specifications Specifications Keyboards • 61 standard-size keys (C1-C6), with Touch Response. Display • LCD display (backlit) Setup • ( Keyboard Stand: L-2C/L-2L • Headphones: HPE-150/HPE-30 * Specifications and descriptions in this owner's manual are for information purposes only. Yamaha - Yamaha YPT-420 | Owner's Manual - Page 103
395 103 - Yamaha YPT-420 | Owner's Manual - Page 104
396 104 - Yamaha YPT-420 | Owner's Manual - Page 105
been authorized by Yamaha, please contact Yamaha's Service Department at the number shown below, or check Yamaha's website at www.Yamaha.com. Product(s) shipped for service should be packed securely and must be accompanied by a detailed explanation of the problem(s) requiring service, together with - Yamaha YPT-420 | Owner's Manual - Page 106
contato com o representante mais próximo da Yamaha ou com o distribuidor autorizado relacionado a seguir. NORTH AMERICA CANADA Yamaha Canada Music 0347-358 040 FRANCE Yamaha Musique France BP 70-77312 Marne-la-Vallée Cedex 2, France Tel: 01-64-61-4000 ITALY Yamaha Musica Italia S.P.A. Viale Italia - Yamaha YPT-420 | Owner's Manual - Page 107
Yamaha Home Keyboards Home Page http://music.yamaha.com/homekeyboard/ Yamaha Manual Library http://www.yamaha.co.jp/manual/ U.R.G., Pro Audio & Digital Musical Instrument Division, Yamaha Corporation © 2009 Yamaha Corporation WT69320 002POXXX.X-XXC0 Printed in China
-
 1
1 -
 2
2 -
 3
3 -
 4
4 -
 5
5 -
 6
6 -
 7
7 -
8
-
9
-
10
-
11
-
12
-
13
-
14
-
15
-
16
-
17
-
18
-
19
-
20
-
21
-
22
-
23
-
24
-
25
-
26
-
27
-
28
-
29
-
30
-
31
-
32
-
33
-
34
-
35
-
36
-
37
-
38
-
39
-
40
-
41
-
42
-
43
-
44
-
45
-
46
-
47
-
48
-
49
-
50
-
51
-
52
-
53
-
54
-
55
-
56
-
57
-
58
-
59
-
60
-
61
-
62
-
63
-
64
-
65
-
66
-
67
-
68
-
69
-
70
-
71
-
72
-
73
-
74
-
75
-
76
-
77
-
78
-
79
-
80
-
81
-
82
-
83
-
84
-
85
-
86
-
87
-
88
-
89
-
90
-
91
-
92
-
93
-
94
-
95
-
96
-
97
-
98
-
99
-
100
-
101
-
102
-
103
-
104
-
105
-
106
-
107
 |
 |
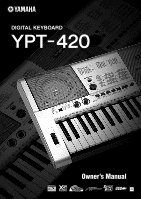
Owner’s Manual
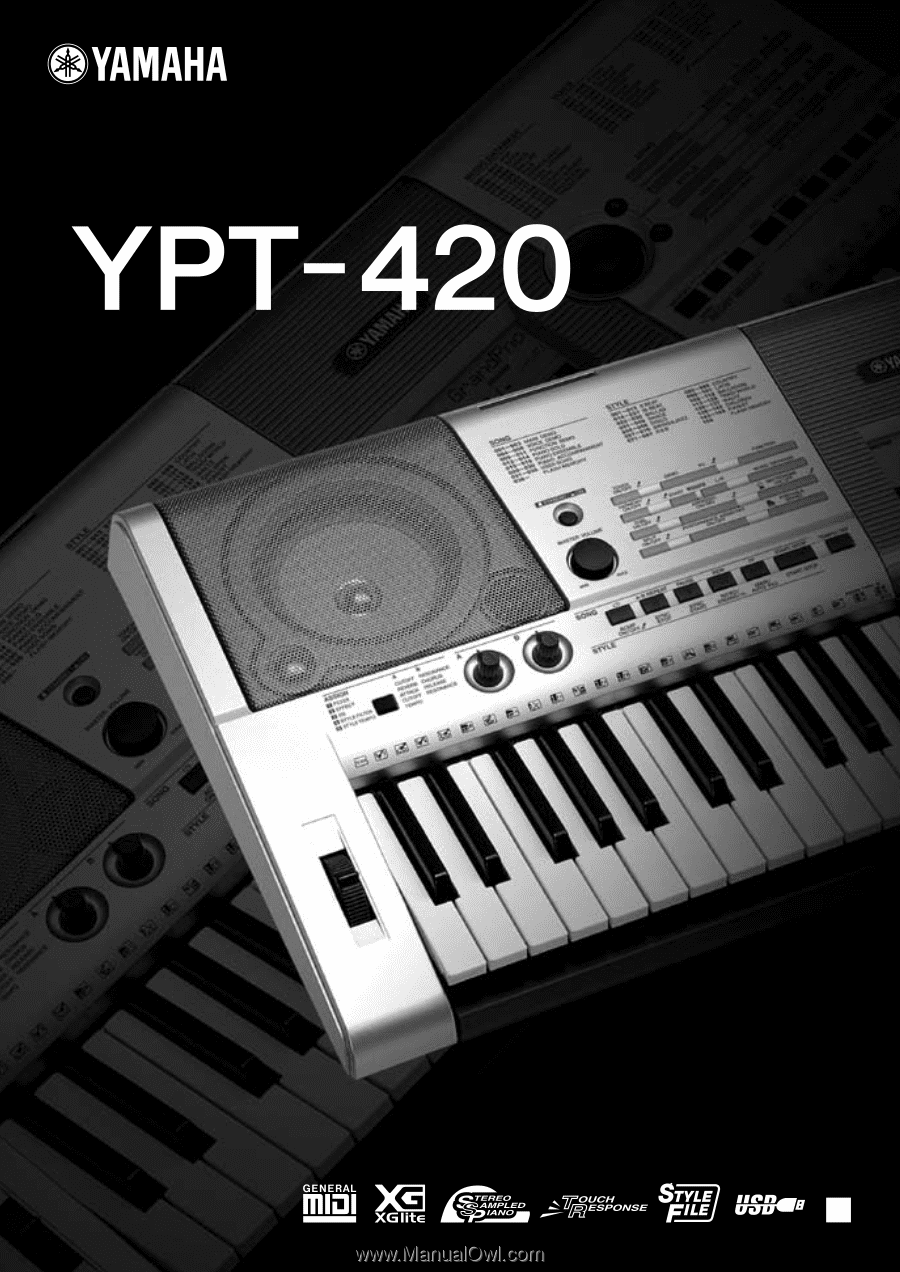
DIGITAL KEYBOARD
EN