Zanussi ZKG7165 Product Manaul - Page 28
U piece supplied
 |
View all Zanussi ZKG7165 manuals
Add to My Manuals
Save this manual to your list of manuals |
Page 28 highlights
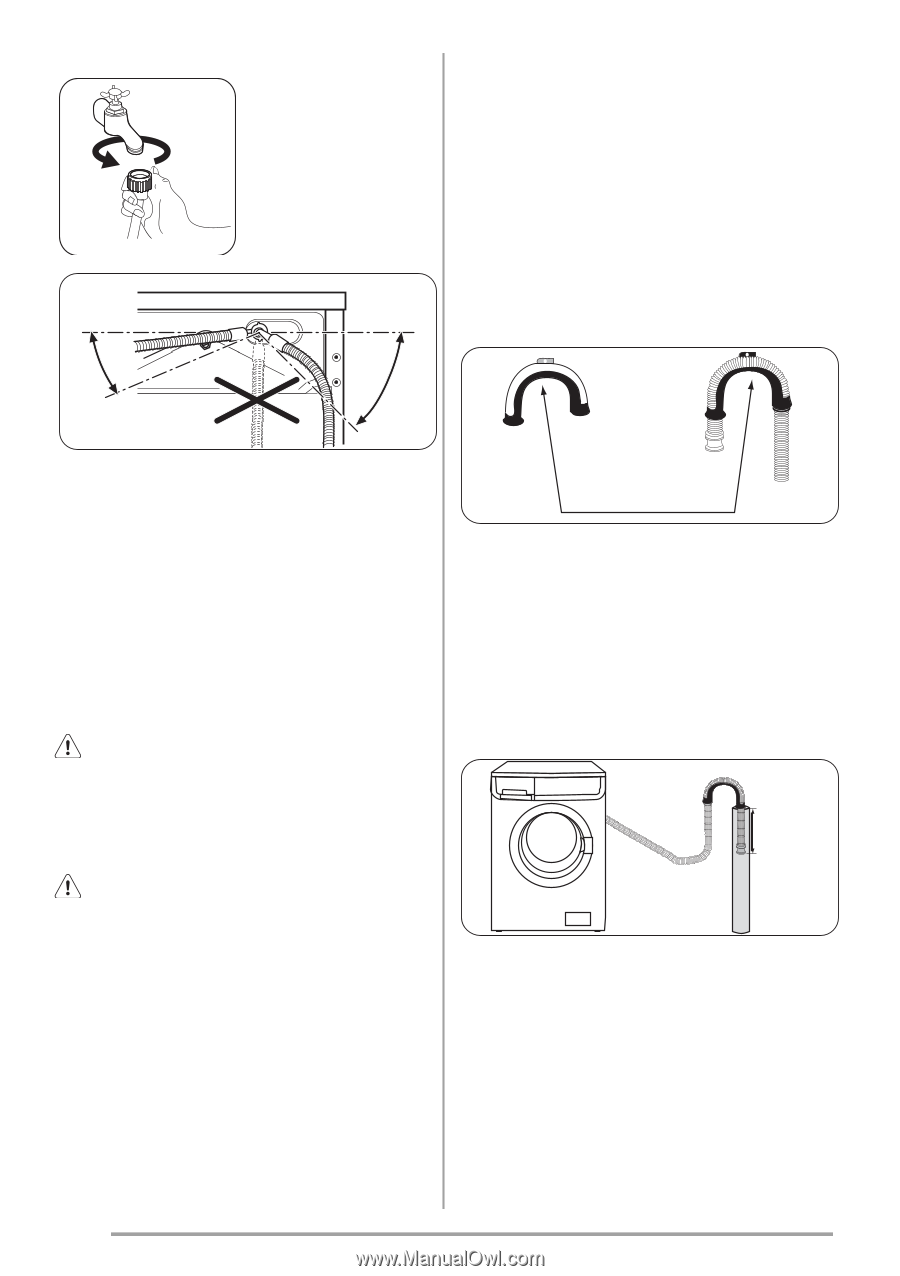
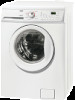
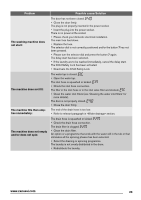
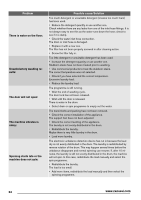
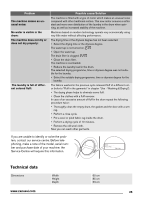
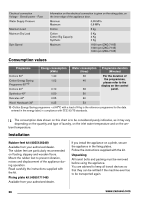
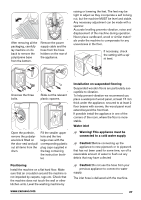
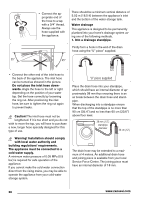
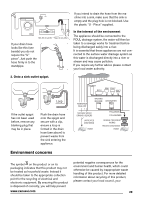
• Connect the appropriate end of the hose to a tap with a 3/4" thread. Always use the hose supplied with the appliance. There should be a minimum vertical distance of 5.02 m (16.5 ft) between the appliance's inlet and the bottom of the water storage tank. Water drainage This appliance is designed to be permanently plumbed into your home's drainage system using one of the following methods. 1. Into a drainage standpipe. Firstly form a hook in the end of the drain hose using the "U" piece" supplied. 35° 45° • Connect the other end of the inlet hose to the back of the appliance. The inlet hose can be turned as showed in the picture. Do not place the inlet hose downwards. Angle the hose to the left or right depending on the position of your water tap. Set the hose correctly by loosening the ring nut. After positioning the inlet hose, be sure to tighten the ring nut again to prevent leaks. Caution! The inlet hose must not be lengthened. If it is too short and you do not wish to move the tap, you will have to purchase a new, longer hose specially designed for this type of use. "U" piece supplied Place the drain hose into your standpipe, which should have an internal diameter of approximately 38 mm thus ensuring there is an air break between the drain hose and standpipe. When discharging into a standpipe ensure that the top of the standpipe is no more than 90 cm (35.4'') and no less than 60 cm (23.6'') above floor level. 38 mm (1.5") standpipe diamater 30 cm (12") Warning! Installation should comply with local water authority and building regulations' requirements. The appliance must be connected to a cold water supply. A minimum water pressure of 0.05 MPa (0.5 bar) is required for safe operation of the appliance. If you cannot make the cold water connection direct from the rising mains, you may be able to operate the appliance from your cold water storage system. The drain hose may be extended to a maximum of 4 metres. An additional drain hose and joining piece is available from your local Service Force Centre. The joining piece must have an internal diameter of 18 mm. 28 www.zanussi.com
-
 1
1 -
2
-
3
-
4
-
5
-
6
-
7
-
8
-
9
-
10
-
11
-
12
-
13
-
14
-
15
-
16
-
17
-
18
-
19
-
20
-
21
-
22
-
 23
23 -
 24
24 -
 25
25 -
 26
26 -
 27
27 -
 28
28 -
 29
29 -
 30
30 -
 31
31 -
 32
32
 |
 |