ZyXEL PLA-407 User Guide - Page 67
Splitting a Network into Two Networks,
 |
View all ZyXEL PLA-407 manuals
Add to My Manuals
Save this manual to your list of manuals |
Page 67 highlights
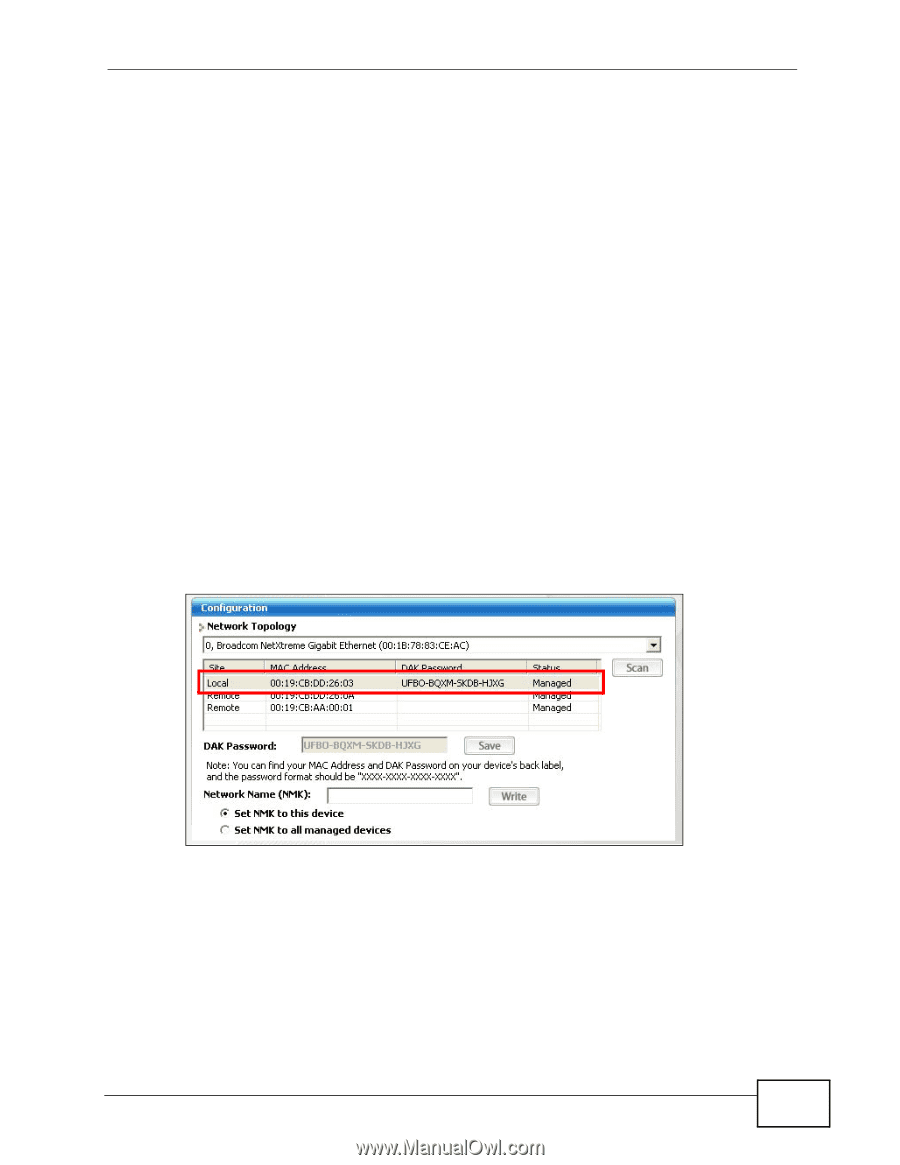
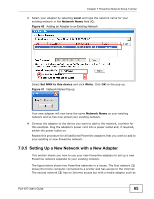
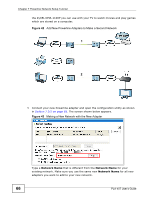
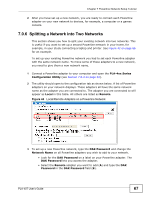
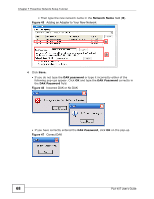
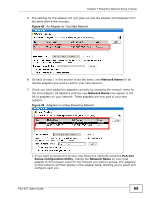
Chapter 7 Powerline Network Setup Tutorial 2 After you have set up a new network, you are ready to connect each Powerline adapter on your new network to devices, for example, a computer or a games console. 7.0.6 Splitting a Network into Two Networks This section shows you how to split your existing network into two networks. This is useful if you want to set up a second Powerline network in your home, for example, in your study connecting a laptop and printer. See Figure 42 on page 66 for an example. To set up your existing Powerline network you had to set each Powerline adapter with the same network name. To move some of these adapters to a new network, you need to give them a new network name. 1 Connect a Powerline adapter to your computer and open the PLA-4xx Series Configuration Utility (see Section 7.0.3 on page 62). 2 The utility should open to the configuration tab as shown below. A list of Powerline adapters on your network displays. These adapters all have the same network name as the adapter you are connected to. The adapter you are connected to will appear as Local in this table. All others are listed as Remote. Figure 44 Local/Remote Adapters on a Powerline Network 3 To set up a new Powerline network, type the DAK Password and change the Network Name on all Powerline adapters you wish to add to your network. • Look for the DAK Password on a label on your Powerline adapter. The DAK Password lets you access the adapter. • Select the Remote adapter you want to add (A) and type the DAK Password in the DAK Password field (B). PLA-407 User's Guide 67
-
 1
1 -
2
-
3
-
4
-
5
-
6
-
7
-
8
-
9
-
10
-
11
-
12
-
13
-
14
-
15
-
16
-
17
-
18
-
19
-
20
-
21
-
22
-
23
-
24
-
25
-
26
-
27
-
28
-
29
-
30
-
31
-
32
-
33
-
34
-
35
-
36
-
37
-
38
-
39
-
40
-
41
-
42
-
43
-
44
-
45
-
46
-
47
-
48
-
49
-
50
-
51
-
52
-
53
-
54
-
55
-
56
-
57
-
58
-
59
-
60
-
61
-
 62
62 -
 63
63 -
 64
64 -
 65
65 -
 66
66 -
 67
67 -
 68
68 -
 69
69 -
 70
70 -
 71
71 -
 72
72 -
73
-
74
-
75
-
76
-
77
-
78
-
79
-
80
-
81
-
82
-
83
-
84
-
85
-
86
-
87
-
88
-
89
-
90
-
91
-
92
-
93
-
94
 |
 |