1999 Ford F350 Owner Guide 4th Printing - Page 206
1999 Ford F350 Manual

Page 206 highlights
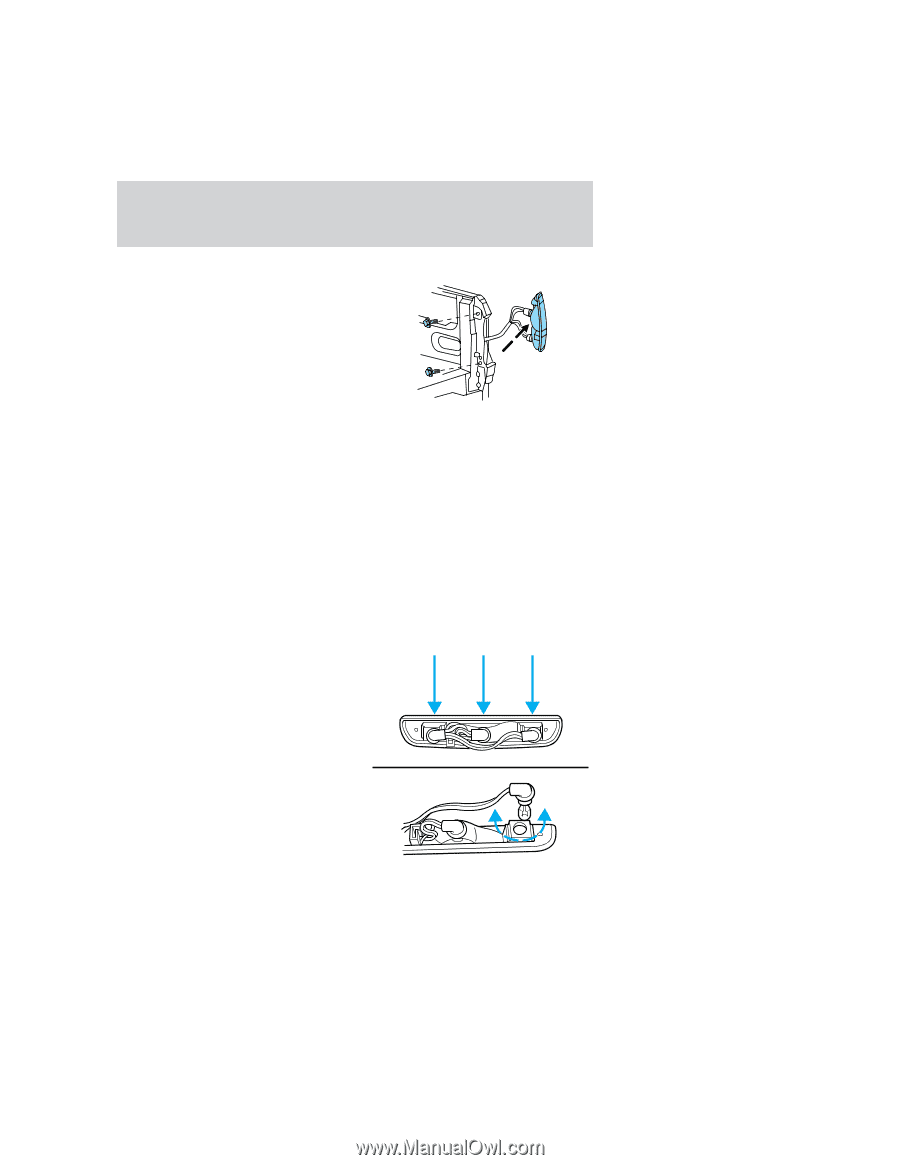
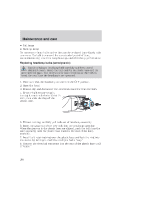
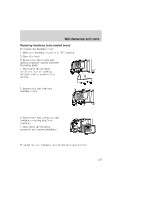
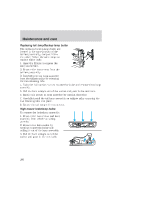
Maintenance and care Replacing tail lamp/Backup lamp bulbs The tail lamp/backup lamp bulbs are located in the same portion of the tail lamp assembly, one just below the other. Follow the same steps to replace either bulb: 1. Open the liftgate to expose the lamp assemblies. 2. Remove the two screws from the tail lamp assembly. 3. Carefully pull the lamp assembly from the tailgate pillar by releasing the two retaining tabs. 4. Twist the bulb socket 1⁄4 turn counterclockwise and remove from lamp assembly. 5. Pull the bulb straight out of the socket and push in the new bulb. 6. Install bulb socket in lamp assembly by turning clockwise. 7. Carefully install the tail lamp assembly on tailgate pillar snapping the two retaining tabs into place. 8. Secure the tail lamp with two screws. High-mount brakelamp bulbs To remove the brakelamp assembly: 1. Remove the two screws and lamp assembly from vehicle as wiring permits. 2. Remove the bulb socket by rotating counterclockwise and pulling it out of the lamp assembly. 3. Pull the bulb straight out of the socket and push in the new bulb. 206
-
 1
1 -
2
-
3
-
4
-
5
-
6
-
7
-
8
-
9
-
10
-
11
-
12
-
13
-
14
-
15
-
16
-
17
-
18
-
19
-
20
-
21
-
22
-
23
-
24
-
25
-
26
-
27
-
28
-
29
-
30
-
31
-
32
-
33
-
34
-
35
-
36
-
37
-
38
-
39
-
40
-
41
-
42
-
43
-
44
-
45
-
46
-
47
-
48
-
49
-
50
-
51
-
52
-
53
-
54
-
55
-
56
-
57
-
58
-
59
-
60
-
61
-
62
-
63
-
64
-
65
-
66
-
67
-
68
-
69
-
70
-
71
-
72
-
73
-
74
-
75
-
76
-
77
-
78
-
79
-
80
-
81
-
82
-
83
-
84
-
85
-
86
-
87
-
88
-
89
-
90
-
91
-
92
-
93
-
94
-
95
-
96
-
97
-
98
-
99
-
100
-
101
-
102
-
103
-
104
-
105
-
106
-
107
-
108
-
109
-
110
-
111
-
112
-
113
-
114
-
115
-
116
-
117
-
118
-
119
-
120
-
121
-
122
-
123
-
124
-
125
-
126
-
127
-
128
-
129
-
130
-
131
-
132
-
133
-
134
-
135
-
136
-
137
-
138
-
139
-
140
-
141
-
142
-
143
-
144
-
145
-
146
-
147
-
148
-
149
-
150
-
151
-
152
-
153
-
154
-
155
-
156
-
157
-
158
-
159
-
160
-
161
-
162
-
163
-
164
-
165
-
166
-
167
-
168
-
169
-
170
-
171
-
172
-
173
-
174
-
175
-
176
-
177
-
178
-
179
-
180
-
181
-
182
-
183
-
184
-
185
-
186
-
187
-
188
-
189
-
190
-
191
-
192
-
193
-
194
-
195
-
196
-
197
-
198
-
199
-
200
-
 201
201 -
 202
202 -
 203
203 -
 204
204 -
 205
205 -
 206
206 -
 207
207 -
 208
208 -
 209
209 -
 210
210 -
 211
211 -
212
-
213
-
214
-
215
-
216
-
217
-
218
-
219
-
220
-
221
-
222
-
223
-
224
-
225
-
226
-
227
-
228
-
229
-
230
-
231
-
232
-
233
-
234
-
235
-
236
-
237
-
238
-
239
-
240
-
241
-
242
-
243
-
244
-
245
-
246
-
247
-
248
 |
 |